Disclosure: This post contains affiliate links. If you purchase something through these links, we may earn a commission at no extra cost to you. We only recommend products we genuinely use and love.
TL;DR Verdict
This guide covers the complete TerraMaster F4-424 Pro Proxmox installation. The TerraMaster F4-424 Pro is one of the more capable consumer NAS devices you can repurpose as a Proxmox hypervisor. The BIOS is fully unlocked, VMX and VT-d are on by default, and the Intel Core i3-N305 barely moves the power meter at idle. I measured 7.7 watts with no spinning drives attached. That is a solid number for a machine running a full Proxmox 9.1.1 stack. The only real complaints are a BIOS typo and a single USB-A port. For a 24/7 homelab host, this hardware earns a 9 out of 10.
Score: 9 / 10
Pros and Cons
- Pro: Fully unlocked AMI BIOS with no artificial restrictions
- Pro: Intel VMX and VT-d enabled by default. PCIe passthrough works without touching anything.
- Pro: SATA controller set to AHCI by default, giving ZFS direct disk access
- Pro: Idle power draw of 7.7 watts with no spinning drives. Good for a homelab host running a full hypervisor.
- Pro: Proxmox installer detected and booted without any driver workarounds
- Pro: C-states, Thunderbolt, and RC6 Render Standby all accessible in BIOS
- Con: Only one USB-A and one USB-C port. Tight when you need a bootable USB and a keyboard at the same time.
- Con: BIOS contains a typo (“Samrt Fan Configuration”). Minor, but sloppy for a device at this price point.
- Con: C-states are disabled by default and must be manually enabled for efficient 24/7 operation
- Con: No AliExpress availability found at time of review
Why I Put Proxmox on the TerraMaster F4-424 Pro Proxmox Host
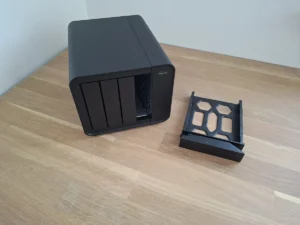
I covered the hardware itself in my TERRAMASTER F4-424 Pro hardware review and walked through TOS 6 in a separate piece. The conclusion from both was the same. This machine was bought with one goal: turn it into a Proxmox host. This article documents exactly how that installation went, which BIOS settings matter, and what the power numbers look like after optimization.
Proxmox VE is a Type 1 hypervisor. It runs directly on bare metal, not inside another operating system. It lets you run virtual machines (VMs) and lightweight containers (LXCs) from a single web interface. For a homelab, it replaces a pile of separate devices with one efficient box running everything in software.
The i3-N305 is an Intel Alder Lake-N chip with eight efficiency cores. It is not a powerhouse, but it is efficient and fully supports Intel VT-x (hardware virtualization) and VT-d (IOMMU, which lets you pass physical hardware directly to a VM). On paper this hardware was a good fit. In practice, it delivered.
Creating the Bootable USB and First BIOS Entry
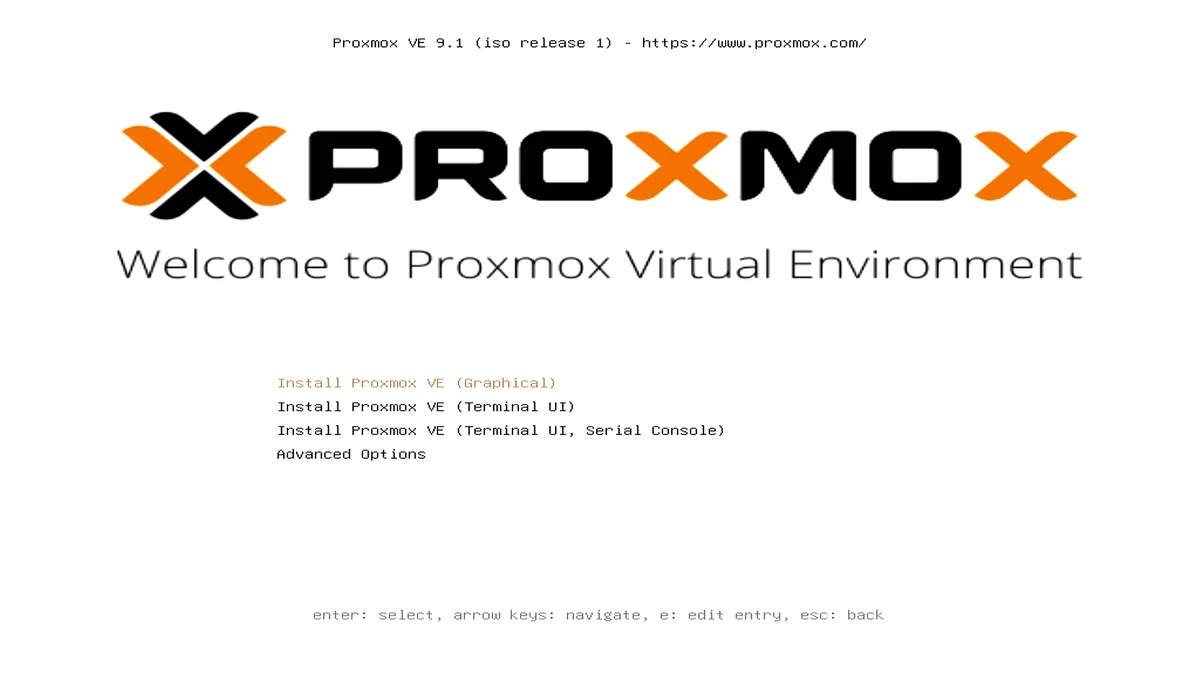
I downloaded the Proxmox VE 9.1.1 ISO from the official Proxmox website and flashed it to a SanDisk USB stick using Rufus on Windows. Standard DD mode works fine here.
The F4-424 Pro has one USB-A port and one USB-C port on the front. That is it. I plugged the SanDisk into the USB-A port and connected a keyboard via USB-C. If you have a USB hub, bring it. You will want it.
I powered on the unit and pressed Delete to enter the BIOS. The system dropped me into a full AMI BIOS, the same firmware you find on desktop motherboards and proper servers. This is not the locked-down, three-option menu you normally get on a consumer NAS. Everything is exposed.
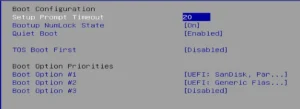
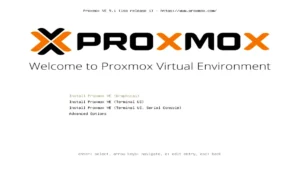
In the Boot tab, I set “TOS Boot First” to Disabled. This stops the machine from trying to load TerraMaster’s TOS. I set the SanDisk as Boot Priority 1, saved, and exited. The Proxmox installer appeared immediately. That part took under three minutes.
A Full BIOS Walkthrough for Proxmox
I did not stop at the boot settings. Before installing anything, I went through every relevant BIOS section. Here is what I found and what I changed.
What Was Already Correct Out of the Box
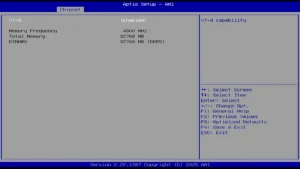
TerraMaster ships this unit with several virtualization settings already enabled. Intel VMX was on. Without it, you cannot run VMs at all. VT-d was also on, which enables the IOMMU and allows PCIe passthrough. In practice, this means you can hand the internal SATA controller directly to a TrueNAS VM so it sees the drives as if they were physically connected.
The SATA controller was already set to AHCI mode. AHCI gives the OS direct, raw access to each drive individually, which ZFS requires. RC6 Render Standby for the integrated GPU and Thunderbolt support were both active by default.
What I Changed
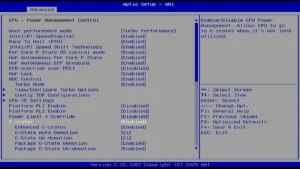
Three settings needed manual adjustment. First, C-states were disabled. C-states are power-saving modes that let the CPU park idle cores into progressively deeper sleep. On a server that spends most of its time waiting, this matters. I enabled them under CPU Power Management Control.
Second, I changed “Restore From AC Power Loss” from Power Off to Power On. With Power Off, the machine stays dead after a power cut until you press the button. Power On makes it boot automatically. For any always-on service, this is non-negotiable.

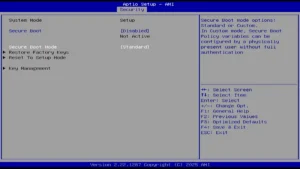
Third, I disabled Secure Boot. Proxmox’s bootloader is not signed in a way that satisfies Secure Boot on all systems, and leaving it enabled risks boot failures after kernel updates. On a homelab machine that is not a corporate endpoint, disabling it is the right call.
The BIOS Typo
Under PC Health Status, the fan control section is labeled “Samrt Fan Configuration.” The correct spelling is Smart. It does not affect functionality. The fan runs in Automatic Mode by default and starts ramping up around 45 degrees Celsius, which is acceptable. Manual curve adjustment is available if drives run hot under sustained load.
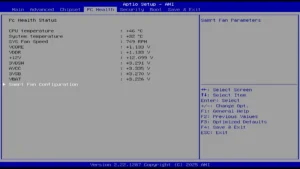
I flag it because it is the kind of detail that suggests the firmware was not carefully reviewed before shipping. On a device at this price, that is worth noting.
Installing Proxmox 9.1.1
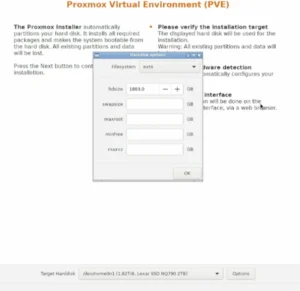
With the BIOS sorted, the installation was straightforward. I targeted the internal NVMe SSD as the boot drive. NVMe is the fastest SSD interface available, and using it for the Proxmox system disk keeps the hypervisor snappy and the data drives separate.
I chose ext4 with LVM-thin as the filesystem for the Proxmox installation, not ZFS. The reason is write amplification. ZFS is a copy-on-write filesystem that generates significantly more actual write operations than the data size suggests. On a consumer NVMe with a finite write endurance rating, this accelerates wear. ext4 with LVM-thin avoids this while still supporting snapshots. ZFS is reserved for the data pool built from the drive bays.
I used the primary 2.5GbE port with a static IP. Static IPs are not optional for server infrastructure. A device that changes its address breaks every service pointing at it.
After the installer finished, the machine rebooted cleanly. The Proxmox web interface was accessible on port 8006 within seconds.

Post-Installation Configuration
Repositories and System Updates
Proxmox VE has two software repository tiers. The Enterprise repository requires a paid subscription. The No-Subscription repository is free and fine for homelab use. Out of the box, only the Enterprise repository is active. Running updates without a subscription key produces errors.
I disabled the Enterprise repository and added the No-Subscription source for the Debian Trixie base that Proxmox 9.x uses. Run these from the Proxmox web terminal:
sed -i 's/^deb/#deb/g' /etc/apt/sources.list.d/pve-enterprise.list
echo "deb http://download.proxmox.com/debian/pve trixie pve-no-subscription" >> /etc/apt/sources.list
apt update && apt dist-upgrade -y
After the upgrade completed, I rebooted to activate the latest kernel.
SSL Warning and Subscription Popup
On first login, Proxmox shows two warnings. The first is an SSL certificate warning in your browser. Proxmox generates a self-signed certificate that your browser does not automatically trust. On a local network, accepting it is safe. The second is a “No Valid Subscription” popup. It is purely informational. No features are locked. Both warnings are normal for any homelab Proxmox deployment.

Power Optimization with Powertop
Powertop is a Linux tool from Intel that analyzes power consumption and applies tuning recommendations automatically. I installed it and ran the auto-tune flag, which applies all suggested optimizations in one pass.
apt install powertop -y
powertop --auto-tune
These settings reset on reboot. To make them stick, I created a systemd service that runs powertop auto-tune on every boot.
echo '[Unit]
Description=Powertop tunings

[Service]
Type=oneshot
ExecStart=/usr/sbin/powertop --auto-tune

[Install]
WantedBy=multi-user.target' > /etc/systemd/system/powertop.service

systemctl enable powertop.service
Power Draw Results
After all BIOS optimizations and the powertop service running, the F4-424 Pro idles at 7.7 watts. No spinning hard drives are installed at this point, and that caveat matters. Each 3.5-inch HDD adds roughly 5 to 7 watts at idle. Four drives would push the system toward 30 watts. But 7.7 watts as a baseline for a machine running a full hypervisor on an eight-core processor is a good result.
For context: a Raspberry Pi 5 idles around 3 to 5 watts but cannot run meaningful VMs. A used Dell OptiPlex with a 6th-gen Core i5 typically idles at 15 to 25 watts running Proxmox. The F4-424 Pro sits between those two while offering more capability than either.
If you are evaluating the software side of this platform before committing, my TerraMaster TOS 6 review covers the native operating system in detail and explains where TOS falls short for power users, which is precisely why Proxmox is the better long-term choice on this hardware.
What Comes Next
The machine is now running a clean Proxmox 9.1.1 installation. BIOS is optimized, repositories are configured, and power consumption is dialed in. The next phase is adding virtual machines, LXC containers, and the physical drives. That will be covered in a follow-up article.
The immediate candidates are a TrueNAS Scale VM with SATA passthrough for the drive bays, a Home Assistant LXC, and several other service containers. The i3-N305 has enough headroom to run all of these simultaneously without thermal stress.
Frequently Asked Questions
Does the TerraMaster F4-424 Pro support PCIe passthrough in Proxmox?
Yes. Intel VT-d, which enables IOMMU and PCIe passthrough, is active by default in the BIOS. You can pass the internal SATA controller directly to a virtual machine like TrueNAS without any additional kernel patches.
Can I go back to TOS after installing Proxmox?
Yes. TerraMaster provides a recovery tool that reinstalls TOS from a USB drive. The process wipes the boot drive, so back up any data first. The BIOS settings you changed for Proxmox would need to be reverted as well.
Is the No-Subscription Proxmox repository safe to use in a homelab?
Yes. The No-Subscription repository receives the same Proxmox VE packages as the Enterprise tier. The Enterprise repository gets updates slightly earlier and includes commercial support. For a homelab, No-Subscription is entirely appropriate.