🎧 Listen to the 60-Second Audio Recap:
What Is Netboot.xyz and Why Should You Care?
This guide covers the complete Netboot.xyz Docker on Proxmox setup. Netboot.xyz is a PXE boot server that serves operating system installers over your local network via a single bootable menu. Running Netboot.xyz Docker on Proxmox lets you boot multiple systems without physical media like USB drives. The homelab community uses it heavily for network-based OS deployment.
The Privacy Lens — Why Self-Host This?
Self-hosting eliminates dependency on proprietary tools like Rufus or Ventoy. What you get:
- Full local control over which OS images are served
- Custom images and ISOs never leave your network
- No outbound calls to external infrastructure during OS deployment
- Eliminates single-use USB drives as a security and logistics concern
How PXE Boot Actually Works (Read This Before You Debug Anything)
Almost every Netboot.xyz problem is a misunderstanding of the boot chain rather than a broken container. The sequence is four steps, and each one uses a different service:
- The client asks for an address. A machine set to network boot sends a DHCP request. Your router answers with an IP, plus two extra fields: Option 66 (which server holds the boot file) and Option 67 (what that file is called).
- The client downloads a bootloader over TFTP. It contacts the address from Option 66 on UDP port 69 and pulls down a small iPXE binary, typically
netboot.xyz.efiornetboot.xyz.kpxe. TFTP is ancient, unencrypted and slow, which is exactly why it is used only for this tiny first file. - iPXE takes over and fetches the menu. Once running, iPXE speaks HTTP. It loads the Netboot.xyz menu, which is where the container’s nginx on port 80 comes in.
- You pick an OS and it streams the installer. Either from the internet, or from your own
/assetsdirectory if you mirrored it locally.
Keep this in mind while reading the troubleshooting section. If you never see a menu, the failure is in step 1 or 2 (router and TFTP). If the menu appears but an entry fails, you are in step 3 or 4 (HTTP and assets).
Prerequisites & Minimal Hardware
Hardware Requirements (Genuinely Minimal)
This is one of the lightest self-hosted services you can run:
| Specification | Requirement |
|---|---|
| CPU | 2 cores minimum |
| RAM | A few hundred MB (container idles well under that) |
| Storage | Minimal for config; scales with how many ISOs you self-host |
| Network | Wired Ethernet strongly recommended for PXE reliability |
Wired is not a style preference. Most network cards will not PXE boot over Wi-Fi at all, because the firmware that runs before the operating system has no wireless stack and no way to ask you for a Wi-Fi password.
Software Requirements
- Docker and Docker Compose installed on your host machine
- Portainer (optional but recommended for the Newbie route)
Networking Prerequisite Check
# Verify Docker is running
docker --version
docker compose version
Use the correct image source. The LinuxServer.io image is deprecated. Always use ghcr.io/netbootxyz/netbootxyz:latest — this resolves a top complaint missed by older guides.
Method 1 — Netboot.xyz Docker on Proxmox: Quick Start (Newbie Nora Route)
Overview of This Method
Deploy via a Portainer stack. No CLI required beyond initial Docker setup. Fastest path from zero to a working PXE boot menu.
Step 1 — Prepare Your Directory Structure
OperatingSystems not Operating Systems. Spaces break web-served URLs and will silently prevent ISO loading.
mkdir -p /mnt/snelle_data/App_Data/netboot/config
mkdir -p /mnt/snelle_data/App_Data/netboot/OperatingSystems
Step 2 — Deploy the Portainer Stack
Navigate to Portainer → Stacks → Add Stack. Paste the following YAML.
services:
netbootxyz:
image: ghcr.io/netbootxyz/netbootxyz:latest
container_name: netbootxyz
environment:
- TZ=Europe/Amsterdam
- PUID=1000
- PGID=1000
volumes:
- /mnt/snelle_data/App_Data/netboot/config:/config
- /mnt/snelle_data/App_Data/netboot/OperatingSystems:/assets
ports:
- 3005:3000
- 69:69/udp
- 8088:80
restart: unless-stopped
Understanding the Three Ports
The port list looks arbitrary until you map it onto the boot chain above. Each container port does one job:
- 3000 — the Node.js web interface where you edit menus. Nothing boots from this port; it is purely for you.
- 69/udp — the TFTP server that hands out the first bootloader. This is the only port that cannot be remapped, because the client firmware has TFTP’s port hard-coded.
- 80 — nginx, serving the menus and your local assets over HTTP once iPXE is running.
If you would rather change the ports inside the container instead of remapping them, the image accepts WEB_APP_PORT and NGINX_PORT as environment variables. PUID and PGID set the user that owns files in /config and /assets, which saves you a permissions fight later when you drop ISOs in from the host.
Step 3 — Verify the Container Is Running
docker ps | grep netbootxyz
Confirm the container shows Up status. Access the web dashboard at http://[YOUR-HOST-IP]:3005.
Method 2 — The Pro Setup (Pro Paul Route)
Overview of This Method
Extends the base deployment with ZFS-backed asset storage and full router configuration for automated PXE boot delivery.
Step 1 — Mount Assets on a ZFS Pool
Store ISO assets on a dedicated ZFS dataset for data integrity, compression, and snapshot capability. If you have not built a pool yet, our ZFS file server on Proxmox guide covers that groundwork.
# Create ZFS datasets for netboot (no spaces in path)
zfs create -p tank/netboot/config
zfs create -p tank/netboot/OperatingSystems
# Verify mount points
zfs list -r tank/netboot
/assets volume.Step 2 — Update Docker Compose Volume Binding
volumes:
- /tank/netboot/config:/config
- /tank/netboot/OperatingSystems:/assets
Step 3 — Configure OPNsense for PXE Boot Delivery
This is the step most guides skip or under-explain. Follow these OPNsense DHCP LAN settings precisely.
- Navigate to:
Services → DHCPv4 → [LAN interface] - Scroll to the Network Booting section and enable it
- Next Server (Option 66): Enter the static IP of your Docker host running Netboot.xyz
- Bootfile Name (Option 67): Enter
netboot.xyz.efi(for UEFI clients) ornetboot.xyz.kpxe(for legacy BIOS clients) - Save and apply changes
Step 3b — The Same Thing on pfSense
pfSense splits the bootfile by client architecture, which is more convenient than juggling one field. Go to Services → DHCP Server → LAN, scroll to Network Booting, tick enable, and fill in:
- Next Server: the IP of your Netboot.xyz host
- Default BIOS file name:
netboot.xyz.kpxe - UEFI 64 bit file name:
netboot.xyz.efi - ARM 64 bit file name:
netboot.xyz-arm64.efiif you boot ARM hardware
With the fields split this way, a modern laptop and an ancient desktop can both PXE boot from the same DHCP scope without you changing a setting between them.
Step 3c — The Same Thing on OpenWrt
If your router runs OpenWrt, dnsmasq handles this with a boot section in /etc/config/dhcp:
uci set dhcp.netboot="boot"
uci set dhcp.netboot.filename="netboot.xyz.efi"
uci set dhcp.netboot.serveraddress="192.168.1.10"
uci commit dhcp
/etc/init.d/dnsmasq restart
Replace the address with your Netboot.xyz host. filename is Option 67 and serveraddress is Option 66; the names differ from the pfSense wording but the DHCP fields on the wire are identical.
Step 4 — Serve a Custom ISO (Manual iPXE Scripting)
Netboot.xyz does NOT auto-scan your /assets directory. Each custom ISO requires a manually written iPXE script linked in the dashboard.
#!ipxe
set base-url http://[YOUR-HOST-IP]:8088
sanboot ${base-url}/OperatingSystems/proxmox-ve_8.x.iso
Reference community-validated iPXE menu files as a starting point for OS-specific boot scripts.
Building a Proper Custom Menu
Pasting a one-line sanboot script works for a single ISO, but it does not scale past two or three. Netboot.xyz supports a real custom menu that appears alongside the built-in one.
- In the web interface, open Menus and create a file called
custom.ipxe. - Enable custom menu support by setting
set menu custom-userinboot.cfg. - Chain to your file from
menu.ipxewithchain custom/custom.ipxe.
A minimal menu with two of your own entries looks like this:
#!ipxe
:custom_menu
menu My Homelab Images
item proxmox Proxmox VE installer
item memtest Memtest86+
item return Return to main menu
choose --default return --timeout 10000 target && goto ${target}
:proxmox
sanboot http://192.168.1.10:8088/OperatingSystems/proxmox-ve_8.x.iso
goto custom_menu
:memtest
sanboot http://192.168.1.10:8088/OperatingSystems/memtest86.iso
goto custom_menu
:return
exit
The official custom menu documentation covers the syntax in depth. Two practical notes: sanboot is what you want for booting an ISO as if it were a virtual CD, and the timeout is in milliseconds, so 10000 is ten seconds, not ten minutes.
Going Fully Offline: Mirroring Assets Locally
By default the menu streams installers straight from the internet, which means a slow link makes for a slow install, and an internet outage means no installs at all. Two settings change that.
First, pin the menu version with the MENU_VERSION environment variable instead of tracking whatever is current. A pinned menu keeps working exactly as tested, which matters when you rebuild machines rarely and want no surprises.
Second, put the installers you actually use into /assets and point your custom menu entries at your own HTTP endpoint, as in the example above. Once both are in place, a full OS install runs at LAN speed and never touches an external server. For a homelab that is the whole point: the ISO you install from is a file you control, on a pool you snapshot, on hardware you own.
Configuration & Validation — Prove It Works
Browser Dashboard Check
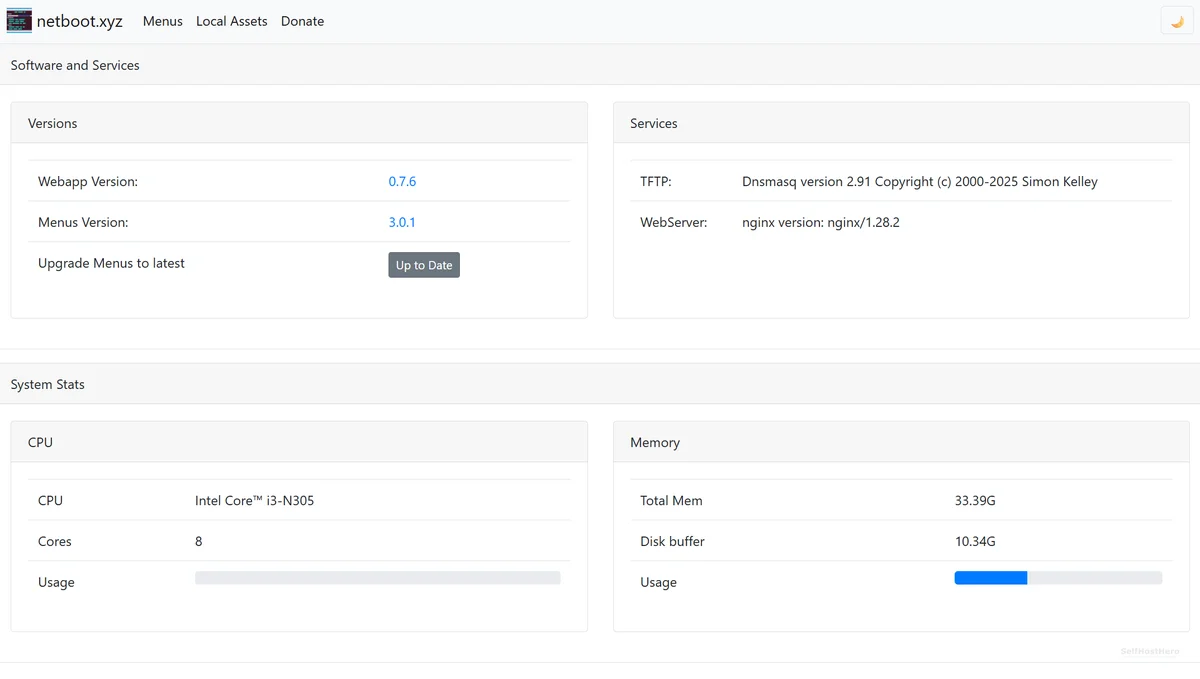
Open http://[HOST-IP]:3005 in a browser. Confirm the Netboot.xyz dashboard loads and shows the menu editor.
Physical PXE Boot Test
- Connect a test machine (laptop or spare PC) via Ethernet to the same LAN
- Power on and enter BIOS/UEFI boot menu
- Select Network Boot / PXE Boot
- Expected result: The Netboot.xyz boot menu appears within seconds
Test Without Touching Hardware
You do not need a spare machine to test this. Create a small VM in Proxmox with no disk attached and set the network card first in the boot order. It will fall through to PXE immediately, and you can watch the whole handshake in the console. It is also the fastest way to test UEFI and legacy BIOS behaviour, since you can flip the VM’s firmware between OVMF and SeaBIOS and boot again in seconds.
The Ugly Truth — Quirks and Honest Limitations
Hard Blockers
- ISP modem/router: If your router does not expose DHCP Option 66/67 fields, this entire setup is non-functional. No workaround exists without replacing the router.
- No auto-discovery of ISOs: The
/assetsdirectory is not scanned automatically. Every custom ISO requires manual iPXE scripting. This is by design, not a bug.
Operational Gotchas
- Spaces in directory or file names silently break URL-based ISO loading
- UEFI vs. Legacy BIOS requires different bootfile names (
netboot.xyz.efivs.netboot.xyz.kpxe) - Port 69/UDP (TFTP) must not be blocked by host firewall rules
- Secure Boot rejects the iPXE bootloader as unsigned, so it must be off on the client while you netboot
- DHCP does not cross subnets: a client on a different VLAN than your DHCP server needs a relay, or it will never see Options 66 and 67
Troubleshooting Common Errors
Error — “no matching manifest for linux/amd64”
# Replace deprecated image reference
image: ghcr.io/netbootxyz/netbootxyz:latest
# Remove any reference to lscr.io/linuxserver/netbootxyz
Error — “driver failed programming external connectivity” (Portainer)
Port collision on 3000 or 8080 with an existing container.
ports:
- 3005:3000 # Change left-side port only
- 8088:80 # Change left-side port only
- 69:69/udp # Do not change — TFTP standard port
Error — Client Gets an IP but No Menu Appears
The client completed step 1 and failed at step 2, so this is TFTP. Work through it in order:
- Confirm the container is actually publishing
69:69/udp, not69:69. TFTP is UDP only, and a TCP mapping silently does nothing. - Check that no other service on the host already holds port 69.
- Verify the host firewall permits UDP 69 from the client’s subnet.
- Re-read the Option 66 value. It must be the Docker host’s IP, not the router’s.
Error — “PXE-E53: No boot filename received”
The DHCP server answered without Option 67. Either Network Booting is not enabled on the interface you are testing from, or you filled in the bootfile field on a different interface or scope than the one serving that client.
Error — Menu Loads but Every Entry Fails to Download
iPXE is running and reached the menu, so TFTP and DHCP are fine. The problem is HTTP: either your client cannot reach the nginx port (8088 in the examples above), or the URL in your script does not match the real path under /assets. Test the exact URL from the iPXE script in a normal browser on another machine; if the browser cannot fetch it, neither can iPXE.
Error — Local ISO Fails to Load
- No spaces in directory path (
OperatingSystems✓ /Operating Systems✗) - No spaces in ISO filename
- iPXE script URL matches exact path under
/assets - Port 8088 (mapped to container port 80) is accessible from the booting client
Error — Boots on One Machine, Fails on Another
Nearly always an architecture mismatch. A UEFI client handed netboot.xyz.kpxe will refuse it, and a legacy BIOS client handed the .efi file does the same. Either split the bootfile per architecture (pfSense makes this easy) or standardise the clients’ firmware mode.
Conclusion & Next Steps
What You Have Built — Completion Checklist
- Netboot.xyz running successfully via Docker
- Port conflicts and deprecated images resolved
- Your router delivering PXE boot files via DHCP Options 66/67
- Physical PXE boot test passed on a client machine
Next Steps — Level Up Your Setup
- Immediate next action: Write custom
custom.ipxescripts in the dashboard to map your local ISO library to named boot menu entries - Mirror what you use. Copy the three or four installers you reach for most into
/assetsso a rebuild never depends on your internet connection - Advanced: Explore caching Netboot.xyz assets with Lancache/Monolithic
- Advanced: Build OS-specific iPXE menu files modeled on community repositories
For more on running Docker containers in your homelab, check out our guide on Docker + Portainer setup. This Netboot.xyz Docker on Proxmox setup pairs naturally with that infrastructure.