This guide covers USB passthrough Proxmox Home Assistant for dual-chip Z-Wave and Zigbee dongles in your HAOS VM, then configuring both ZHA and Z-Wave JS as active, fully local integrations.
This guide assumes you already have a running HAOS VM inside Proxmox. If you do not, start with our Proxmox + HAOS VM setup guide first, then return here.
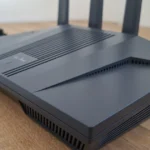
Your Smart Home’s Physical Antenna
🎧 Listen to the 60-Second Audio Recap:
Why This Matters: The Cloud Dependency Problem
If you own a Tuya or eWeLink smart bulb, every toggle of that light travels from your phone to a server in Shenzhen and back before the bulb responds. That round trip depends on your internet connection, the vendor’s uptime, and their continued goodwill toward your data.
Zigbee and Z-Wave are different by design. They are encrypted, local, and mesh-native. Your devices talk directly to a coordinator in your home, with zero cloud involvement.
The real test: Pull the ethernet cable from your router right now. With this setup, your lights still work. That is the goal.
If you want to explore dedicated Home Assistant hardware as an alternative starting point, our AVATTO HA 70 Review covers a budget-friendly option.
Prerequisites & Minimal Hardware
Software Requirements
- Running Proxmox installation with a Home Assistant OS (HAOS) VM already deployed — see our HAOS VM setup guide
- VM ID example:
201 - Proxmox web UI accessible at
https://[SERVER-IP]:8006
Hardware Shopping List
| Category | Budget Pick | Power User Pick |
|---|---|---|
| Dongle | Sonoff Zigbee 3.0 USB Dongle Plus (Zigbee only) | Z-Wave.Me Z-Station (dual-chip: Zigbee + Z-Wave on one stick) |
| Chip | Single radio, single ttyUSB entry |
CP2105 dual UART bridge — creates two ttyUSB entries from one USB plug |
| Complexity | Simple — one port, one integration | Requires precise port assignment — this guide covers it fully |
The dual-chip note: One USB plug, two radios. The CP2105 chip presents itself to Linux as two separate serial ports: ttyUSB0 and ttyUSB1. This is the source of most confusion on Reddit. Method 2 resolves it completely.
The One Non-Negotiable Accessory
You need a USB extension cable, minimum 1 meter. This is not optional.
Why this matters: USB 3.0 ports and NVMe SSDs emit RF noise directly on the 2.4GHz band — the exact same frequency Zigbee uses. Without physical distance between your dongle and the server chassis, your mesh range will be severely degraded. This is the number one complaint on r/homeassistant, and the answer is always the same: use the extension cable. Use a USB 2.0 extension cable specifically, not USB 3.0.
Method 1: The Quick Start (Newbie Nora Route — Bare Metal)
Important prerequisite note: This guide is written for users running HAOS as a VM inside Proxmox. The section below describes the simpler bare-metal path for context only. This guide does not cover Raspberry Pi setups. The required setup described in the prerequisites is a running Proxmox server with a HAOS VM (see our HAOS VM setup guide).
Why This Route Is Simpler
If you are running HAOS directly on bare metal hardware without a hypervisor, there is no virtualization layer between the hardware and Home Assistant. The Linux kernel inside HAOS detects USB serial devices natively on boot. No passthrough configuration is needed.
Physical Installation
- Plug the dongle into a USB port on your machine. Use the extension cable regardless.
- Restart the machine. Navigate to
Settings → Devices & Services. The hardware will be detected directly by the base installation.
Add Integrations
- Go to
Settings → Devices & Services → Add Integration. - Search for ZHA. Select the port ending in
if01-port0(ttyUSB1— Standard Com Port). This is your Zigbee radio. - Search for Z-Wave. Home Assistant will automatically install the Z-Wave JS Supervisor Add-on. Select the port ending in
if00-port0(ttyUSB0— Enhanced Com Port). This is your Z-Wave radio.
Newbie Nora stops here. If you are running Proxmox, continue to Method 2. The steps above do not apply to a VM — the USB device is owned by the Proxmox host OS, not by Home Assistant directly.
Method 2: USB Passthrough Proxmox Home Assistant — Pro Setup
Audience: HAOS is running as a VM inside Proxmox. The USB dongle is physically attached to the Proxmox host and must be explicitly handed to the VM. The VM cannot see it until you do this.
Step 1: Physical Preparation
- Plug the dongle into a USB 2.0 port on the Proxmox host, via the extension cable.
- Identify the correct port visually: USB 2.0 ports are black. USB 3.0 ports are blue.
Do not plug the dongle directly into the server chassis without the extension cable. USB 3.0 interference combined with zero physical distance equals an unreliable Zigbee mesh. This is documented in the Proxmox forums and repeated constantly on r/homeassistant. The cable is the fix.
Step 2: Identify the Device on the Proxmox Host
SSH into your Proxmox host, or open the Shell tab inside the Proxmox web UI for your node. Run the following command:
lsusbLook for a line similar to this in the output:
Bus 001 Device 003: ID 10c4:ea71 Silicon Labs CP2105 Dual USB-to-UART Bridge ControllerNote the Vendor ID (10c4) and Device ID (ea71). You will need these in the next step. If you do not see your device listed here at all, stop and jump to the Troubleshooting section before continuing.
Step 3: Configure USB Passthrough in the Proxmox Web UI
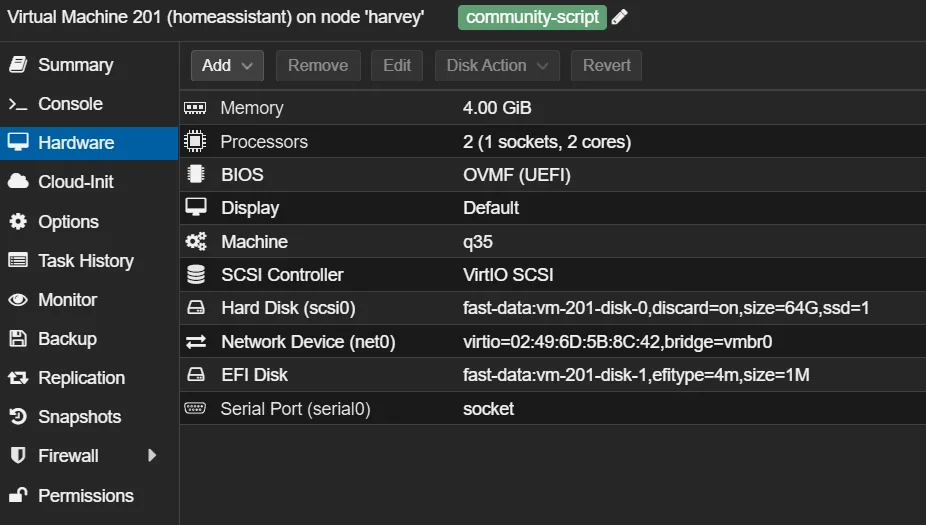
- Open the Proxmox web UI and select your HAOS VM (e.g., VM
201). - Navigate to
Hardware → Add → USB Device. - Critical choice: Select “Use USB Vendor/Device ID”. Do NOT select “Use USB Port”.
- From the dropdown, select your dongle. It will appear as something like
Silicon Labs CP2105. - Click Add.
Why Vendor/Device ID and not Port? Proxmox can reassign internal USB port numbers after a reboot. If you use “Use USB Port,” the VM loses the device the moment port numbering shifts. Vendor/Device ID is a hardware fingerprint tied to the chip itself, not to which physical socket it occupies. It survives reboots, port shuffles, and server moves. You configure it once and never touch it again. This is the direct answer to the most common Reddit complaint in this category: “my Zigbee stick disappeared after a reboot.”
Step 4: Reboot the HAOS VM
Reboot the HAOS VM from the Proxmox web UI by selecting your VM and clicking the Reboot button.
Important: The reboot must be initiated at the Proxmox level to ensure the USB device is properly re-attached to the VM on startup.
Step 5: Validate Detection Inside the VM
- In Home Assistant, navigate to
Settings → Devices & Services. - Confirm the hardware is visible. For a dual-chip stick, you should see two serial port entries corresponding to:
/dev/ttyUSB0 — CP2105 Enhanced Com Port   (→ Z-Wave)
/dev/ttyUSB1 — CP2105 Standard Com Port   (→ Zigbee / ZHA)
For more precise identification, check the stable by-id paths. These strings are unique to your specific dongle and will not change:
/dev/serial/by-id/usb-Silicon_Labs_CP2105_..._if00-port0   → Z-Wave JS
/dev/serial/by-id/usb-Silicon_Labs_CP2105_..._if01-port0   → ZHA (Zigbee)
The rule to memorize: if00 is Z-Wave. if01 is Zigbee. This is consistent behavior for the CP2105 chip.
Step 6: Configure the ZHA Integration (Zigbee)
- Go to
Settings → Devices & Services → Add Integration. - Search for and select ZHA.
- When prompted for a port, choose the entry ending in
if01-port0(ttyUSB1— Standard Com Port). This is your Zigbee radio. - Complete the setup wizard. ZHA will initialize the Zigbee coordinator.
Step 7: Configure the Z-Wave JS Integration
- Go to
Settings → Devices & Services → Add Integration. - Search for and select Z-Wave.
- Home Assistant will automatically install the Z-Wave JS Supervisor Add-on. Allow time for this to complete.
- When prompted for a port, choose the entry ending in
if00-port0(ttyUSB0— Enhanced Com Port). This is your Z-Wave radio.
Back up your security keys immediately. Z-Wave JS generates security keys during setup. If you lose these keys, every paired device must be factory reset and re-paired from scratch. Save them to a password manager the moment they appear.
Configuration & Validation: Confirming Everything Works
The Integration Status Check
Go to Settings → Devices & Services. Under the Configured section, both ZHA and Z-Wave must show a green status indicator, confirming both radios are active and communicating.
Completion Checklist
[ ] USB passthrough configured via Vendor/Device ID (not Port)
[ ] HAOS VM rebooted from Proxmox level
[ ] ZHA integration active — Zigbee coordinator online (port: if01-port0 / ttyUSB1)
[ ] Z-Wave JS Add-on installed and running (port: if00-port0 / ttyUSB0)
[ ] Z-Wave security keys backed up to password manager
[ ] Dongle connected via USB 2.0 extension cable (minimum 1 meter), away from server chassis
The Ugly Truth: Quirks & Honest Limitations
The Dual-Chip Naming Problem
Linux assigns ttyUSB0 and ttyUSB1 dynamically at boot. The order is not guaranteed across all hardware combinations. The CP2105 chip is consistent in practice — if00 maps to Z-Wave and if01 maps to Zigbee — but this is chip-specific behavior, not a universal Linux rule.
If you select the wrong port for ZHA, the integration will crash immediately. ZHA will receive Z-Wave protocol responses it cannot parse and will fail to initialize. The fix is simple: delete the broken integration, re-add it, and use the /dev/serial/by-id/ string to confirm the correct port before saving.
If you are using a single-radio dongle (Zigbee only or Z-Wave only), this complexity disappears entirely. You will see one
ttyUSBentry and one integration to configure. The dual-chip stick is powerful, but it demands precision on first setup.
This Is a One-Time Configuration Tax
Once Vendor/Device ID passthrough is set and both integrations are configured correctly, the setup is fully persistent. You can move the dongle to a different physical USB port on the server chassis and Proxmox will still locate it by hardware fingerprint. The VM will not notice.
The precision work on day one eliminates 100% of the Reddit posts that start with “my Zigbee stick disappeared after a reboot.”
Troubleshooting Common Errors
Problem: Poor Range or Devices Randomly Going Offline
Root cause: USB 3.0 RF interference on the 2.4GHz band.
Fix: Move the dongle to a USB 2.0 port and add a minimum 1-meter extension cable. To verify which USB version your port is running, use this command on the Proxmox host:
lsusb -t
# Look for "480M" in the output — this indicates USB 2.0 speed
# "5000M" indicates USB 3.0 — move the dongle to a different port
Problem: Dongle Disappears After Server Reboot
Root cause: Passthrough was configured using “Use USB Port” instead of “Use USB Vendor/Device ID.” When Proxmox reassigns internal USB port numbers after a reboot, the VM loses the device reference entirely.
Fix: Go to Proxmox web UI, select your VM, open the Hardware tab, find the USB device entry, click edit, and switch the method to Vendor/Device ID. Save the change and reboot the VM from Proxmox.
Problem: Wrong ttyUSB Selected, Integration Crashes
Root cause: ZHA was pointed at the Z-Wave port, or Z-Wave JS was pointed at the Zigbee port.
Fix: Delete the broken integration. Before re-adding it, run this command inside the Home Assistant terminal or via SSH to confirm the correct port mapping:
ls -la /dev/serial/by-id/
# Match "if00" in the string → use this port for Z-Wave JS (ttyUSB0 - Enhanced Com Port)
# Match "if01" in the string → use this port for ZHA (ttyUSB1 - Standard Com Port)
Problem: Dongle Not Visible in the Proxmox USB Device List
Root cause: The device is not recognized by the Proxmox host OS, or there is a power issue with a USB hub or port.
Fix sequence:
- Run
lsusbon the Proxmox host. Confirm the device appears at the OS level before attempting passthrough. - Try a different physical USB port on the server.
- Temporarily remove the extension cable to isolate whether the cable itself is faulty.
- Check the kernel log for USB error messages:
dmesg | grep -i usb | tail -20Look for lines mentioning “disconnect,” “error,” or “unable to enumerate.” These will point you toward a hardware or power delivery issue rather than a configuration problem.
Conclusion & Next Steps
What You Have Built
- A local Zigbee mesh network, active and coordinated by ZHA inside your HAOS VM, with zero cloud dependency.
- A local Z-Wave mesh network, managed by Z-Wave JS.
- A smart home setup that survives a complete internet outage without losing a single automation.
The Privacy Win
The Tuya and eWeLink cloud call chain is now permanently broken for every device you add to these networks. No packet from your light switch will ever touch a server in Shenzhen again. Every toggle, every sensor reading, every automation runs entirely within your home.
If you want to extend this approach to other parts of your infrastructure, our guide on building a self-hosted Docker and Portainer environment on Proxmox LXC is a natural next step for running additional local services alongside Home Assistant.
Final Completion Checklist
[x] USB Passthrough configured via Vendor/Device ID
[x] ZHA integration running — Zigbee network active (if01-port0 / ttyUSB1)
[x] Z-Wave JS Add-on installed and configured (if00-port0 / ttyUSB0)
[x] Security keys backed up to password manager
[x] Extension cable in place (minimum 1 meter, USB 2.0) — RF interference mitigated
Up Next: Pair Your First Device
The antenna is up. The networks are live. Now comes the useful part.
In the next guide, we pair your first real devices: a Zigbee bulb and a Z-Wave motion sensor. We cover pairing mode, device naming conventions, and writing your first automation script from scratch. Everything you configured here becomes immediately useful.
Next guide: Pair Your First Zigbee Sensor with Home Assistant ZHA.