Your Solar Data Is Flying to China First — Here’s How to Stop It
🎧 Listen to the 60-Second Audio Recap:
The Privacy Problem With the Official Hoymiles DTU
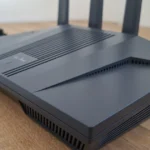
This guide covers OpenDTU Hoymiles Home Assistant integration via local MQTT, replacing the official cloud-dependent DTU with open-source firmware on an ESP32. Here is what actually happens when you use the official Hoymiles monitoring setup. Your inverter generates power data. That data travels wirelessly to the official Hoymiles DTU box. That box sends everything to a Hoymiles cloud server — located in China. Only then does the data bounce back to the app on your phone, with a delay of up to 15 minutes. You are paying for hardware that makes your own roof data take a round trip across the planet before you can see it.
The official Hoymiles DTU-Pro costs roughly €80–€120. The OpenDTU hardware you need to replace it entirely costs between €15 and €40, depending on your inverter series. We will cover exactly which hardware to buy in the next section.
OpenDTU takes a different approach. It is an ESP32-based device with a radio module that intercepts the RF signal your inverters are already broadcasting. No cloud. No relay. No delay. You get real-time per-panel data updated every second, published directly to your local network via MQTT, ingested natively by Home Assistant. The Chinese server never enters the picture.
Your roof. Your data. Your rules. OpenDTU is the self-hosting answer to proprietary solar monitoring. Everything stays on your local network, under your control, forever.
What OpenDTU Actually Does (The 30-Second Technical Explanation)
OpenDTU is open-source firmware running on an ESP32 microcontroller paired with one or two radio modules. It speaks the Hoymiles RF protocol natively, which means it can communicate directly with your inverters without any Hoymiles infrastructure involved.
Once it has data, it publishes that data to an MQTT broker on your local network. Home Assistant picks it up through the MQTT integration. The full data flow looks like this:
Hoymiles Inverter → RF Signal → OpenDTU (ESP32) → MQTT (Local) → Home AssistantNo internet connection required at any step. If your internet goes down, your solar monitoring keeps working.
Prerequisites and Minimal Hardware — Read This Before You Buy Anything
The Hardware Checklist
- One or more Hoymiles micro-inverters — HM-series (older) or HMS-series (newer). Know which series you have before purchasing anything else.
- An OpenDTU module — see the comparison table below. This is the most critical purchase decision.
- A 5V USB-A to USB-C charger. An old phone charger works.
- A running Home Assistant instance on any hardware.
The Most Expensive Mistake You Can Make — Choosing the Wrong Radio Module
Warning: HMS-series inverters transmit on 868 MHz (Sub-1GHz). A cheap OpenDTU module equipped with only an
NRF24L01+chip operates at 2.4 GHz and is completely deaf to this signal. You will plug it in, wait, and see nothing. Buying the wrong module is a €15–€25 mistake that wastes your time and money.
Use this table to match your inverter series to the correct hardware:
| Inverter Series | Required Radio Chip | Example Hardware | Approx. Cost |
|---|---|---|---|
| HM-series (older) | NRF24L01+ | Generic OpenDTU | ~€15 |
| HMS-series (newer) | CMT2300A | CASmo-DTU-HX, “Fusion”, “Combo” variants | ~€25–€40 |
| Both series (mixed) | NRF24L01+ AND CMT2300A | OpenDTU “Fusion” / “Combo” | ~€35–€45 |
A common question on forums is whether you can use the CMT2300A chip directly via a custom ESPHome configuration. Do not go down that road for this use case. The OpenDTU firmware handles the CMT2300A natively and correctly. It implements the full Hoymiles RF protocol stack, which is far more complex than a simple radio driver. ESPHome is the right tool for many things, but OpenDTU firmware is the correct and authoritative tool here. The OpenDTU GitHub repository is your primary reference for supported hardware and firmware releases.
If you are running other local-first smart home hardware and want to understand the broader philosophy of keeping your data off foreign servers, our guide on stopping your door and window sensor data from reaching Big Tech via a local 433MHz gateway covers the same principle applied to a different protocol.
Software Prerequisites
- Home Assistant — any recent version.
- The Mosquitto MQTT Broker add-on installed and actively running in Home Assistant.
- A dedicated local Home Assistant user account for OpenDTU. We recommend the username
opendtu. When creating this user in HA, enable the Local access only toggle. This user has no access to the HA frontend and exists solely to authenticate MQTT connections.
Method 1 — The Quick Start (Newbie Route)
Step 1 — Physical Placement and Antenna Setup
The 868 MHz frequency used by HMS-series inverters penetrates walls and floors better than 2.4 GHz Wi-Fi. In most homes, a single OpenDTU unit will reach all inverters on the roof without issue. Placement still matters.
Find a power outlet directly below or reasonably close to the roof section where your panels are installed. Avoid placing the unit in a metal enclosure or directly behind a thick concrete wall. A utility room, attic hatch area, or hallway near the roof line are all good candidates.
Screw the antennas firmly onto the DTU module — a loose antenna reduces range significantly. Plug the unit into USB power and wait 30 seconds for it to boot.
Step 2 — First Boot, Setup Wizard, and Connecting to Your Wi-Fi
On first boot, OpenDTU broadcasts its own temporary Wi-Fi access point so you can configure it.
- On your phone or laptop, scan for Wi-Fi networks and connect to the network named
OpenDTU-XXXXXX(the X’s will be unique to your device). - Enter the default password:
openDTU42. Some firmware versions useopenDTU4u— try both if the first fails. - Open a browser and navigate to
http://192.168.4.1. - Go to Settings → Network.
- Enter your home Wi-Fi (or dedicated IoT VLAN) SSID and password, then click Save.
- The DTU reboots and joins your network.
- Find its new IP address in your router’s DHCP client table, or try the mDNS address:
http://opendtu.local.
Step 3 — Adding Your Inverters via Serial Number
OpenDTU uses the 12-digit serial number printed on each inverter to identify and communicate with it. This is how it knows which RF packets belong to which device.
- In the OpenDTU web interface, navigate to Settings → Inverter Settings.
- Click Add Inverter.
- Enter a recognizable name, for example
Roof_South_1. - Enter the 12-digit serial number from the sticker on the physical Hoymiles inverter body. HMS-series serials typically begin with
114. HM-series serials typically begin with112. - Select the correct inverter type: HMS or HM.
- Click Save.
- Repeat for each additional inverter on your system.
After saving, the inverter entry will appear in the dashboard. Within a minute or two — assuming your radio module matches your inverter series — the status will change from Offline to Reachable.
Method 2 — The Pro Setup
Step 4 — Hardening the OpenDTU Web Interface
Before you do anything else on the pro path, lock down the web interface. The default credentials are public knowledge.
- Navigate to Settings → Security.
- Set a strong admin password. Use a minimum of 16 characters with mixed case, numbers, and symbols. A password manager-generated string is ideal.
- Click Save.
This prevents anyone on your local network from accessing the OpenDTU configuration interface without your credentials.
Step 5 — MQTT Configuration and Home Assistant Auto Discovery
This step is the bridge between OpenDTU and Home Assistant. A single typo here causes silent failures that are frustrating to debug.
- In OpenDTU, navigate to Settings → MQTT.
- Toggle Enable MQTT to ON.
- Toggle Enable Home Assistant MQTT Auto Discovery to ON. This is the setting that makes your inverters appear automatically as devices in Home Assistant — do not skip it.
- In the Broker IP field, enter your Home Assistant server’s local IP address (for example,
192.168.1.10). - Set Port to
1883. - Set Username to
opendtu(the dedicated HA user you created in prerequisites). - Enter the password you set for that HA user.
- Click Save.
OpenDTU publishes data to structured MQTT topics. The per-string power topics follow this pattern:
solar/hoymiles/[SERIAL]/0/powerdc
solar/hoymiles/[SERIAL]/1/powerdc
solar/hoymiles/[SERIAL]/2/powerdc
Where [SERIAL] is your inverter’s 12-digit serial number and the number after it is the string (panel) index.
Step 6 — Enabling Individual Panel Sensors (The Pro Power Move)
By default, OpenDTU pushes only the total inverter output to Home Assistant. Individual panel data lets you instantly spot shading problems, soiling on a specific panel, or a string underperforming due to a hardware fault. This is where OpenDTU’s diagnostic value over the official DTU becomes clear.
- Stay in Settings → MQTT in OpenDTU.
- Scroll down to the Home Assistant MQTT Auto Discovery block.
- Find the Individual Panels toggle and change it from Disabled to Enabled.
- Click Save.
After the next reboot, each panel string appears as a separate sensor entity in Home Assistant. You will see entities like sensor.hoymiles_roof_south_1_string_1_power, sensor.hoymiles_roof_south_1_string_2_power, and so on — each with its own voltage, current, and power readings.
Step 7 — Verifying the MQTT Connection
Navigate to Settings → MQTT in OpenDTU and confirm the status badge shows Connected in green. If it shows red or a connection error, proceed to the troubleshooting section below.
For a deeper verification, subscribe to all solar topics directly from the command line using the Mosquitto client tools:
mosquitto_sub -h [HA_IP] -p 1883 -u opendtu -P [password] -t "solar/#" -vReplace [HA_IP] with your Home Assistant IP and [password] with your opendtu user password. You should see a stream of topic/value pairs updating in real time as your inverters report in.
Configuration and Validation — Confirming Everything Works
Validation Checklist — 5 Things to Verify Before Calling It Done
- Correct OpenDTU hardware purchased with CMT2300A chip (if you have HMS-series inverters).
- All inverters added via 12-digit serial number — status shows Reachable in the OpenDTU dashboard.
- Dedicated
opendtulocal user created in Home Assistant with Local access only enabled. - Both Auto Discovery and Individual Panels toggled to Enabled in MQTT settings.
- OpenDTU web interface secured with a custom admin password via Settings → Security.
Confirming Entities Appear in Home Assistant
- In Home Assistant, navigate to Settings → Devices & Services → MQTT.
- You should see your Hoymiles inverter(s) listed as new devices.
- Click on a device to see all its sensor entities: per-panel power (W), voltage (V), current (A), temperature (°C), and total yield (kWh).
If no devices appear, read the troubleshooting section — specifically the Auto Discovery reboot fix. It resolves the majority of cases.
Building Your First Energy Dashboard Card
Once your entities are live, add a power gauge to your Lovelace dashboard. Navigate to your dashboard, click Edit, add a new card, and paste this YAML into the manual card editor:
type: gauge
entity: sensor.hoymiles_[name]_total_power
name: Solar Output
min: 0
max: 2000
unit: W
severity:
  green: 500
  yellow: 200
  red: 0
Replace [name] with the actual entity name from your HA device page. Adjust max to match your system’s peak wattage.
The Honest Truth — Quirks and Real Limitations
What OpenDTU Does NOT Do
- It does not replace a grid meter. OpenDTU tells you what your panels produce. It does not measure what you consume from the grid or what you export. For a complete Home Assistant Energy Dashboard, you still need a separate energy meter — a P1 reader for Dutch/Belgian smart meters is the standard solution.
- RF range is excellent but not infinite. Thick reinforced concrete floors or metal roofing can attenuate the signal. If inverters show intermittent connectivity, try repositioning the DTU closer to the roof line.
- OpenDTU is community firmware. It is maintained by volunteer contributors. HMS support was added later than HM support. Updates are not on a fixed schedule. This is the trade-off for free, open, local-first software — it is a good trade-off, but set your expectations accordingly.
- ESPHome is not the right tool for CMT2300A Hoymiles monitoring. ESPHome is excellent for many custom sensor builds, but it does not implement the Hoymiles RF protocol. OpenDTU firmware is the correct and complete solution for this specific use case. Do not try to reinvent this wheel.
The “It Works But…” Caveats
Auto Discovery packets are sent by OpenDTU only at boot time. If Home Assistant was not fully ready when OpenDTU started — or if the MQTT integration was not yet configured — HA will have missed those packets entirely. The entities simply will not exist. The fix is a soft reboot of the OpenDTU unit, which re-sends all discovery packets. This is not a bug; it is how MQTT Auto Discovery works by design.
MQTT credentials in Home Assistant are case-sensitive. If you created the user as OpenDTU in HA but typed opendtu in the OpenDTU MQTT settings, you will get a silent Connection Refused error. The MQTT status badge will show red with no helpful error message. Verify the exact spelling and casing of your username in both places.
Troubleshooting Common Errors
Error: Inverters Show “Offline” in OpenDTU Web Interface
Cause: Wrong radio module for your inverter series, or a loose antenna.
Solution:
- Confirm your inverter series. Check the model number on the sticker — HMS-series model numbers start with “HMS”. HM-series start with “HM”.
- If you have HMS-series inverters, verify that your OpenDTU module contains the CMT2300A chip. A module with only an NRF24L01+ will never see HMS inverters, regardless of firmware version or placement.
- Check that both antennas are screwed on firmly. A finger-tight connection is not enough — give them a firm quarter-turn past hand-tight.
- Check the OpenDTU event log for RF-level errors: navigate to Info → Event Log in the web interface.
Error: MQTT Connection Refused
Cause: Credential mismatch, or the Mosquitto broker is not running.
Solution:
- In Home Assistant, go to Settings → People and verify the exact username spelling of your
opendtuuser. Copy it character by character into the OpenDTU MQTT username field. - Confirm the Mosquitto add-on is running: Settings → Add-ons → Mosquitto Broker. The status should show Running.
- If Mosquitto is running but connections still fail, perform a soft restart of the add-on from its page. Do not uninstall and reinstall — this wipes your Mosquitto configuration and user credentials.
- Check the Mosquitto logs for the specific rejection reason: Settings → Add-ons → Mosquitto Broker → Log.
Error: MQTT Shows “Connected” But No Entities Appear in Home Assistant
Cause: Auto Discovery packets were sent before Home Assistant was ready, or before the MQTT integration was configured in HA.
Solution:
- In OpenDTU, navigate to Info → Reboot.
- Confirm the reboot and wait 60 seconds for the unit to fully restart and reconnect.
- In Home Assistant, navigate to Settings → Devices & Services → MQTT and check for new device entries.
This single reboot resolves approximately 90% of post-setup “no entities” reports. It is always the first thing to try.
Error: Individual Panel Sensors Missing After Enabling the Toggle
Cause: The new per-panel Auto Discovery topics are only announced on boot. Enabling the toggle does not retroactively push new discovery packets.
Solution: Perform the same soft reboot procedure described above. After the reboot, the individual string sensors will appear as new entities under your inverter device in Home Assistant.
Conclusion and Next Steps — Your Roof Is Now a Local Data Source
Final Verification Checklist
- Correct OpenDTU hardware with the right radio module for your inverter series.
- All inverters added via serial number and showing Reachable in OpenDTU.
- Local, cloud-free MQTT user configured in Home Assistant.
- Auto Discovery and Individual Panels both active.
- OpenDTU web interface secured with a custom admin password.
Your solar system is now a fully local data source. Every watt your panels produce is measured, stored, and acted upon entirely within your own network. No subscriptions. No cloud dependency. No data leaving your home.
Next Steps — Advanced Home Assistant Automations
Now that you have real-time per-second solar data flowing into Home Assistant, you can start making decisions with it. The two automations below are the highest-value starting points for maximizing self-consumption.
Automation 1 — Zero-Export Air Conditioning (Solar-Powered Cooling)
If you have air conditioning units with local Wi-Fi control (for example, a Mitsubishi unit running local ESPHome firmware), you can run them entirely on surplus solar power. When production exceeds a threshold and the house is warm, turn on cooling. When production drops, turn it off before you start drawing grid power.
- Trigger:
sensor.hoymiles_total_powerexceeds 1500 W for 5 consecutive minutes. - Condition: Indoor temperature sensor reads above 22°C.
- Action: Call
climate.turn_on, set mode tocool, target temperature21°C. - Reset trigger: Power drops below threshold for more than 10 minutes → call
climate.turn_off.
alias: "Solar AC - Turn on cooling when surplus available"
trigger:
  - platform: numeric_state
    entity_id: sensor.hoymiles_total_power
    above: 1500
    for:
      minutes: 5
condition:
  - condition: numeric_state
    entity_id: sensor.indoor_temperature
    above: 22
action:
  - service: climate.turn_on
    target:
      entity_id: climate.living_room_ac
  - service: climate.set_temperature
    target:
      entity_id: climate.living_room_ac
    data:
      temperature: 21
      hvac_mode: cool
mode: single
alias: "Solar AC - Turn off when solar drops"
trigger:
- platform: numeric_state
entity_id: sensor.hoymiles_total_power
below: 1500
for:
minutes: 10
action:
- service: climate.turn_off
target:
entity_id: climate.living_room_ac
mode: singleAutomation 2 — The Dynamic Boiler (Thermal Battery)
When your panels produce more than you consume, that surplus normally flows back to the grid. In many countries — including the Netherlands and Belgium where net metering policies are being phased out — that exported power earns you very little. Instead, redirect that surplus into your electric boiler or hot water cylinder. You are storing solar energy as heat: a thermal battery at zero extra hardware cost beyond a smart relay.
Connect a Shelly Pro relay (or equivalent) to your boiler’s heating element circuit. Then build this automation:
- Concept: Excess solar production detected → switch boiler relay ON → store energy as hot water.
- Trigger: Grid export sensor exceeds 300 W sustained (requires a P1 reader or clamp meter for grid measurement).
- Action: Switch boiler relay ON.
- Reset: Grid export drops to zero or grid import begins → relay OFF.
alias: "Solar Boiler - Activate on surplus export"
trigger:
  - platform: numeric_state
    entity_id: sensor.grid_export_power
    above: 300
    for:
      minutes: 2
action:
  - service: switch.turn_on
    target:
      entity_id: switch.boiler_relay
mode: single
alias: "Solar Boiler - Deactivate when surplus ends"
trigger:
- platform: numeric_state
entity_id: sensor.grid_export_power
below: 50
for:
minutes: 1
action:
- service: switch.turn_off
target:
entity_id: switch.boiler_relay
mode: singleFurther Reading and Community Resources
- OpenDTU GitHub Repository — firmware releases, supported hardware list, and issue tracker. This is the authoritative source.
- Home Assistant MQTT Integration Documentation — official reference for MQTT setup and Auto Discovery behavior.
- SelfHostHero: Stop Sending Your Door & Window Data to Big Tech — The Case for a Local 433MHz Gateway — the same local-first philosophy applied to sensor protocols.
- SelfHostHero: Local Control of Your Mitsubishi Heavy Industries AC with ESP32-S3 & ESPHome — the ideal companion for the solar AC automation above.
- SelfHostHero: Smart Mechanical Ventilation — Control Your Itho Daalderop CVE Locally in Home Assistant — local-first control for your home ventilation, no cloud.