🎧 Listen to the 60-Second Audio Recap:
The Privacy Problem — What Happens Every Time Your Front Door Opens
his guide covers the complete RFX-433EMC Home Assistant MQTT setup with Auto Discovery. Every time a door sensor fires a 433MHz EV1527 signal and your Sonoff RF Bridge picks it up, that event does not stay in your home. If you are running the default eWeLink or Tuya cloud stack, that door open event — with its timestamp — travels to an external server you do not control, cannot audit, and cannot delete from. Motion triggers, window events, button presses: all logged off-premises. You agreed to this in a terms-of-service document nobody reads.
The alternative is straightforward. The signal path with an RFX-433EMC looks like this: 433MHz sensor transmits, RFX receives, RFX publishes a JSON payload to your Mosquitto MQTT broker running on your own Home Assistant server, Home Assistant processes it. Zero external hops. No account required. No telemetry. The data never leaves your local network.
This guide is the direct answer to a recurring question on r/homeassistant: “Need better and more reliable 433MHz RF bridge to MQTT than Sonoff RF bridge.” We will walk through exactly why the Sonoff hits a ceiling, and how the RFX-433EMC removes it entirely.
What This Guide Covers (And What It Doesn’t)
We start with the Sonoff RF Bridge running Tasmota as the baseline. We test its limits. Then we move to the RFX-433EMC WiFi+MQTT as the upgrade path, covering full MQTT Auto Discovery in Home Assistant with zero manual YAML for sensors.
Here is the protocol comparison between your options:
| Protocol | Sonoff + Tasmota | Sonoff + Portisch | RFX-433EMC |
|---|---|---|---|
| EV1527 / PT2262 alarm sensors | ✅ | ✅ | ✅ |
| KaKu AC / HomeEasy EU | ❌ | ⚠️ Fragile | ✅ |
| Somfy RTS blinds | ❌ | ❌ | ✅ |
| Brel / Dooya bidirectional | ❌ | ❌ | ✅ |
| Weather stations (Oregon / FineOffset) | ❌ | ❌ | ✅ |
One thing this guide does not cover: Itho Daalderop ventilation. That system operates on 868MHz, which is an entirely different frequency band. The RFX-433EMC does not handle it. We will point you toward the correct solution in the Next Steps section.
Prerequisites & Minimal Hardware
Required Hardware
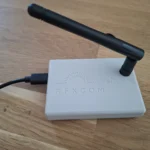
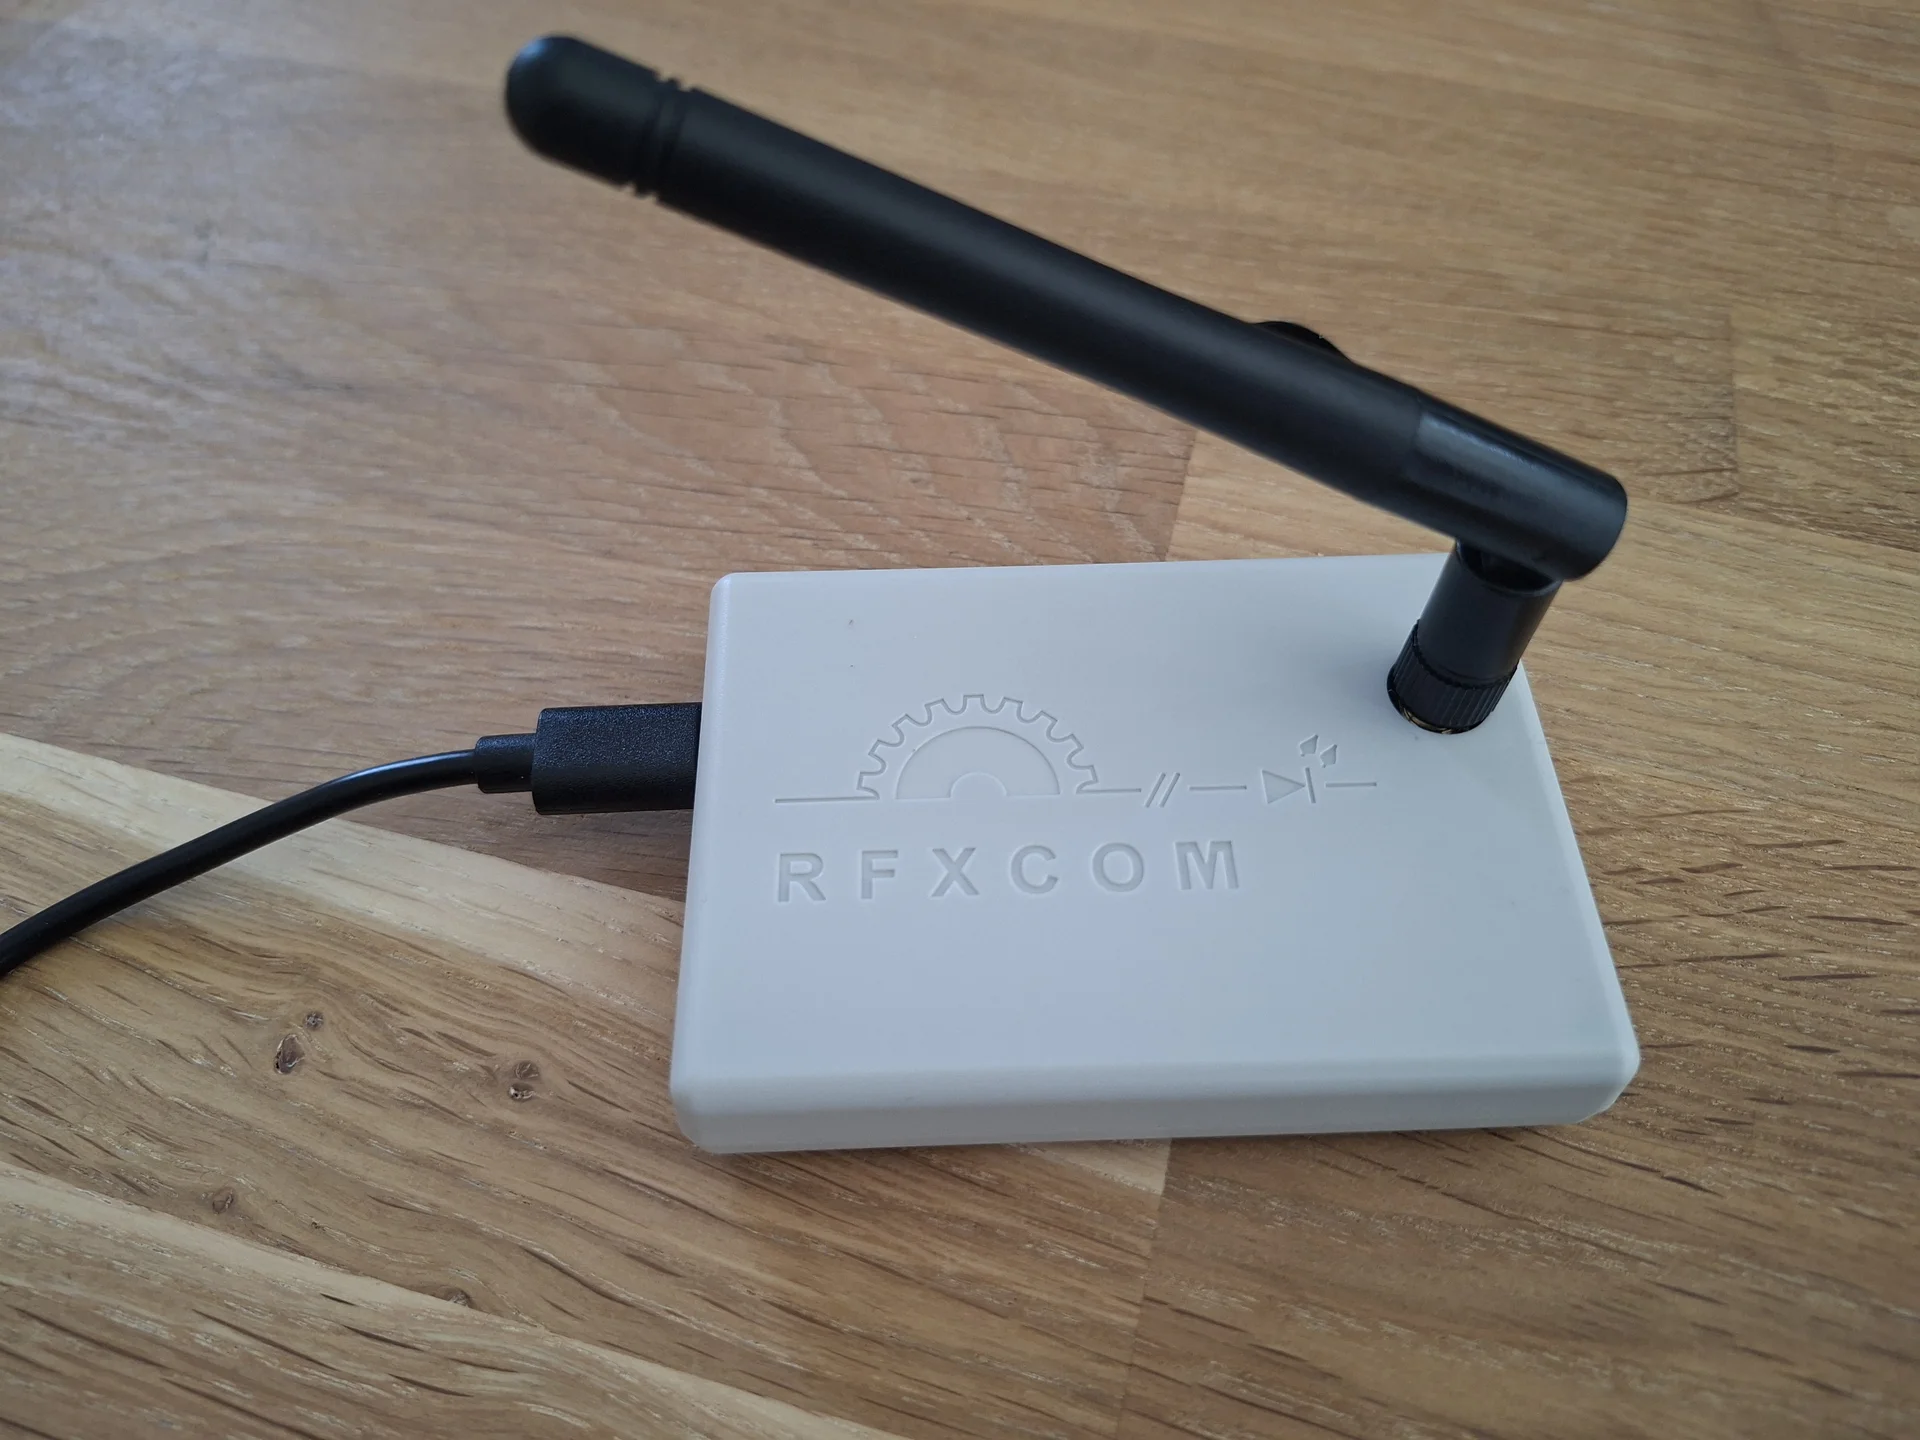
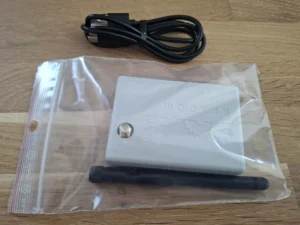
- RFXCOM RFX-433EMC — USB/WiFi+MQTT version, batch 5025 or newer, firmware 4047 or higher
- USB-C power supply, or a free USB port on your Home Assistant server
- A fixed local IP address for the RFX (configure a DHCP reservation on your router, or assign a static IP)
Optional Hardware
- A Windows PC with the RFXmngr tool installed — useful for confirming firmware mode and running diagnostics before you go wireless
Required Software & Services
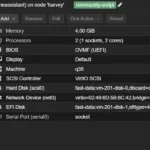
- A working Home Assistant installation — HAOS, Container, or Supervised all work. If you are still setting up your HA environment, see our guide on installing Home Assistant OS on a Proxmox VM.
- An active Mosquitto MQTT broker add-on, or any equivalent MQTT broker reachable on your local network
- Browser access to HA Settings so you can create a dedicated MQTT user
Pre-Flight Check — Verify Your Sonoff RF Bridge Limitation
Before spending a single euro on new hardware, confirm whether your existing Sonoff RF Bridge actually has the limitation we are describing. Open the Tasmota web console and type the following command:
RfRaw 192Two outcomes are possible. If you have Portisch firmware installed, you will hear a short beep and see a confirmation message in the console. If you are running stock Sonoff firmware, nothing happens. KaKu signals are filtered as noise and never reach the console output. That silence is your confirmation: the migration is necessary.
Method 1 — The Quick Start
Who this is for: Users with 4 to 5 EV1527/PT2262 alarm sensors only, comfortable with basic YAML, and not requiring KaKu or Somfy support.
Option A — Sonoff RF Bridge + Tasmota (The €15 Path)
Flash Tasmota using the Tasmota Web Installer at tasmota.github.io/install. For most RF Bridge variants, no soldering is required. Connect the bridge to your computer via USB, select the correct firmware variant, and follow the on-screen steps.
Once Tasmota is running, configure MQTT via the Tasmota console:
MqttHost [HA_IP_ADDRESS]
MqttPort 1883
MqttUser tasmota
MqttPassword [YOUR_PASSWORD]
Topic rfbridge
From here, the workflow is manual. Trigger each sensor once. Watch the Tasmota console for the raw RF code that appears in the output. Copy that hex code. Then open your Home Assistant configuration.yaml and add an entry like this for each sensor:
mqtt:
  binary_sensor:
    - name: "Front Door"
      state_topic: "tele/rfbridge/RESULT"
      value_template: "{{ value_json.RfReceived.Data }}"
      payload_on: "363D56"
      payload_off: "363D56"
      device_class: door
      off_delay: 5
This works. It is a legitimate setup for a small sensor count. But be clear about the limitations: you write one YAML block per sensor, per button, per code variant. There is no auto-discovery. KaKu support requires the Portisch firmware modification, which means flashing a separate RF chip via FTDI or soldering hardware bridges onto the PCB. Every Tasmota update carries a risk of breaking that modification.
Option B — Skip Ahead to the RFX-433EMC (Recommended Even for Beginners)
The RFX-433EMC costs approximately €79. The Sonoff RF Bridge costs approximately €15. That is more than five times the price. The honest calculation: if you have more than five sensors, plan to add KaKu switches, or want to avoid writing and maintaining YAML for every single device, the RFX pays for itself in saved troubleshooting hours within the first month.
There is no Portisch flash risk. There is no YAML for sensors. There is no protocol ceiling. If you are building a home automation setup you intend to expand, start with the right tool. Continue to Method 2 below.
Method 2 — RFX-433EMC Home Assistant MQTT: Pro Setup with Auto Discovery
Step 1 — Verify RFX Firmware Mode with RFXmngr
Connect the RFX-433EMC to a Windows PC via USB. Open RFXmngr. Watch for a yellow warning banner that reads:
“RFXmngr cannot be used with MQTT software in the RFX-433EMC/RFX-868!”
If you see that warning, your device is in MQTT/WiFi firmware mode. This is exactly correct for this guide. The device is not broken. Do not attempt to reflash it.
If no warning appears, your device is in USB firmware mode. You will need to switch it to MQTT/WiFi firmware before proceeding. Refer to the official RFX User Guide for the firmware switch procedure.
Step 2 — Connect to the RFX Temporary WiFi Access Point
Power the RFX via USB-C or a USB port on your server. Within 60 seconds, the device broadcasts a temporary WiFi network. It will appear in your device’s network list. Connect to it using these credentials:
SSID:     [RFX device SSID — visible in your network scan]
Password: 12345678
Once connected, open a browser and navigate to http://192.168.4.1. This is the RFX web configuration interface.
Step 3 — Create a Dedicated MQTT User in Home Assistant
Navigate to HA Settings, then People, then Add Person. Fill in the following values:
- Name:
rfx433 - Password: Choose a strong, memorable password
- Allow login: ON
- Administrator: OFF
- Local only: ON
Why a dedicated user per device? If you follow this pattern consistently — rfx433, tasmota, itho-wifi — you can rotate any single device’s password without disrupting the rest of your IoT stack. One compromised credential does not cascade.
Step 4 — Configure RFX Web Server (MQTT Settings)
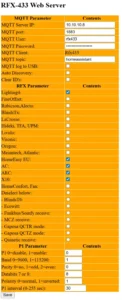
On the RFX web interface at http://192.168.4.1 (or the local IP it receives after joining your home WiFi), fill in the MQTT configuration form with these exact values:
MQTT Server IP:  [HOME_ASSISTANT_IP]
MQTT Port:       1883
MQTT User:       rfx433
MQTT Password:   [password from Step 3]
MQTT Client:     Rfx433
MQTT Topic:      homeassistant   <-- CRITICAL: exact string, lowercase, no spaces
Auto Discovery:  ENABLED
The MQTT topic field is the most common source of failure. It must be exactly homeassistant. Lowercase. No spaces. No underscores. No capital letters. One wrong character here and Auto Discovery will not work.
Step 5 — Select Protocols (Sensitivity Optimization)
This step matters more than most guides acknowledge. Every additional active protocol reduces the receiver’s sensitivity. The RFX is a single radio receiver. The more protocols it listens for simultaneously, the more processing overhead it carries, and the weaker the signals it can reliably decode.
Enable only what you actually use:
- ✅ Lighting4 — EV1527/PT2262 alarm, door, and window sensors
- ✅ HomeEasy EU — Modern KaKu and Chacon devices
- ✅ AC — Modern KlikAanKlikUit
- ✅ ARC — Legacy KaKu
- ✅ X10 — Low interference impact, safe to leave enabled
- ❌ BlindsT0 — This protocol blocks all other protocols. Do not enable it unless you are exclusively using Somfy hardware and nothing else.
- ❌ Oregon / FineOffset / LaCrosse — Weather station protocols only. Disable if you have no weather stations.
- ❌ Funkbus / Somfy receive — Enable only when Somfy hardware is physically present and paired.
Leave the P1 Parameter section untouched. Click Save. The RFX reboots, joins your home WiFi network, and connects to your MQTT broker.
Step 6 — Verify Auto Discovery in Home Assistant
Navigate to HA Settings, then Devices & Services, then MQTT. The RFX appears automatically under the Mosquitto MQTT Broker as device Rfx433. You will see entities for RFX type, SW version, IP address, and HW version. No YAML was written. No manual configuration was required.
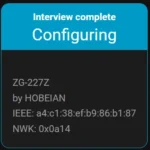
Now trigger each sensor once. Open a door. Press a KaKu button. Activate a PIR. Each sensor appears as a new device in HA immediately after its first transmission. A door sensor might appear as PT2262_363d56, with Status and RSSI entities visible in the Activity log. Walk through every sensor in your home, one by one, to register them all.
Configuration & Validation
Confirming MQTT Message Flow
To verify that messages are flowing from the RFX to your broker, use the MQTT listener built into Home Assistant (Settings, Devices & Services, MQTT, Configure, Listen to a topic) or an external tool like MQTT Explorer. Subscribe to:
homeassistant/#Trigger a sensor. You should see a JSON payload arrive within one second. If nothing appears, the most likely cause is an incorrect MQTT topic string on the RFX. Verify it is exactly homeassistant.
RSSI Signal Quality Benchmarks
Each sensor entity in HA includes an RSSI value. Use these benchmarks to evaluate placement:
- -54 dBm — Strong signal, optimal placement
- -70 dBm — Acceptable, monitor over time
- -85 dBm — At the threshold, consider repositioning the RFX
For best results, place the RFX in a central location in your home, elevated, away from metal enclosures, and away from WiFi routers operating on 2.4GHz. The 433MHz band and 2.4GHz WiFi do not interfere directly, but physical proximity to a router introduces electrical noise.
⚠️ Disable Auto Discovery After Pairing All Devices
This is not optional. Once you have triggered all your own sensors and confirmed they appear in HA, return to the RFX web interface and disable Auto Discovery immediately.
If you leave it enabled, the RFX will register every 433MHz device it hears. Your neighbor’s doorbell. The weather station three gardens away. Passing vehicles with keyless entry systems. All of them will appear as new devices in your Home Assistant MQTT integration. Cleaning that up is tedious. Preventing it takes ten seconds.
The Ugly Truth — Quirks, Limitations & Honest Cost Analysis
The €79 vs €15 Reality Check
We will say this plainly: for users with exclusively four or five EV1527 alarm sensors and no plans to expand, the Sonoff RF Bridge with Tasmota is a legitimate choice. The manual YAML workflow is manageable at that scale. The cost difference is real. If that describes your situation, Method 1 is not a wrong answer.
For anyone who wants KaKu, Somfy, weather stations, bidirectional blind motors, or a sensor count above five, the RFX-433EMC is the correct tool. The price difference disappears quickly when you factor in the hours you will not spend debugging Portisch flashes, chasing missing YAML entries, and wondering why a sensor stopped responding after a Tasmota update.
PT2262 / Lighting4 Protocol Limitation
The RFX cannot extract a device ID and a command separately from PT2262 packets. Each button press on a remote, each unique code from a sensor, appears as a separate device in Home Assistant. This is a protocol limitation, not an RFX defect. The PT2262 chip encodes everything into a single fixed code with no structured device/command separation.
The practical workaround is straightforward: build your automations by triggering on the Status value of each entity rather than attempting to group multiple buttons as a single logical device. It works cleanly once you accept the model.
433MHz Alarm Control Caveat
The RFX can retransmit Lighting4 codes. Whether your specific alarm panel accepts a retransmitted code as a valid arm or disarm command depends entirely on the alarm brand and its rolling code implementation. Some panels will accept it. Many will not. Do not assume bidirectional alarm control works without testing it explicitly with your hardware.
868MHz Is Out of Scope
Itho Daalderop ventilation systems operate on 868MHz. The RFX-433EMC does not cover this frequency band. If you need to integrate Itho ventilation into Home Assistant, you need a separate solution: the Itho WiFi add-on by NRG.Watch. We will cover that in a future guide.
Troubleshooting Common Errors
Error — “Failed Setup, Will Retry: Timeout on Connect” (USB Mode)
This error appears in Home Assistant when you connect the RFX via USB and HA tries to communicate with it as a serial device. The cause is that your RFX shipped with MQTT/WiFi firmware, not USB firmware. HA cannot talk to it over serial in this mode.
Confirm this by connecting the RFX to a Windows PC and opening RFXmngr. If you see the yellow warning about MQTT software, the device is in MQTT/WiFi firmware mode. The device is functional. Switch to the WiFi+MQTT setup route described in Method 2. Do not attempt to reflash unless you specifically need USB mode.
Error — WiFi Setup Page at 192.168.4.1 Requests a Password
Default WiFi password: 12345678Error — RFX Does Not Appear in HA After MQTT Configuration
Run through this three-point diagnostic in order:
- Verify the MQTT topic on the RFX web interface is exactly
homeassistant— lowercase, no spaces, no underscores, no capital letters. - Confirm Auto Discovery is enabled on the RFX web interface.
- Verify the
rfx433MQTT user exists in HA under Settings, People, and that the password matches what you entered on the RFX.
To confirm messages are reaching the broker at all, subscribe to the following topic in MQTT Explorer or in HA’s built-in MQTT listener:
Subscribe to: homeassistant/#
Expected:     Incoming JSON payloads on RFX heartbeat (approximately every 30 seconds)
If no messages arrive, the issue is between the RFX and the broker. If messages arrive but the device does not appear in HA, the issue is in the Auto Discovery configuration.
Error — KaKu Remote Appears as Multiple Separate Devices
This is expected behavior for PT2262/Lighting4 protocol, as described in the limitations section above. Each button code is a separate HA device. Build your automations by triggering on the Status value of each entity. Do not attempt to merge them into a single device — the protocol does not support it.
Error — Neighbor’s Devices Appearing in HA
Auto Discovery is still enabled on the RFX. Navigate to the RFX web interface at http://[ip-of-rfx] and disable Auto Discovery. Then go to HA Settings, Devices & Services, MQTT, and delete any unknown devices that appeared. This is a one-time cleanup if you catch it early.
Conclusion & Next Steps
Migration Completion Checklist
- [x] Sonoff RF Bridge tested with
RfRaw 192— KaKu confirmed non-functional on stock firmware - [x] RFX-433EMC received, MQTT firmware confirmed via RFXmngr yellow warning
- [x] Dedicated MQTT user
rfx433created in HA under Settings, People - [x] RFX joined home WiFi via
192.168.4.1(password:12345678) - [x] MQTT settings configured on RFX Web Server, topic set to
homeassistant - [x] Protocols enabled: Lighting4, HomeEasy EU, AC, ARC, X10
- [x] Oregon, Somfy, BlindsT0 left disabled for maximum receiver sensitivity
- [x] Auto Discovery ON — RFX appears automatically in HA under MQTT integration
- [x] First sensor tested:
PT2262_363d56visible with RSSI value after one activation - [ ] All own sensors activated and registered (walk through each one)
- [ ] Auto Discovery DISABLED on RFX web interface
- [ ] Sonoff RF Bridge taken offline or resold
- [ ] Manual
mqtt: binary_sensor:entries removed fromconfiguration.yaml
What Comes Next
Your 433MHz layer is solved. Every door sensor, window sensor, KaKu remote, and PIR in your home now reports directly to Home Assistant over local MQTT with zero cloud dependency. The automations this unlocks are practical and immediate: arm your alarm when all door and window sensors report closed, send a notification when a specific window has been open for more than 30 minutes, trigger KaKu lights via a 433MHz remote without touching any cloud service.
The next target is 868MHz. Itho Daalderop ventilation requires the Itho WiFi add-on by NRG.Watch — a completely separate solution on a completely separate frequency band. That guide is coming.
If you are building out your full self-hosted smart home stack and want to add Zigbee sensors alongside your 433MHz devices, our guide on pairing your first Zigbee sensor with Home Assistant ZHA covers the full local setup with zero cloud dependency on that protocol as well.
You now have a professional-grade 433MHz gateway running entirely on your own infrastructure. No accounts. No subscriptions. No data leaving your network.