This guide covers a complete paperless-ngx Docker Proxmox deployment. Your tax returns, pay stubs, medical invoices, and passport scans are sitting in a Google Drive folder right now. Google’s OCR engine has read every word. Adobe Scan has processed your BSN number. Microsoft Lens uploaded your insurance documents to a cloud API you never audited.
Paperless-ngx ends that. This guide walks you through deploying a self-hosted document management system using Docker Compose and Portainer. Two paths are covered: a quick ten-minute setup for beginners, and a production configuration with split NVMe/HDD storage and Dutch OCR for EU users.
Everything runs locally. Tesseract reads your documents inside the container. Zero bytes leave your network.
Why Paperless-ngx Belongs on Your Server
🎧 Listen to the 60-Second Audio Recap:
What You Are Actually Replacing
This stack replaces Google Drive (with its built-in document scanning and cloud OCR), Evernote document capture, Adobe Scan, and Microsoft Lens. Every one of those products sends your document images to a remote API for text recognition.
The document categories at risk are exactly the ones you cannot afford to expose: tax returns, pay stubs, medical invoices, identity documents including passports and BSN numbers, insurance policies, and bank statements.
What Paperless-ngx Actually Does
The full pipeline in thirty seconds:
- Paperless watches an inbox folder on your server.
- You drop a PDF or image into that folder.
- The consumer service ingests the file and passes it to Tesseract OCR.
- Tesseract extracts the full text and stores it in PostgreSQL.
- The web UI serves a fully searchable document archive.
One point that confuses newcomers: Paperless-ngx is not a single container. It runs three containers. The webserver container handles the UI and processing logic. The db container runs PostgreSQL for document indexing. The broker container runs Redis for the task queue. All three must be running for the system to function. This is why you use Docker Compose rather than a single docker run command.
Prerequisites and Minimum Hardware
Required Infrastructure
You need a Proxmox node with Docker and Portainer already running inside an LXC container. If you have not set that up yet, follow our guide: Build Your Privacy Machine Room: Docker + Portainer on Proxmox LXC.
Minimum Hardware Specifications
| Component | Minimum | Recommended |
|---|---|---|
| CPU Cores | 2 | 4+ (e.g., Intel i3-N305) |
| RAM | 4 GB | 8 GB |
| Fast Storage (NVMe) | DB + Redis data | /mnt/snelle_data/ |
| Bulk Storage (HDD/NAS) | Media + Inbox | /mnt/opslag/ |
Split storage is not cosmetic. Tesseract OCR is both CPU-intensive and I/O-intensive. PostgreSQL performs thousands of small random reads during indexing. If your database and your PDF archive share the same spinning disk, they compete for the same read/write head. Putting PostgreSQL and Redis on NVMe eliminates that contention. Your bulk PDFs can live on a slower HDD or NAS without impacting search performance.
Pre-Flight Checklist
- ☐ Portainer accessible at
http://[server-ip]:9000 - ☐ NVMe mount point verified:
/mnt/snelle_data/ - ☐ HDD or NAS mount point verified:
/mnt/opslag/ - ☐ SMB share configured if you want Windows inbox access
- ☐ Port 8010 confirmed free (Pro setup)
Run this command to verify port availability before deploying:
ss -tlnp | grep -E '8000|8010'No output means both ports are free. Any output means something is already listening on that port and you need to resolve the conflict before continuing.
Method 1: The Quick Start (Beginner Route)
Who This Is For
Use this method if you have a single-drive setup, English OCR is acceptable, and you want to test Paperless-ngx before committing to the full configuration. Estimated time: ten minutes.
Step 1: Create the Stack in Portainer
- Open Portainer in your browser.
- In the left sidebar, click Stacks.
- Click + Add Stack in the top right.
- Name the stack
paperless.
Step 2: Paste the Official Docker Compose File
Navigate to docs.paperless-ngx.com and copy the official docker-compose.yml. Paste it into the Portainer web editor. Before deploying, change these three variables at minimum:
PAPERLESS_ADMIN_USER— your chosen admin usernamePAPERLESS_ADMIN_PASSWORD— a strong password, not the defaultPAPERLESS_TIME_ZONE— your local timezone (e.g.,Europe/Amsterdam)
Step 3: Deploy and Verify
Click Deploy the stack. Wait thirty seconds, then run:
docker ps | grep paperlessYou should see three containers listed. Open your browser and navigate to http://[server-ip]:8000.
Method 2: The Pro Setup (Production Route)
What This Configuration Adds
This is the configuration we recommend for any long-term deployment. It adds the following over the basic install:
- Port remapped to
8010to avoid port conflicts permanently - PostgreSQL data stored on NVMe at
/mnt/snelle_data/ - Redis data stored on NVMe at
/mnt/snelle_data/ - PDF media and inbox stored on HDD at
/mnt/opslag/ - Dutch Tesseract language pack (
nld) downloaded automatically at container start - OCR language set to
nld+eng(Dutch primary, English fallback) - Timezone set to
Europe/Amsterdam
Step 1: Prepare the Directory Structure
Run these commands on your Proxmox host or inside your LXC, depending on where your mount points live:
mkdir -p /mnt/snelle_data/App_Data/paperless_redis
mkdir -p /mnt/snelle_data/App_Data/paperless_db
mkdir -p /mnt/snelle_data/App_Data/paperless_data
mkdir -p /mnt/opslag/Paperless_Media
mkdir -p /mnt/opslag/Paperless_Export
mkdir -p /mnt/opslag/Paperless_Inboxchown -R 1000:1000 /mnt/snelle_data/App_Data/
chown -R 1000:1000 /mnt/opslag/See the LXC UID mapping fix in the Troubleshooting section for the full Proxmox config entry.
Step 2: Paste the Pro Docker Compose into Portainer
In Portainer, go to Stacks → + Add Stack, name it paperless, and paste the following into the web editor:
version: "3.8"
services:
broker:
image: docker.io/library/redis:7
container_name: paperless_redis
restart: always
volumes:
- /mnt/snelle_data/App_Data/paperless_redis:/data
db:
image: docker.io/library/postgres:15
container_name: paperless_db
restart: always
volumes:
- /mnt/snelle_data/App_Data/paperless_db:/var/lib/postgresql/data
environment:
POSTGRES_DB: paperless
POSTGRES_USER: paperless
POSTGRES_PASSWORD: paperless_database_password
webserver:
image: ghcr.io/paperless-ngx/paperless-ngx:latest
container_name: paperless_app
restart: always
depends_on:
- db
- broker
ports:
- "8010:8000"
volumes:
- /mnt/snelle_data/App_Data/paperless_data:/usr/src/paperless/data
- /mnt/opslag/Paperless_Media:/usr/src/paperless/media
- /mnt/opslag/Paperless_Export:/usr/src/paperless/export
- /mnt/opslag/Paperless_Inbox:/usr/src/paperless/consume
environment:
PAPERLESS_REDIS: redis://broker:6379
PAPERLESS_DBHOST: db
PAPERLESS_DBPASS: paperless_database_password
PAPERLESS_TIME_ZONE: Europe/Amsterdam
PAPERLESS_OCR_LANGUAGES: nld
PAPERLESS_OCR_LANGUAGE: nld+eng
PAPERLESS_ADMIN_USER: admin
PAPERLESS_ADMIN_PASSWORD: superSecretPasswordpaperless_database_password and superSecretPassword are placeholders. Replace both with strong, unique passwords before clicking deploy. These credentials are stored as plaintext in the YAML. For a hardened production setup, Docker Secrets is the correct long-term solution, but replacing the defaults is the critical first step.Step 3: Environment Variable Reference
What each key variable does and why it matters:
| Variable | Value | Why It Matters |
|---|---|---|
PAPERLESS_OCR_LANGUAGES |
nld |
Triggers download of the Dutch Tesseract dictionary at container startup |
PAPERLESS_OCR_LANGUAGE |
nld+eng |
Sets Dutch as the primary OCR language with English as fallback |
PAPERLESS_TIME_ZONE |
Europe/Amsterdam |
Ensures correct timestamps on all ingested documents |
PAPERLESS_DBPASS |
Your password | Must be an exact string match with POSTGRES_PASSWORD in the db service |
Step 4: Map the Windows SMB Inbox
On your Windows machine:
- Open File Explorer.
- Right-click This PC and select Map network drive.
- Enter the path:
\\[server-ip]\Paperless_Inbox - Assign it a drive letter (e.g.,
P:for Paperless).
Dropping any PDF into that mapped drive is equivalent to dropping it directly into the consume folder inside the container. Paperless polls the consume directory every ten seconds by default. The file will disappear from the folder and appear in your web UI within thirty seconds.
Validation: Proving It Works
Step 1: Confirm All Three Containers Are Running
docker ps --filter "name=paperless"You should see three rows: paperless_redis, paperless_db, and paperless_app. All three should show a status of Up. If any container shows Restarting, check its logs immediately with docker logs [container_name].
Step 2: Log Into the Web Interface
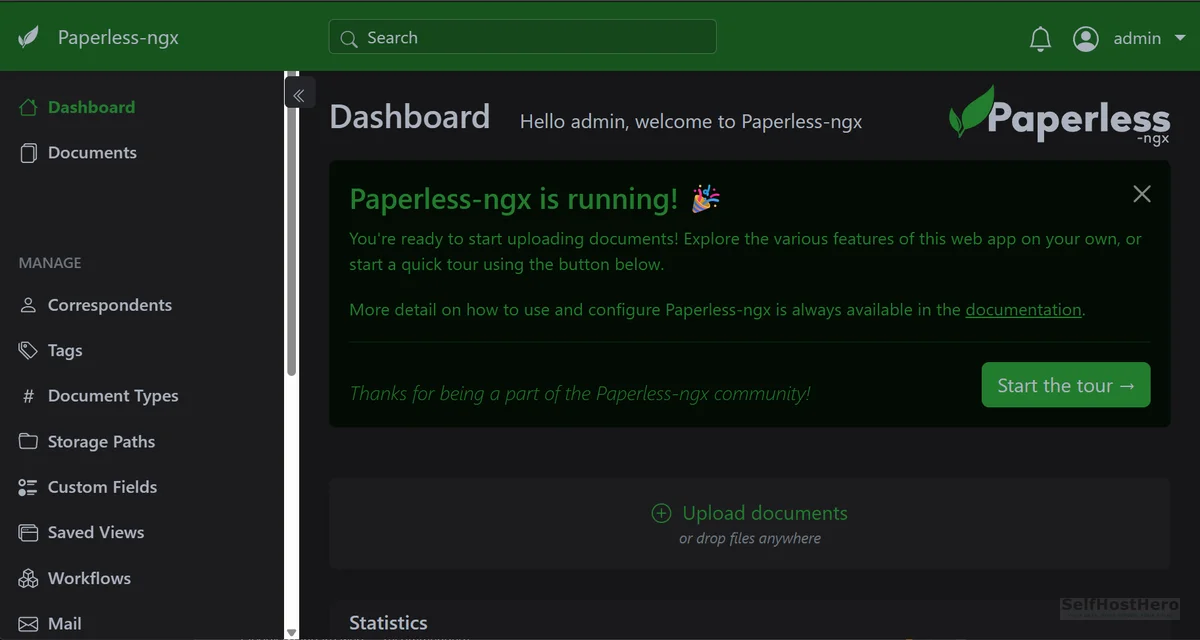
Navigate to http://[server-ip]:8010 in your browser. Log in with the credentials you set in PAPERLESS_ADMIN_USER and PAPERLESS_ADMIN_PASSWORD. You should see an empty dashboard. That is correct — you have not added any documents yet.
Step 3: The Inbox Test
- On your Windows machine, open the mapped
Paperless_Inboxnetwork drive. - Drag any PDF file into the folder.
- Watch the folder. Within thirty seconds, the file should disappear.
- Switch to the Paperless web UI and click Documents.
- Your document should appear with its filename and, if OCR succeeded, extracted text visible in the preview.
If the file disappears from the folder but does not appear in the UI after two minutes, check the webserver container logs. This is almost always a database connection issue or a permission problem on the consume directory.
Step 4: Confirm Dutch OCR Is Active
docker exec paperless_app tesseract --list-langsThe output should include both nld and eng. If nld is missing, the language pack did not download at startup. See Error 3 in the Troubleshooting section.
The Honest Truth: Quirks and Real Expectations
The AI Needs Training Before It Gets Smart
The automatic correspondent and tag matching in Paperless-ngx does not work on day one. The system needs examples to learn from.
Your workflow for the first few weeks: manually assign a Correspondent (for example, “IKEA”) and a Tag (for example, “Furniture”) to each document you import. After you have tagged fifteen to twenty documents from the same sender, the pattern matcher starts recognizing them automatically. Think of it as onboarding a new employee. They need to see examples before they can work independently.
OCR Is CPU-Hungry
Tesseract will spike one CPU core to 100% for every document it processes. During a bulk import of fifty documents, your server will be working hard. Fan noise on physical hardware is normal. This is why the minimum spec is 2 CPU cores, with a modern processor such as the Intel i3-N305 recommended.
If you are importing a large archive, consider scheduling it during off-hours. You can control how frequently Paperless polls the consume folder using the PAPERLESS_CONSUMER_POLLING variable. Setting it to a higher value spreads the load:
PAPERLESS_CONSUMER_POLLING: 60 # Check inbox every 60 seconds instead of 10The Proxmox Unprivileged LXC Gotcha
This is the most common silent failure mode in Proxmox deployments. You deploy the stack, everything shows as running, you drop a file into the inbox, and nothing happens. No error. No log entry. The file just sits there.
The cause is a UID/GID mismatch between the host filesystem and the container’s internal user. The Paperless container runs its processes as UID 1000. In an unprivileged LXC, that UID is remapped on the host side, and the container cannot read from or write to the mounted volumes.
The fix requires two parts. First, set correct ownership on the host:
chown -R 1000:1000 /mnt/snelle_data/App_Data/
chown -R 1000:1000 /mnt/opslag/Second, if the ownership fix alone does not resolve it, add UID/GID mapping to your LXC configuration file at /etc/pve/lxc/[id].conf:
# Add these lines to /etc/pve/lxc/[id].conf
lxc.idmap: u 0 100000 1000
lxc.idmap: g 0 100000 1000
lxc.idmap: u 1000 1000 1
lxc.idmap: g 1000 1000 1
lxc.idmap: u 1001 101001 64535
lxc.idmap: g 1001 101001 64535
Proxmox must also be authorized to use host UID/GID 1000 in this mapping. The default /etc/subuid and /etc/subgid only grant root the range starting at 100000, so add this single line to both files on the host:
root:1000:1Without it, the container refuses to start with a newuidmap failed to write mapping error. Restart the LXC after making this change. This maps the container’s UID 1000 directly to host UID 1000, bypassing the remapping that causes the permission mismatch.
Troubleshooting Common Errors
Error 1: “driver failed programming external connectivity”
Cause: Port 8000 is already in use by another service on the same host.
Fix: Change the host-side port mapping in your YAML from 8000 to 8010:
# Before (broken)
ports:
  - "8000:8000"

# After (fixed)
ports:
  - "8010:8000"
The number on the left is the host port. The number on the right is the container’s internal port. You are only changing the left side. Paperless still listens on 8000 inside the container. You reach it from outside on 8010.
Error 2: “password authentication failed for user paperless”
Cause: The PostgreSQL password is set in the db service environment block, but the webserver service does not know what it is because PAPERLESS_DBPASS is missing or does not match.
Fix: Both variables must be present and must be identical strings. Verify your YAML contains both of these with matching values:
# In the db service:
environment:
  POSTGRES_PASSWORD: your_strong_password_here

# In the webserver service:
environment:
  PAPERLESS_DBPASS: your_strong_password_here
A single character difference between these two values will cause this error every time.
Error 3: “The selected OCR language nld is not installed”
Cause: You set PAPERLESS_OCR_LANGUAGE: nld+eng but omitted PAPERLESS_OCR_LANGUAGES: nld (note the S at the end). These are two different variables with two different jobs. The first tells Paperless which language to use during OCR. The second tells it which language packs to download at startup.
Fix: Both lines must be present in your webserver environment block:
PAPERLESS_OCR_LANGUAGES: nld       # Downloads the Dutch Tesseract pack at startup
PAPERLESS_OCR_LANGUAGE: nld+eng    # Sets Dutch as primary OCR language, English as fallback
After adding the missing line, redeploy the stack. The Dutch language pack will download during the container’s first startup sequence. This takes about thirty seconds on a typical connection.
Error 4: Files Drop Into Inbox But Never Get Consumed
Cause: Permission mismatch on the consume directory. Most common in Proxmox unprivileged LXC deployments.
Fix: Run these two commands to diagnose the problem:
ls -la /mnt/opslag/Paperless_Inbox
docker exec paperless_app id
The first command shows who owns the inbox directory on the host. The second shows what UID the Paperless process is running as inside the container. If those UIDs do not match, the container cannot read the files you drop in. Apply the chown fix and the LXC UID mapping described in the Quirks section above.
Conclusion and Next Steps
Deployment Sign-Off Checklist
- ☐ Paperless-ngx running on port
8010with no conflicts - ☐ PostgreSQL and Redis data confirmed on NVMe path (
/mnt/snelle_data/) - ☐ HDD paths confirmed for Media, Export, and Inbox (
/mnt/opslag/) - ☐ Dutch OCR (
nld) verified viadocker exec paperless_app tesseract --list-langs - ☐ Windows SMB inbox mapped and consume test passed
- ☐ Admin password changed from the default placeholder
What to Build Next
You have a working document archive. Three logical next steps:
- Email Ingestion: Configure Paperless to pull invoices from Gmail or Outlook via IMAP. This eliminates manual scanning for any document that arrives by email.
- Paperless Mobile App: Install the companion mobile app to photograph receipts on your phone and push them directly to the consume folder.
- Automated Export and Backup: Schedule nightly exports to a second storage location. A drive failure without an export means starting over.
The Bigger Picture
If you are running this on a NAS or mini PC and want to understand the hardware side, our guide on the TerraMaster F4-424 Pro as a Proxmox Host covers exactly the kind of hardware this stack runs well on, including storage configuration for split NVMe and HDD workloads.