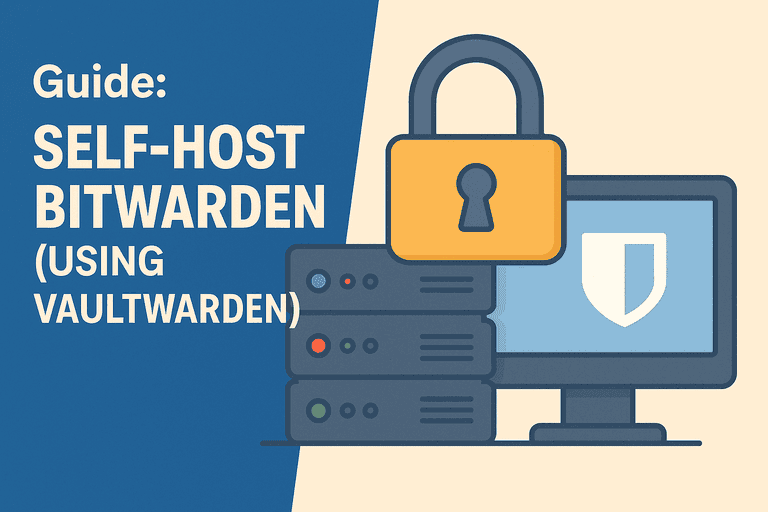
Why a Self-Hosted Password Manager Beats the Cloud
🎧 Listen to the 60-Second Audio Recap:
The Privacy Lens — Why This Service Specifically?
Your password vault is the master key to your entire digital life. Every bank account, every email inbox, every server login lives inside it. A self-hosted password manager changes that equation. When you store that vault with a commercial cloud provider, you are trusting a single company that is, by definition, one of the highest-value targets for every attacker on the planet. A breach there is not a minor inconvenience. It is a total compromise.
Vaultwarden is a lightweight, Rust-based reimplementation of the Bitwarden server. It is 100% compatible with the official Bitwarden apps and browser extensions. You get the seamless sync and autofill you expect from Bitwarden, but your encrypted vault lives on your own hardware, under your own control.
What about KeePass? KeePass is a local file you manually sync between devices. That works, but it creates friction. Vaultwarden gives you the same local control plus effortless multi-device sync. Your phone, your laptop, and your browser extension all stay in sync automatically.
Is Cloudflare Tunnel safe for Vaultwarden? This question comes up constantly on r/selfhosted. The short answer is yes, with the right hardening. Most tutorials skip the critical Argon2 admin token step entirely. This guide does not. We cover it in full in the Pro route below.
Prerequisites and Minimal Hardware
What You Need Before You Start
- Docker and Docker Compose with Portainer running — if you need to set this up first, see our guide: Build Your Privacy Machine Room: Docker + Portainer on Proxmox LXC
- A domain name — this is a hard requirement. Vaultwarden refuses to function without valid HTTPS. Bare IP addresses will not work.
- A Cloudflare account with your domain added — the free tier is sufficient. Required for the Pro route.
- No router port-forwarding required — Cloudflare Tunnel operates on an outbound connection only. Your router stays closed.
Minimal Hardware Footprint
Vaultwarden is written in Rust. It is one of the most resource-efficient self-hosted services you will ever run.
| Resource | Usage |
|---|---|
| RAM (idle) | ~10 MB |
| CPU | Negligible |
| Storage (base) | ~50 MB + your vault data |
It runs on a Proxmox LXC container or any existing Docker host. The persistent storage path is /data. This single directory contains everything: db.sqlite3, your rsa_key files, and the attachments/ folder. Back up this directory and you back up everything.
Method 1: The Quick Start (Newbie Nora Route — LAN + Nginx Proxy Manager)
Who This Route Is For
This route is for you if you want to test Vaultwarden locally before exposing it to the internet, and you already have Nginx Proxy Manager (NPM) running on your LAN.
Hard Warning: Without valid HTTPS, the Web Vault UI will not load and WebAuthn/2FA will fail. This is not a configuration choice. It is enforced at the browser level. Do not skip the SSL step in NPM.
Step 1 — Deploy the Basic Docker Compose Stack in Portainer
- Open Portainer in your browser.
- Navigate to Stacks and click Add Stack.
- Give your stack a name (for example,
vaultwarden). - Paste the following compose definition into the web editor:
services:
  vaultwarden:
    image: vaultwarden/server:latest
    container_name: vaultwarden
    restart: unless-stopped
    environment:
      DOMAIN: "https://vault.local.yourdomain.com"
      SIGNUPS_ALLOWED: "true"
    volumes:
      - /mnt/snelle_data/App_Data/vaultwarden:/data
    ports:
      - "8080:80"
Adjust the volume path to match your own storage layout. The DOMAIN value must match the URL you will access Vaultwarden from, including the https:// prefix.
- Click Deploy the stack.
- Confirm the container shows a green “running” status in Portainer before continuing.
Step 2 — Configure Nginx Proxy Manager
- Open Nginx Proxy Manager.
- Go to Proxy Hosts and click Add Proxy Host.
- Set the Domain Name to your chosen subdomain (for example,
vault.local.yourdomain.com). - Set the Forward Hostname / IP to your Docker host’s LAN IP address.
- Set the Forward Port to
8080. - Switch to the SSL tab. Request a Let’s Encrypt certificate. This requires a valid domain, even for a local subdomain using split-horizon DNS.
- Save the proxy host.
Confirm the padlock icon appears in your browser when you navigate to the domain before moving on. No padlock means no HTTPS, and Vaultwarden will not work correctly.
Step 3 — First Login and Smoke Test
- Navigate to
https://vault.local.yourdomain.com. - Create your account using the Web Vault interface.
- Verify the Web Vault loads correctly and your account is accessible.
This confirms your container and reverse proxy are working. You are now ready to move to the Pro route if you want external access with zero open ports.
Method 2: The Pro Setup (Pro Paul Route — Cloudflare Tunnel + Hardened Config)
Why Cloudflare Tunnel Over Open Ports?
Cloudflare Tunnel creates an outbound connection from your server to Cloudflare’s edge. There are zero open inbound ports on your router. Cloudflare automatically provisions and renews a valid TLS certificate. You do not need Certbot. You do not need NPM. And to answer the Reddit question directly: yes, this is safe for Vaultwarden, provided you harden the admin panel with an Argon2 token. That is exactly what we do next.
Step 1 — Generate a Secure Argon2 Admin Token
Never store a plaintext ADMIN_TOKEN. Vaultwarden will log a security warning if you do, and it is a genuine risk. Vaultwarden ships with a built-in hash utility. Run this command on your Docker host:
docker run --rm -it vaultwarden/server /vaultwarden hash
The tool will prompt you for a password. Enter a strong, unique password. Copy the full output. It will start with $argon2id$ and look something like this:
$argon2id$v=19$m=65540,t=3,p=4$[salt]$[hash]
Critical: In
docker-compose.yml, every$sign in the Argon2 hash must be escaped by doubling it to$$. Docker Compose treats a single$as a variable reference and will silently corrupt your token. This is the most common reason admin panel logins fail.
So a hash that reads $argon2id$v=19$m=... in the terminal output must be written as $$argon2id$$v=19$$m=... inside the compose file.
Step 2 — Deploy the Hardened Stack in Portainer
- Open Portainer.
- Navigate to Stacks and click Add Stack.
- Paste the following hardened compose definition:
services:
  vaultwarden:
    image: vaultwarden/server:latest
    container_name: vaultwarden
    restart: unless-stopped
    environment:
      DOMAIN: "https://vault.yourdomain.com"
      SIGNUPS_ALLOWED: "true"
      # Paste your Argon2 hash below.
      # IMPORTANT: Every $ in the hash must be doubled to $$ in this file.
      # Example: $argon2id$ becomes $$argon2id$$
      ADMIN_TOKEN: "$$argon2id$$v=19$$m=65540,t=3,p=4$$paste-your-full-escaped-hash-here"
    volumes:
      - /mnt/snelle_data/App_Data/vaultwarden:/data
    ports:
      - "8080:80"
Replace the ADMIN_TOKEN value with your own escaped hash — every $ from the terminal output becomes $$ in this file. Replace vault.yourdomain.com with your actual domain. Adjust the volume path to match your storage layout.
- Click Deploy the stack.
- Confirm the container is running in Portainer before proceeding.
Step 3 — Connect the Cloudflare Tunnel
- Log in to the Cloudflare Zero Trust dashboard.
- Navigate to Networks and then Tunnels.
- Click Create a tunnel. Give it a name (for example,
homelab). - Cloudflare will provide a tunnel token. Deploy the
cloudflaredconnector using that token. The recommended approach for a Docker environment is to run it as a container:
docker run -d \
  --name cloudflared \
  --restart unless-stopped \
  cloudflare/cloudflared:latest \
  tunnel --no-autoupdate run \
  --token YOUR_TUNNEL_TOKEN_HERE
Replace YOUR_TUNNEL_TOKEN_HERE with the token Cloudflare provides in the dashboard. If you prefer, you can also add cloudflared as a second service in your Vaultwarden stack’s compose file.
- Back in the Cloudflare Zero Trust dashboard, navigate to your tunnel and click Configure.
- Go to the Public Hostname tab and click Add a public hostname.
- Fill in the following:
- Subdomain:
vault - Domain:
yourdomain.com - Service Type:
HTTP - URL:
vaultwarden:80ifcloudflaredis on the same Docker network, orYOUR_HOST_IP:8080if it is running separately
- Subdomain:
- Save the hostname.
Cloudflare handles HTTPS certificate provisioning and renewal automatically. There is nothing to configure on your end for TLS.
Step 4 — Create Your Account, Then Lock Down Registration
- Navigate to
https://vault.yourdomain.com. - Confirm the padlock is present in your browser’s address bar.
- Create your Vaultwarden account immediately.
- Return to Portainer, open your stack, and edit the compose file.
- Change
SIGNUPS_ALLOWED: "true"toSIGNUPS_ALLOWED: "false". - Click Update the stack to redeploy.
Warning: If you skip this step, anyone who discovers your URL can create an account on your vault server. This is not a theoretical risk. Close registration immediately after creating your own account. Future authorized users can be invited via the
/adminpanel without re-enabling open signups.
Configuration and Validation — Proving It All Works
Validation Check 1 — Web Vault HTTPS Confirmation
- Navigate to
https://vault.yourdomain.com. - Expected result: A valid padlock icon appears, the Web Vault UI loads, and you can log in successfully.
- What this proves: The Cloudflare Tunnel is active and TLS is correctly terminated at Cloudflare’s edge.
Validation Check 2 — Admin Panel Diagnostics
- Navigate to
https://vault.yourdomain.com/admin. - Enter your Argon2 token password when prompted.
- Expected result: The Diagnostics page loads and shows all checks passing: DNS resolution, HTTPS, and system time sync should all be green.
- If any check is red, the diagnostics page will describe the issue. Time sync failures are common on fresh LXC containers and are fixed by enabling NTP on the host.
Validation Check 3 — Official Bitwarden Client Connection
- Install the official Bitwarden browser extension from your browser’s extension store.
- Open the extension and click the region selector (the globe icon or the region dropdown near the login button).
- Select Self-hosted and enter your server URL:
https://vault.yourdomain.com. - Log in with the account you created.
- Save a test password entry in the browser extension.
- Expected result: The entry appears immediately in the Web Vault at
https://vault.yourdomain.com. - What this proves: Real-time sync between the client and your self-hosted server is working correctly.
The Honest Truth — Quirks and Warnings
Disclaimer: Self-hosting transfers operational responsibility to you. The setup described in this guide is technically sound, but no guide can account for every environment. You are responsible for keeping your instance updated, backed up, and secured. Proceed with that understanding.
You Are Now Your Own Helpdesk
No company will restore your vault. If you lose the /data volume without a backup, every password is permanently and irrecoverably gone. This is not a hypothetical. It happens.
The /data directory contains three critical components:
db.sqlite3— your entire vault databasersa_key.*— the encryption keys for your vaultattachments/— any file attachments stored in your vault
You must automate encrypted off-site backups of this entire directory before you migrate any real passwords into Vaultwarden. This is not optional. It is the single most important follow-up task after completing this guide. A good starting point is our guide on 18TB Proxmox Backup: ZFS Pool, SMB Share and Rsync LXC for building a solid local backup foundation before adding off-site replication.
You Are Exposing an Authentication Server to the Internet
Even behind Cloudflare, this is a public authentication endpoint. Treat it accordingly. Work through this security checklist before you consider this setup production-ready:
- Always use an Argon2 token. Never use a plaintext
ADMIN_TOKEN. - Enable Two-Factor Authentication on your own Vaultwarden account immediately after creation.
- Keep the
vaultwarden/serverimage updated. Subscribe to their GitHub releases page. - Confirm
SIGNUPS_ALLOWED: "false"is set and the stack has been redeployed.
With these measures in place, Vaultwarden is at minimum as secure as a commercial password manager, and significantly more private.
Troubleshooting Common Errors
Error: Web Vault Fails to Load, or WebAuthn / 2FA Returns an Error
Symptom: The browser shows an error when loading the Web Vault, or two-factor authentication and WebAuthn refuse to work.
Root cause: Vaultwarden enforces valid HTTPS at the browser level. Self-signed certificates and bare IP addresses are rejected by design.
Fix:
- Confirm you are accessing Vaultwarden via the Cloudflare Tunnel URL with
https://and a green padlock. - Confirm the
DOMAINenvironment variable in your compose file exactly matches the URL you are using, including thehttps://prefix. - Do not attempt to access Vaultwarden via a bare IP address or a self-signed certificate.
Error: Admin Panel Login Fails, or Logs Show “ADMIN_TOKEN Is Insecure”
Symptom: You cannot log in to /admin, or the container logs contain a warning that the admin token is insecure.
Root cause A: A plaintext token is still in use instead of an Argon2 hash.
Root cause B: The $ signs in the Argon2 hash are not escaped as $$ in docker-compose.yml.
Here is the difference between a correct and incorrect token entry:
# INCORRECT — Compose will silently corrupt this token
ADMIN_TOKEN: "$argon2id$v=19$m=65540,t=3,p=4$somesalt$somehash"

# CORRECT — Every $ is doubled to $$
ADMIN_TOKEN: "$$argon2id$$v=19$$m=65540,t=3,p=4$$somesalt$$somehash"
Fix:
- Run
docker run --rm -it vaultwarden/server /vaultwarden hashagain to generate a fresh hash. - Manually replace every
$in the output with$$before pasting it into your compose file. - Redeploy the stack in Portainer.
Error: Unwanted Users Can Register on Your Server
Symptom: Someone else has created an account on your Vaultwarden instance.
Root cause: SIGNUPS_ALLOWED was left as "true" after initial setup.
Fix:
- Open your stack in Portainer and set
SIGNUPS_ALLOWED: "false". - Redeploy the stack immediately.
- Review the
/adminpanel to audit existing accounts and remove any unauthorized ones. - For any future authorized users, use the Invite User function in the
/adminpanel. You do not need to re-enable open signups.
Conclusion and Next Steps
What You Have Now
You have a private, multi-device password vault that works with every official Bitwarden client, fully under your own control.
- Vaultwarden running in Docker with a persistent
/datavolume. - Accessible via HTTPS with zero open router ports, thanks to Cloudflare Tunnel.
- Admin panel secured with an Argon2 token. Open registration disabled.
- Official Bitwarden client connected and real-time sync verified.
Your Immediate Next Actions (In Priority Order)
- Configure automated, encrypted off-site backups of
/data. This is the single most critical follow-up task. Do not skip it. Do not delay it. - Install the Bitwarden mobile app on your phone. Set the server to self-hosted and enter your domain. Verify that vault entries sync correctly on mobile.
- Enable Emergency Access in your Vaultwarden account settings. This designates a trusted contact who can request access to your vault in an emergency, preventing a permanent lockout scenario.
- Enable Two-Factor Authentication on your Vaultwarden account if you have not done so already. Use an authenticator app, not SMS.
If you are building out a broader self-hosting stack and want a clean dashboard to manage all your running containers, the Homarr Dashboard guide is a natural next step alongside this setup.