From 3 Stuttering Cloud Devices to 1 Local Beast: Flash the GL.iNet Flint 2 (GL-MT6000) to Vanilla OpenWrt
🎧 Listen to the 60-Second Audio Recap:
Why You Should Stop Tolerating Cloud-Dependent Mesh Systems
Three TP-Link Deco units sound like a solid home network on paper. In practice, you get three separate telemetry streams phoning home to TP-Link’s servers, three cloud dependencies that can take your Wi-Fi offline during a vendor outage, three power adapters drawing standby current around the clock, a dead zone in the attic, and IoT devices in the garden dropping their MQTT connections at the worst possible moment. That is not a network. That is a liability.
Switching to the GL.iNet Flint 2 seems like the obvious fix. GL.iNet markets itself as the privacy-conscious router brand, and the hardware is genuinely excellent. The problem is the firmware. GL.iNet’s stock software is a graphical shell built on top of an older OpenWrt fork, but underneath that shell sit proprietary code paths and cloud hooks used for remote management and telemetry. You are trading one vendor’s cloud for a slightly smaller one.
Vanilla OpenWrt is the answer: it turns the Flint 2 into a lean, fully private vanilla OpenWrt access point with no vendor cloud hooks at all. By “Vanilla OpenWrt” we mean the stock upstream build published directly by the OpenWrt project at firmware-selector.openwrt.org: zero vendor additions, zero background cloud processes, and zero modifications between the kernel and your hardware. What you flash is exactly what runs. Nothing more.
r/homelab and r/openwrt users consistently report this flash as the first step before any serious Flint 2 deployment. Those threads confirm the approach works. This guide covers what they leave out: the exact radio settings, the bridge configuration, the static IP assignment, and the specific failure modes that will catch you off guard.
| Feature | GL.iNet Stock Firmware | Vanilla OpenWrt (LuCI) |
|---|---|---|
| Base | Older OpenWrt fork | Latest kernel (6.12+) |
| RAM usage | High (~40%+) | ~12% |
| Telemetry | Manufacturer tracking present | Zero |
| Package manager | Modified opkg | Modern apk (10,000+ packages) |
| Cloud dependency | Yes | None |
| Manual config required | No | Yes |
Prerequisites and Minimal Hardware
Hardware Requirements
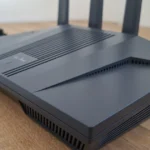
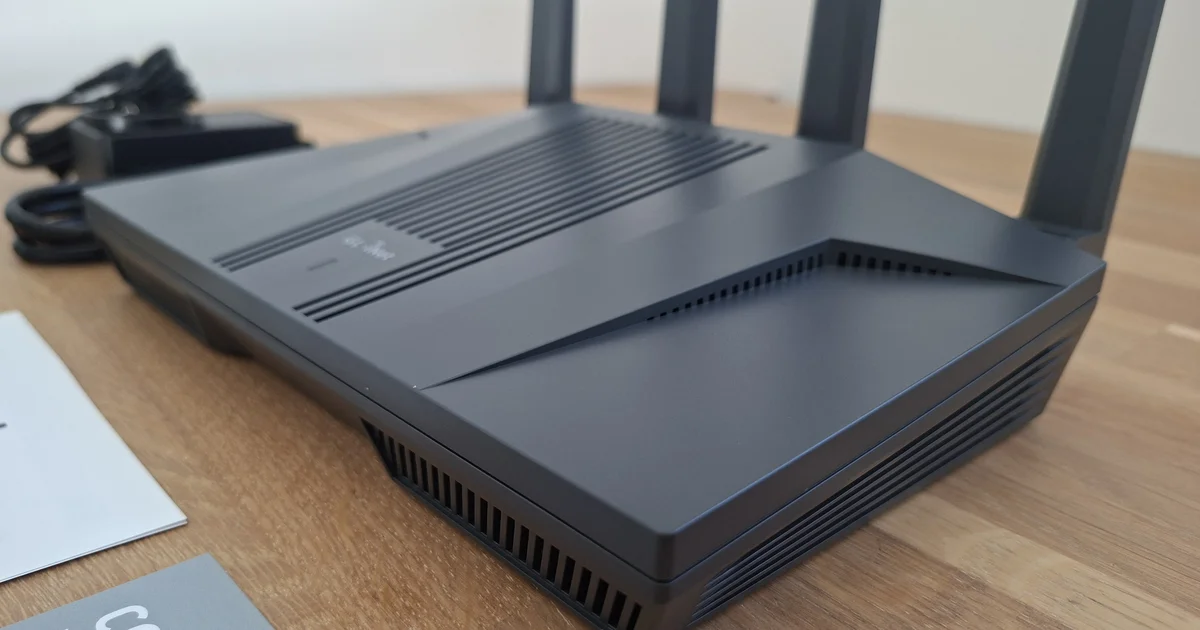
- GL.iNet Flint 2 (GL-MT6000) — powered by the MediaTek MT7986 (Filogic 830) quad-core processor with 4×4 MIMO antennas on both bands
- A computer or laptop with a physical ethernet port — a USB-to-ethernet adapter introduces driver variables; a built-in port is strongly preferred
- One UTP ethernet cable — Cat5e or better
- Power adapter note: The Flint 2 frequently ships with a Global/US plug. Verify you have an EU adapter before you start if you are in Europe.
Software Requirements
- The official OpenWrt Sysupgrade
.binfile for theGL-MT6000 - Source:
firmware-selector.openwrt.org— search the exact model stringGL-MT6000 - Target version: verify the current stable release on the selector at the time you read this
- Do not use third-party mirror downloads. The firmware selector provides the official build. Checksum verification is mandatory before flashing.
Network Information You Need Before Starting
- Your main router’s IP address — we use
192.168.1.1throughout this guide as the example - The static IP you want to assign to the Flint 2 — we use
192.168.1.2 - Your subnet mask in CIDR notation:
/24 - Your planned Wi-Fi SSIDs and WPA2 passwords for both bands
Method 1 — The Quick Start: Flash Vanilla OpenWrt
This section covers physical isolation, firmware download, flashing via the GL.iNet web interface, and verifying a successful boot. Network configuration comes in Method 2.
Step 1 — Physical Isolation and Firmware Download
We isolate the Flint 2 from your main network before flashing for one specific reason: during the flash process the router will restart multiple times and temporarily run a DHCP server on its default subnet. If it is connected to your main network during this period, you risk IP conflicts and DHCP lease pollution on devices you care about. Isolation prevents this entirely.
- Navigate to
firmware-selector.openwrt.orgin your browser. - Search for
GL-MT6000using the exact model string. - Download the Sysupgrade
.binfile to your local computer. Do not download the factory image — the Sysupgrade file is correct for flashing from within the existing GL.iNet interface. - Critical isolation step: Physically unplug the ethernet cable that connects the Flint 2 to your main router or modem. The Flint 2 must be completely isolated from your main network.
- Connect your computer directly to any LAN port on the Flint 2 using your UTP cable. Your computer and the Flint 2 are now in a private two-device bubble. This prevents DHCP conflicts from appearing on your main network during the flash process.
Step 2 — Flash via the GL.iNet Web Interface
- Open your browser and navigate to
http://192.168.8.1(the default GL.iNet address). If you previously configured the Flint 2 as an access point with a custom IP — for example192.168.1.2— use that address instead. - Navigate to System → Upgrade and select the Local Upgrade tab.
- Click the file selector and choose the Sysupgrade
.binfile you downloaded in Step 1. - Critical: Locate the “Keep Settings” checkbox. Verify it is unchecked. We want a completely clean slate. Any retained GL.iNet settings will conflict with the Vanilla OpenWrt configuration.
- Click Install or Flash.
- Do not touch the power. Do not close the browser tab. The LED on the Flint 2 will cycle through patterns — this is normal flash behavior. Wait a minimum of 3 to 5 minutes before doing anything.
Warning: Pulling power during a firmware flash will brick the device. The LED cycling is expected. Sit on your hands and wait.
Step 3 — Verify Successful Boot to Vanilla OpenWrt
- After 3 to 5 minutes, navigate to
http://192.168.1.1in your browser. This is the default LuCI address for a fresh OpenWrt installation. - Log in with username
rootand a blank password — leave the password field empty on first boot. - Confirm the LuCI interface loads and displays the OpenWrt version. You are now running Vanilla OpenWrt.
- Immediately navigate to System → Administration and set a strong root password. Do not skip this step.
Method 2 — The Pro Setup: Configure Wireless Radios and Dumb AP Mode
This section transforms your freshly flashed Flint 2 into a properly configured dumb access point. We configure both Wi-Fi radios, then assign a static IP and disable the DHCP server. On this MediaTek Filogic (DSA) switch hardware we deliberately leave the WAN interface and the bridge ports untouched — the warning in Step 6 explains why. Complete Method 1 before starting here.
Step 4 — Configure the 5 GHz Radio (The Highway)
- Navigate to Network → Wireless.
- Locate radio1 (the 5 GHz radio) and click Edit.
- Set the ESSID field to
HomeWiFi-5G. - Under Wireless Security, select WPA2-PSK and enter your chosen password.
- Click the Advanced Settings tab and configure the following:
- Country Code: set your own country here — we use
NL - Netherlandsas the worked example throughout this guide. Setting it correctly is mandatory. See the Troubleshooting section for exactly what happens if you force a mismatched region such as US or BO on an EU unit. - Channel:
36or40— set manually, not auto. Channels 36 through 48 are DFS-free in the Netherlands. - Width:
80 MHz
- Country Code: set your own country here — we use
- Click the Interface Configuration tab, then the Advanced Settings sub-tab within it.
- Find Disassociate On Low Acknowledgement and uncheck it. This prevents IoT devices at the edge of your range from being kicked off the network.
- Click Save. Do not click Apply yet.
Pro tip: Channels 36 through 48 are DFS-free in the Netherlands. Avoid channels 52 and above unless you want radar detection delays that can take your 5 GHz radio offline for up to 60 seconds at a time.
Step 5 — Configure the 2.4 GHz Radio (The Garden Hose)
- Navigate to Network → Wireless.
- Locate radio0 (the 2.4 GHz radio) and click Edit.
- Set the ESSID field to
HomeWiFi. - Under Wireless Security, select WPA2-PSK and enter your password.
- Click the Advanced Settings tab and configure the following:
- Country Code:
NL - Netherlands - Channel:
6— fixed, not auto - Width:
20 MHz— do not set this to 40 MHz
- Country Code:
- Find Disassociate On Low Acknowledgement and uncheck it.
- Click Save.
Pro tip: 20 MHz on 2.4 GHz is not a limitation — it is a deliberate choice. A narrow 20 MHz channel concentrates radio energy more tightly, which penetrates concrete and glass more effectively than a wide 40 MHz channel. This is why the garden IoT device at 46 meters maintains a stable link at -82 dBm. Do not widen it.
Step 6 — Assign a Static IP and Disable the DHCP Server
Do not delete the WAN interface or add the WAN port to the LAN bridge on this hardware. The Flint 2 uses a MediaTek Filogic (DSA) switch. Merging the WAN port into
br-lan— or deleting thewan/wan6interfaces and restarting the network — can take down the entire switch, including the LAN ports and your own management session, recoverable only with a physical factory reset. You do not need any of that. For a dumb AP, leave the default interfaces and bridge exactly as they are and simply run your uplink from the main router into a LAN port (never the WAN port). The two steps below are all you need.
This is the final and most important configuration step. We give the Flint 2 a permanent, predictable address on your main network and disable its DHCP server so that your main router remains the sole authority for issuing IP addresses.
- Navigate to Network → Interfaces.
- Locate the lan interface and click Edit.
- Change the Protocol field to
Static address. - Fill in your network values:
- IPv4 address:
192.168.1.2/24— pick an address on your main subnet that sits outside your router’s DHCP pool. This also moves the Flint 2 off its default192.168.1.1, which would otherwise clash with most home routers. The/24CIDR suffix is required in modern OpenWrt versions; do not enter the subnet mask separately. - IPv4 gateway:
192.168.1.1— your main router’s IP address - Custom DNS:
192.168.1.1
- IPv4 address:
- Click the DHCP Server tab.
- Check the Ignore interface checkbox. This disables the Flint 2’s DHCP server entirely. Your main router remains the only device issuing IP addresses.
- Click Save.
# Summary of LAN interface values
IPv4 address:  192.168.1.2/24
IPv4 gateway:  192.168.1.1
DNS server:    192.168.1.1
DHCP:          Disabled (Ignore interface = checked)
Configuration and Validation — Test Your New Network
Step 7 — Apply Settings and Reconnect to Your Main Network
- Click the blue Save & Apply button in the top-right corner of LuCI.
- Your browser will hang or show a timeout error. This is expected. The Flint 2 has changed its IP address from
192.168.1.1to192.168.1.2and your computer no longer has a valid route to it. - Unplug the ethernet cable from your computer.
- Plug the ethernet cable from your main router or modem into one of the Flint 2’s LAN ports (not the WAN port). The wireless radios are bridged to the LAN, so your clients now join the main network through the access point.
- Access LuCI at its new permanent address:
http://192.168.1.2.
Real-World Performance Benchmarks
Before this setup, three TP-Link Deco units managed the house. The bedroom showed 0 Mbps during peak hours due to mesh handoff failures. The attic was unreachable. Garden IoT devices dropped their Home Assistant connections multiple times per day. One Flint 2, positioned centrally near the mezzanine, replaced all three units with the following measured results:
| Location | Band | Result |
|---|---|---|
| Bedroom (direct line of sight) | 5 GHz (HomeWiFi-5G) | 520.7 Mbps |
| Attic corner (through concrete floor) | 2.4 GHz (HomeWiFi) | 104.6 Mbps |
| Garden (46 meters, -82 dBm signal) | 2.4 GHz (HomeWiFi) | 0.2 Mbps active link — sufficient for MQTT and Home Assistant API calls |
That garden result deserves a note. 0.2 Mbps sounds unimpressive. For a Home Assistant IoT node sending MQTT sensor payloads and receiving API commands, it is more than enough. The device stays connected. That is the goal.
Validation Checklist
- LuCI is accessible at
http://192.168.1.2 - Both SSIDs (
HomeWiFi-5GandHomeWiFi) are visible and connectable from client devices - Speed test from the bedroom confirms 500+ Mbps on 5 GHz
- Garden IoT device maintains its MQTT connection to Home Assistant
-
apk updatecompletes without error in System → Software - No second DHCP server conflict exists on the main network — verify by checking your main router’s DHCP lease table for duplicate entries
The Honest Truth — Quirks and Real Limitations
What This Setup Does Not Do
- No built-in VPN server. GL.iNet’s stock firmware had WireGuard pre-configured in the UI. On Vanilla OpenWrt you install it manually via
apk add wireguard-tools luci-app-wireguard. We have a full guide on self-hosting WireGuard if you want to go that route. - No mobile app management. LuCI is a desktop browser interface. There is no official OpenWrt mobile app.
- Power plug sourcing. The Flint 2 frequently ships with a Global/US plug. EU adapter availability varies by retailer. Verify before ordering if you are in Europe.
- Package manager syntax change. Vanilla OpenWrt uses
apkinstead ofopkg. Existing GL.iNet tutorials and older OpenWrt guides that useopkg installcommands require syntax adjustment. The package names are largely the same; only the command changes.
The Disassociate On Low ACK Setting — Why It Matters for IoT
OpenWrt’s “Disassociate On Low Acknowledgement” feature is designed for roaming environments. When a client’s signal drops below a threshold, the AP kicks the client off, forcing it to roam to a stronger access point. In a multi-AP mesh setup, this is useful behavior. In a single-AP setup with IoT devices at the edge of your range, it causes false disconnections. The router sees a weak signal from your garden sensor and boots it. The sensor then spends 30 seconds trying to reconnect. During that window, your Home Assistant automations fail silently.
Disabling this setting on both radios is not optional for a single-AP deployment with distant IoT devices. It is mandatory.
Troubleshooting Common Errors
Error 1 — 5 GHz Radio Shows “? Mbit/s” or “0 Mbit/s” After Apply
Symptom: radio1 (5 GHz) stops functioning after saving wireless settings. The status column in LuCI shows no speed or a question mark.
Root cause: The Country Code was set to US or BO in an attempt to unlock higher transmit power. The MediaTek MT7986 (Filogic 830) reads physical EEPROM calibration data burned into the hardware at the factory. European units carry a European EEPROM lock. When the software region does not match the hardware calibration, the MediaTek driver enters a crash loop and the radio goes offline.
Fix:
- Navigate to Network → Wireless → radio1 → Edit → Advanced Settings.
- Set the Country Code back to
NL - Netherlands. - Click Save, then Save & Apply.
- Navigate to System → Reboot and perform one full reboot.
Warning: Attempting to override transmit power via country code on the MediaTek Filogic 830 is not a gray area. The driver enforces EEPROM values at the hardware level. NL at 20 dBm is the correct and legal operating point. There is no software workaround for a hardware calibration lock.
Error 2 — apk update Fails with “Operation not permitted (error code 4)”
Root cause: The Flint 2 has no internet connectivity. The gateway or DNS is misconfigured on the LAN interface, or the physical cable from your main router is not plugged in.
Fix:
- Navigate to Network → Interfaces → lan → Edit.
- Verify IPv4 gateway is set to
192.168.1.1(your main router’s IP). - Verify Custom DNS is set to
192.168.1.1. - Physically verify that the ethernet cable from your main router is plugged into one of the Flint 2’s ports.
- Click Save & Apply and retry
apk updatefrom System → Software.
Error 3 — Your Computer Cannot Reach the Flint 2 After DHCP Disable
Root cause: This is expected behavior, not an error. The Flint 2 no longer issues IP addresses. Your computer, if connected directly to the Flint 2, has no valid IP on the 192.168.1.x subnet and cannot reach the router’s new address.
Fix — Option A (recommended): Reconnect your computer to your main network. Your main router issues an IP address. Access the Flint 2 at http://192.168.1.2.
Fix — Option B (direct connection): Manually assign your computer’s network adapter a static IP in the 192.168.1.x range (for example, 192.168.1.50 with gateway 192.168.1.1). Connect directly to the Flint 2 and access http://192.168.1.2.
Error 4 — Clients Connect to Wi-Fi but Get No Internet or No IP Address
Root cause: The uplink from your main router is plugged into the Flint 2’s WAN port instead of a LAN port, or the DHCP server was not actually disabled on the lan interface. On a dumb AP the uplink must enter through a LAN port so it lands on the same bridge as the Wi-Fi.
Fix:
- Move the uplink cable from your main router into one of the Flint 2’s LAN ports. Leave the WAN port empty.
- Navigate to Network → Interfaces → lan → DHCP Server and confirm Ignore interface is checked.
- Confirm the
laninterface still has the static IP, gateway, and DNS you set in Step 6. - Do not delete the
wan/wan6interfaces or add the WAN port tobr-lanon this hardware. On the MediaTek Filogic (DSA) switch that can knock out the whole switch and force a factory reset — and it is unnecessary, because a dumb AP works with the default bridge left intact.
What Comes Next
Three unstable, cloud-dependent consumer mesh units are gone. One Flint 2 running clean, local, upstream OpenWrt has replaced them. Here is a summary of what you have built:
- Official OpenWrt Sysupgrade firmware flashed from the official selector
- Clean installation with no retained GL.iNet settings
- Country code set to NL to initialize the MediaTek chipset correctly at 20 dBm
- 5 GHz highway configured at 80 MHz width on channel 36 or 40
- 2.4 GHz garden hose configured at 20 MHz width on channel 6
- Disassociate On Low ACK disabled on both radios for IoT stability
- Default WAN interface and bridge left untouched (safe on the DSA switch); uplink runs through a LAN port
- DHCP server disabled and static IP
192.168.1.2/24assigned
With apk live and more than 10,000 packages available, the Flint 2 is ready to extend. A natural next step is installing luci-app-statistics to generate signal strength graphs for every room in your house — useful data for deciding whether antenna tilt adjustments at the mezzanine position can push that attic corner from 104 Mbps to something higher. If you want network-level ad blocking without a separate device, our guide on self-hosting Pi-hole via Docker pairs well with this setup as a DNS upstream for the Flint 2. And if you want to add a VPN back to the stack on your own terms, the WireGuard package installs cleanly on Vanilla OpenWrt in under five minutes.