🎧 Listen to the 60-Second Audio Recap:
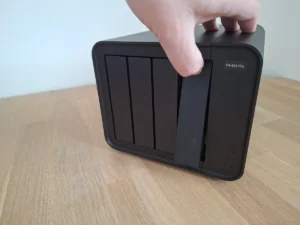
I bought the TerraMaster F4-424 Pro primarily for its hardware. My plan was always to wipe TOS 6 and install Proxmox. But before I did that, I wanted to give TOS 6 a fair shot. I tested it across three specific scenarios: basic SMB file sharing for a casual user, app deployment via the built-in App Center, and manual Docker container management for a power user. The results were not always flattering.
This review is purely about the software. If you want the full hardware breakdown of the F4-424 Pro, I covered that separately in my TERRAMASTER F4-424 Pro NAS Storage Review.
Disclosure: This post contains affiliate links. If you purchase something through these links, we may earn a commission at no extra cost to you. We only recommend products we genuinely use and love.
TL;DR Verdict
Score: 5 / 10
TOS 6.0 works well enough as a simple storage box. Setting up drives, creating a pool, and getting a network share running takes no real effort. As a dumb storage appliance, it does its job. The illusion of a mature operating system collapses the moment you want to do anything beyond dragging files around. Not all apps work, the App Center is a mess of broken installations, and if you try to solve it yourself with Docker, you end up fighting the OS.
It gets a bare passing grade for basic functionality. My advice for power users: buy the TerraMaster for its hardware, wipe TOS 6 immediately, and install Proxmox, Unraid, or TrueNAS instead.
Pros and Cons
- Pro: SMB share is created automatically. Beginners can see their storage on the network immediately without any configuration.
- Pro: No bloatware pre-installed. You start with a clean system and do not have to remove unwanted software before you begin.
- Pro: Hardware recognition on the F4-424 Pro is solid and setting up a basic storage pool is straightforward.
- Con: The menu structure and overall UI polish do not feel like a premium product in daily use.
- Con: The advertised 57 apps in the App Center is heavily inflated. Many entries are simply links to external mobile apps or desktop clients, not actual NAS applications.
- Con: Nextcloud via the App Center is broken out of the box. It throws a database error immediately on first launch.
- Con: VirtualBox installation via the App Center hangs indefinitely at 100% and never completes.
- Con: Opaque file permissions and kernel restrictions make manual Docker usage unnecessarily frustrating.
First Boot and Initial Setup
The side of the unit has a QR code sticker directing you to download the TNAS mobile app.
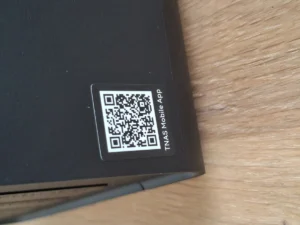
I scanned it and landed on a broken page. Half a logo, a button with no text, nothing functional. I tested this on a second phone outside my home network to rule out my own filters. Still broken. This is the first interaction a new customer has with the product. It is inexcusable that a manufacturer cannot keep a simple QR code landing page working.
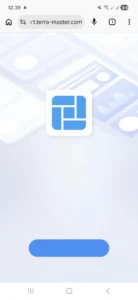
The app itself is on the Google Play Store, so I found it manually. On opening it, I was presented with a choice to accept the privacy policy or select “Disagree Temporarily.” I tried the latter first. The app closed immediately. That option is completely pointless. On the second attempt I accepted the policy and the NAS was discovered on the network instantly, with its IP address on screen.
I chose to finish initialization via a browser on my PC. Typing the IP address into the browser brought up the initialization screen, along with a warning about drive compatibility and a link to the compatibility list. I pressed Start and a countdown timer began. The automatic initialization launched immediately.
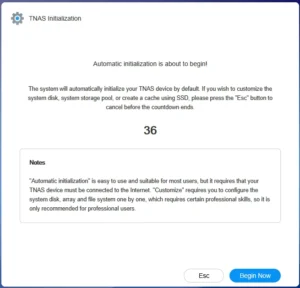
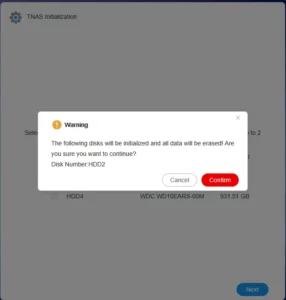
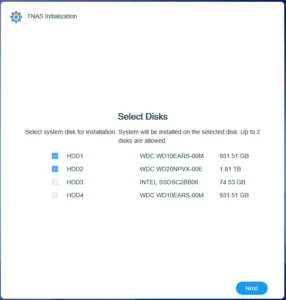
Here is the first real concern. The system decided on its own which drives to use for the TOS installation. It defaulted to the first two drives in the bays, which in my case were two completely different drives. There is no intelligent selection happening here. It is a fixed default. If you are not paying close attention and have an existing RAID array you want to import, this default behavior could cause data loss. I manually selected a small SATA SSD for the OS and clicked Next.
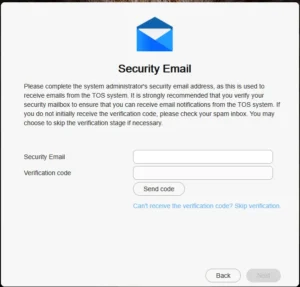
After a five-minute installation, I had to accept the EULA before proceeding. Then I set a hostname, username, and password. Minimum eight characters for the password, which is at least something. The next screen required an email address for security notifications. I did not want to provide one. Clicking “Can’t receive the verification code” still required an email address. I entered a long, non-existent address and moved on. The reset button on the unit itself handles password recovery anyway.
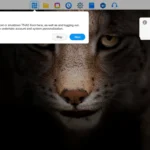
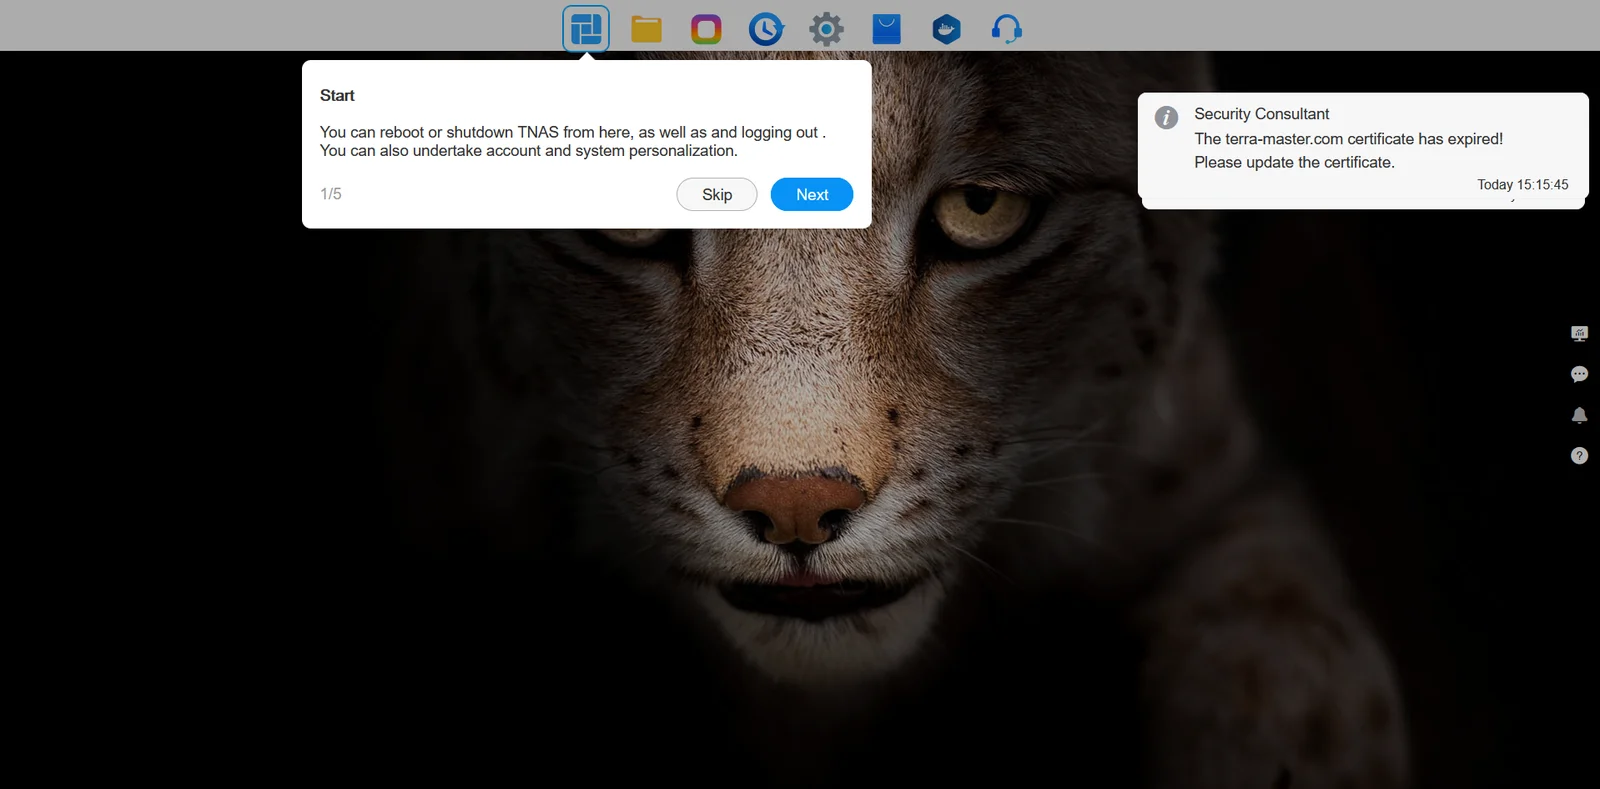
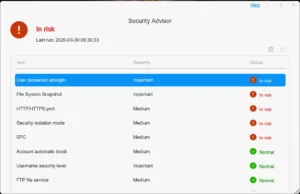
The main dashboard loaded with a brief tutorial overlay explaining the interface elements. That is a nice touch. Immediately after, the Security Advisor opened and flagged my password as non-compliant. The same password that met the requirements during creation. That is a contradictory and sloppy experience, TerraMaster.
Storage Pool and Volume Setup
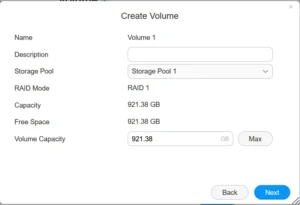
Creating a storage pool is genuinely easy. I selected two 3.5-inch 1TB Western Digital test drives, and the system automatically suggested TRAID. TRAID is TerraMaster’s proprietary RAID alternative, similar in concept to Synology’s SHR (Synology Hybrid RAID), designed to allow mixing different drive sizes while maintaining redundancy. I prefer a standard, well-understood configuration, so I selected RAID 1 instead. RAID 1 mirrors your data across two drives, so if one drive fails, your data survives on the other.
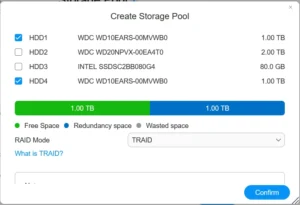
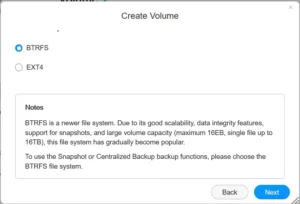
I was then prompted to create a Volume on the pool. During this process, I was asked whether I wanted to enable Hyperlock-WORM. WORM stands for Write Once, Read Many. It is a data immutability feature that prevents files from being modified or deleted once written, useful for compliance or ransomware protection. I skipped it for this test. I was then asked to choose between btrfs and ext4. Both are Linux filesystems. btrfs supports snapshots, checksums, and self-healing, making it the more modern choice. ext4 is older, simpler, and extremely stable. I kept the default, btrfs, and the volume began synchronizing.
App Center: The Broken Promise
By default, no apps are pre-installed. That is genuinely good practice. I have wasted time on other platforms removing bloatware before I could even start. The App Center lists 57 apps. That number is misleading. Several entries are download links for Android or desktop client applications, not NAS-side software. The actual installable server applications number significantly fewer than 57.
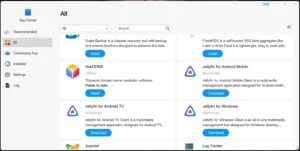
Highlights that caught my eye include Docker Engine, Jellyfin, Nextcloud, Portainer, Docker Manager, Photos, Plex, and VirtualBox. Here is how those installations actually went.
Nextcloud
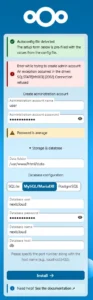
I clicked Install. Ten seconds later the Open button appeared. That seemed suspiciously fast. I clicked Open, entered some test credentials, and clicked to complete the installation. The result was an immediate error.
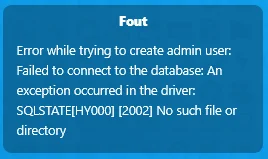
“Error while trying to create admin user: Failed to connect to the database: An exception occurred in the driver: SQLSTATE[HY000] [2002] No such file or directory”
Changing localhost to 127.0.0.1 made no difference. For an application that is supposed to be accessible to a regular user, this is a complete failure. It should work. It does not work. Full stop.
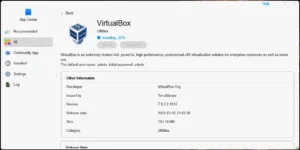
VirtualBox
I clicked Install. The download progress bar ran to 100% and stopped. Nothing appeared in the installed apps list. I clicked Install again. Same result. A third attempt, same result. VirtualBox is simply not installable via the App Center. It hangs at the finish line every single time.
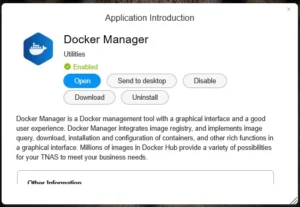
Docker Manager
I clicked Install on Docker Manager. The system correctly notified me that Docker Engine would also be installed. Within one minute, both were installed and Docker Manager launched successfully. One out of three is not a good ratio for an App Center.
Docker and Nextcloud: The Hard Way
Since the App Center installation of Nextcloud was broken, I tried deploying it manually via Docker Manager. This is where TOS 6 revealed its most serious flaw for power users.
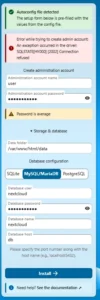
First, I created the necessary directory structure on the NAS. I set up Docker/nextcloud/app for the Nextcloud application files and Docker/nextcloud/db for the database. I opened Docker Manager, navigated to Projects, clicked Add, filled in the project name and path, and applied a Docker Compose configuration using MariaDB. MariaDB is a widely-used open-source relational database, essentially a drop-in replacement for MySQL.
The project started building and transitioned to a running state. I navigated to the IP address on port 8080. Connection Refused. The database container was in an infinite crash loop, restarting itself continuously.
After digging through the logs, I found two problems. TerraMaster’s file permission system fights against Docker when it tries to read and write to local folders. Even after manually setting folder permissions to fully open, the system kept breaking them. More critically, the TOS 6 kernel blocks the fast write methods (AIO, Asynchronous I/O) that MariaDB uses by default. TOS 6 forced MariaDB to fall back to a much slower I/O method. Combined with my decade-old WD Green test drives, which are already slow, the result was constant timeouts and a database that could not stay running.
To get around these blockers, I made two significant changes. I replaced MariaDB with PostgreSQL. PostgreSQL handles slow I/O more gracefully and is less sensitive to the specific kernel quirks of TOS 6. I also removed the database storage directory from the NAS public folder entirely and replaced it with an internal Docker Volume. Docker manages the database storage in its own isolated environment, completely bypassing TerraMaster’s unpredictable permission system. The Nextcloud app folder itself stayed in the public directory for easy access to configuration files.
With this revised configuration, the containers started without crashing. But there was one more obstacle. If you open the Nextcloud setup page in your browser immediately after starting the Docker project, you will get another error. PostgreSQL needs several minutes to create its initial database files on first run. On those old WD Green drives, that means approximately six minutes. The only working approach was to start the project in Docker Manager, wait six full minutes, and only then open the browser to complete setup. On the final setup screen, you also need to manually switch the database tab from the default MariaDB to PostgreSQL, or the installer will try to connect to the wrong database engine.
After all of that, Nextcloud runs stably. But the amount of debugging, log analysis, and workarounds required to get there is completely unreasonable for a platform that markets app installation as a simple one-click process. Here is the Docker Compose configuration that actually works. Replace the example passwords with strong ones before using it.
version: '3'
volumes:
  nextcloud_db_data:

services:
  db:
    image: postgres:15
    restart: always
    volumes:
      - nextcloud_db_data:/var/lib/postgresql/data
    environment:
      - POSTGRES_PASSWORD=YourStrongPassword
      - POSTGRES_DB=nextcloud
      - POSTGRES_USER=nextcloud

  app:
    image: nextcloud
    restart: always
    ports:
      - 8080:80
    links:
      - db
    volumes:
      - /Volume1/public/Docker/nextcloud/app:/var/www/html
    environment:
      - POSTGRES_PASSWORD=YourStrongPassword
      - POSTGRES_DB=nextcloud
      - POSTGRES_USER=nextcloud
      - POSTGRES_HOST=db
User Management and Security Features
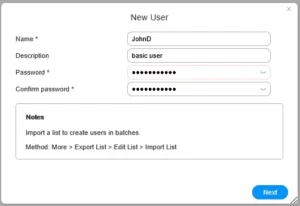
Creating a New User
User management in TOS 6 is straightforward. In the New User window I entered a username (JohnD), an optional description, and a password. On the next screen I assigned the user to the default “allusers” group and left the admin checkbox empty. The following screen showed all shared folders with permission columns. I set Read Only access for the public and virtualbox folders, so this user can view files but cannot delete or modify anything.
The confirmation summary showed all settings clearly. After clicking Confirm, the user appeared in the list with a Normal status. This part of TOS 6 works cleanly and without issues.
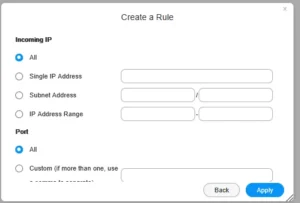
Firewall Rules
Creating a basic firewall rule is handled well. The firewall overview starts empty. Clicking Create Now opens a tips window that explains one important priority rule: Deny rules always take precedence over Allow rules, and rules higher in the list have higher priority. I created a rule named BlockAll, selected TCP, UDP, and ICMP protocols, set the operation to Deny, left Incoming IP and Port both set to All, and applied it. The rule was active immediately. The interface makes the logic clear enough that a less experienced user can follow it.
Security Isolation Mode
Under the security section sits a feature called Security Isolation Mode. Enabling it requires a full system restart and, once active, completely severs the NAS from the internet. The device will only accept connections from devices on your local network.
The consequences are significant. Remote access services including TNAS.online, SSH, and Telnet are disabled immediately. Applications dependent on PHP, Python 3, or Java cannot be installed or run. External Docker images cannot be pulled. Updates cannot be downloaded.
For someone using the NAS purely as an air-gapped local backup vault or a simple SMB share with no external access requirements, this provides genuine peace of mind. For anyone running a media server, Nextcloud instance, or Docker workloads, this feature is too destructive to be practical. It is good that it exists. Read the warnings carefully before enabling it.
Bloatware Behavior
One minor but irritating point. The first time I opened the File Manager, a popup appeared recommending I install Duple Backup. Unsolicited app recommendations inside a core system tool erode trust in a platform.
Performance
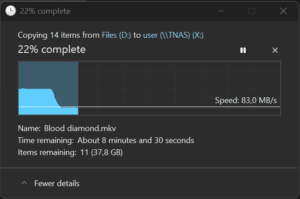
I copied a 4GB file to the NAS over the network and measured a transfer speed of 282 MB/s. After approximately one minute of sustained transfer with a larger dataset, the speed dropped to around 90 MB/s. This is almost certainly the ceiling of the older WD Green drives used in testing, not a software limitation. The web interface itself is fast and responsive throughout. No lag, no stuttering.
Interface and Documentation
The TOS 6 web interface is visually clean and clearly inspired by Synology’s DSM (DiskStation Manager). The imitation is obvious and not entirely successful. Menu structures are sometimes illogically organized and the overall finish feels less refined than the product it is trying to emulate. It is functional, but it does not feel premium.
Documentation is a weak point. The startup tutorial is helpful for absolute beginners. Beyond that, the help section contains poorly translated text and surface-level explanations that provide no useful guidance for anything complex. If you need help configuring permissions, firewall rules, or understanding Hyperlock-WORM behavior in detail, the official documentation will not help you. You will be searching forums and GitHub issues instead.
OS Compatibility
Basic compatibility is solid. Once a volume is created, the SMB share (SMB stands for Server Message Block, the standard protocol Windows and macOS use to access shared network folders) appears automatically on both Windows and macOS without any additional configuration. For a simple file server use case, this works exactly as it should.
Third-party software compatibility is a different story. The TOS 6 kernel’s aggressive behavior toward external processes makes running Docker containers reliably more difficult than it should be. The Nextcloud experience documented above is not an edge case. It is representative of what you should expect when trying to run anything beyond the officially supported app list.
How TOS 6 Compares to the Competition
TOS 6 is competing against three serious alternatives: TrueNAS Scale, Unraid, and Open Media Vault (OMV).
TrueNAS Scale is free and delivers a significantly more capable and professional platform. Its Docker and Kubernetes app integration is better, and its use of ZFS (a filesystem with built-in checksumming, snapshots, and self-healing) is a real advantage for data integrity. The learning curve is steeper, but the stability payoff is real.
Unraid costs a modest one-time license fee and offers good flexibility for mixing drives of different sizes in a single array, something neither TOS 6 nor TrueNAS handles as elegantly. Its Community Applications store is an app ecosystem that actually works, which makes the TOS 6 App Center look embarrassing by comparison.
Open Media Vault is closer to TOS 6 in scope. It is lightweight and relatively simple. But it is built on a pure Debian Linux base, which makes it predictable, stable, and well-documented. The underlying system behaves the way Linux is supposed to behave, without the kernel-level interference that makes TOS 6 so frustrating for advanced use cases.
TOS 6 is clearly trying to replicate the user-friendliness of Synology’s DSM. It has not yet achieved the polish, stability, or quality control that would make that comparison flattering.
Final Verdict
TOS 6.0 is a competent operating system for one specific use case: a simple, local network storage box. If you need an SMB share that just works, TOS 6 delivers that without friction. The clean default install, automatic share creation, and straightforward pool setup are genuine strengths for users who want basic functionality without complexity.
Everything beyond that baseline is a problem. The App Center is unreliable. Two of the three headline applications I tested either crashed immediately or failed to install at all. Docker works, but only after you fight through permission issues and kernel restrictions that have no equivalent on competing platforms. The documentation does not help. The interface copies Synology without matching Synology’s quality.
If you are a power user who wants to run Nextcloud, Plex, Jellyfin, or any meaningful Docker workload on your NAS, do not rely on TOS 6 to support that. The hardware inside the F4-424 Pro is genuinely good. The software sitting on top of it is holding the platform back.
My recommendation remains what it was before I started testing. Buy the hardware. Wipe TOS 6. Install Proxmox, TrueNAS, or Unraid. If you are curious about how to approach that transition, my full F4-424 Pro hardware review covers the platform in more detail and discusses why this hardware pairs so well with alternative operating systems.
TOS 6 scores a 5 out of 10. It passes for basic storage. It fails for everything else.
Frequently Asked Questions
Can TOS 6 automatically create an SMB network share without manual configuration?
Yes. Once you create a volume, TOS 6 automatically makes the share visible on both Windows and macOS without any additional network configuration. This works reliably out of the box.
Does the TOS 6 App Center installation of Nextcloud actually work?
No. The one-click App Center installation of Nextcloud fails immediately with a database connection error. Getting Nextcloud running requires a manual Docker Compose deployment using PostgreSQL instead of MariaDB, plus several workarounds for TOS 6’s file permission and kernel restrictions.
What does Security Isolation Mode do in TOS 6, and should I enable it?
Security Isolation Mode completely disconnects the NAS from the internet, limiting access to local network devices only. It disables remote access, breaks apps that depend on PHP, Python, or Java, and prevents Docker from pulling external images. Enable it only if you are using the NAS exclusively as a local, air-gapped storage device with no need for remote access or app functionality.