🎧 Listen to the 60-Second Audio Recap:
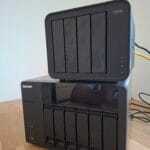
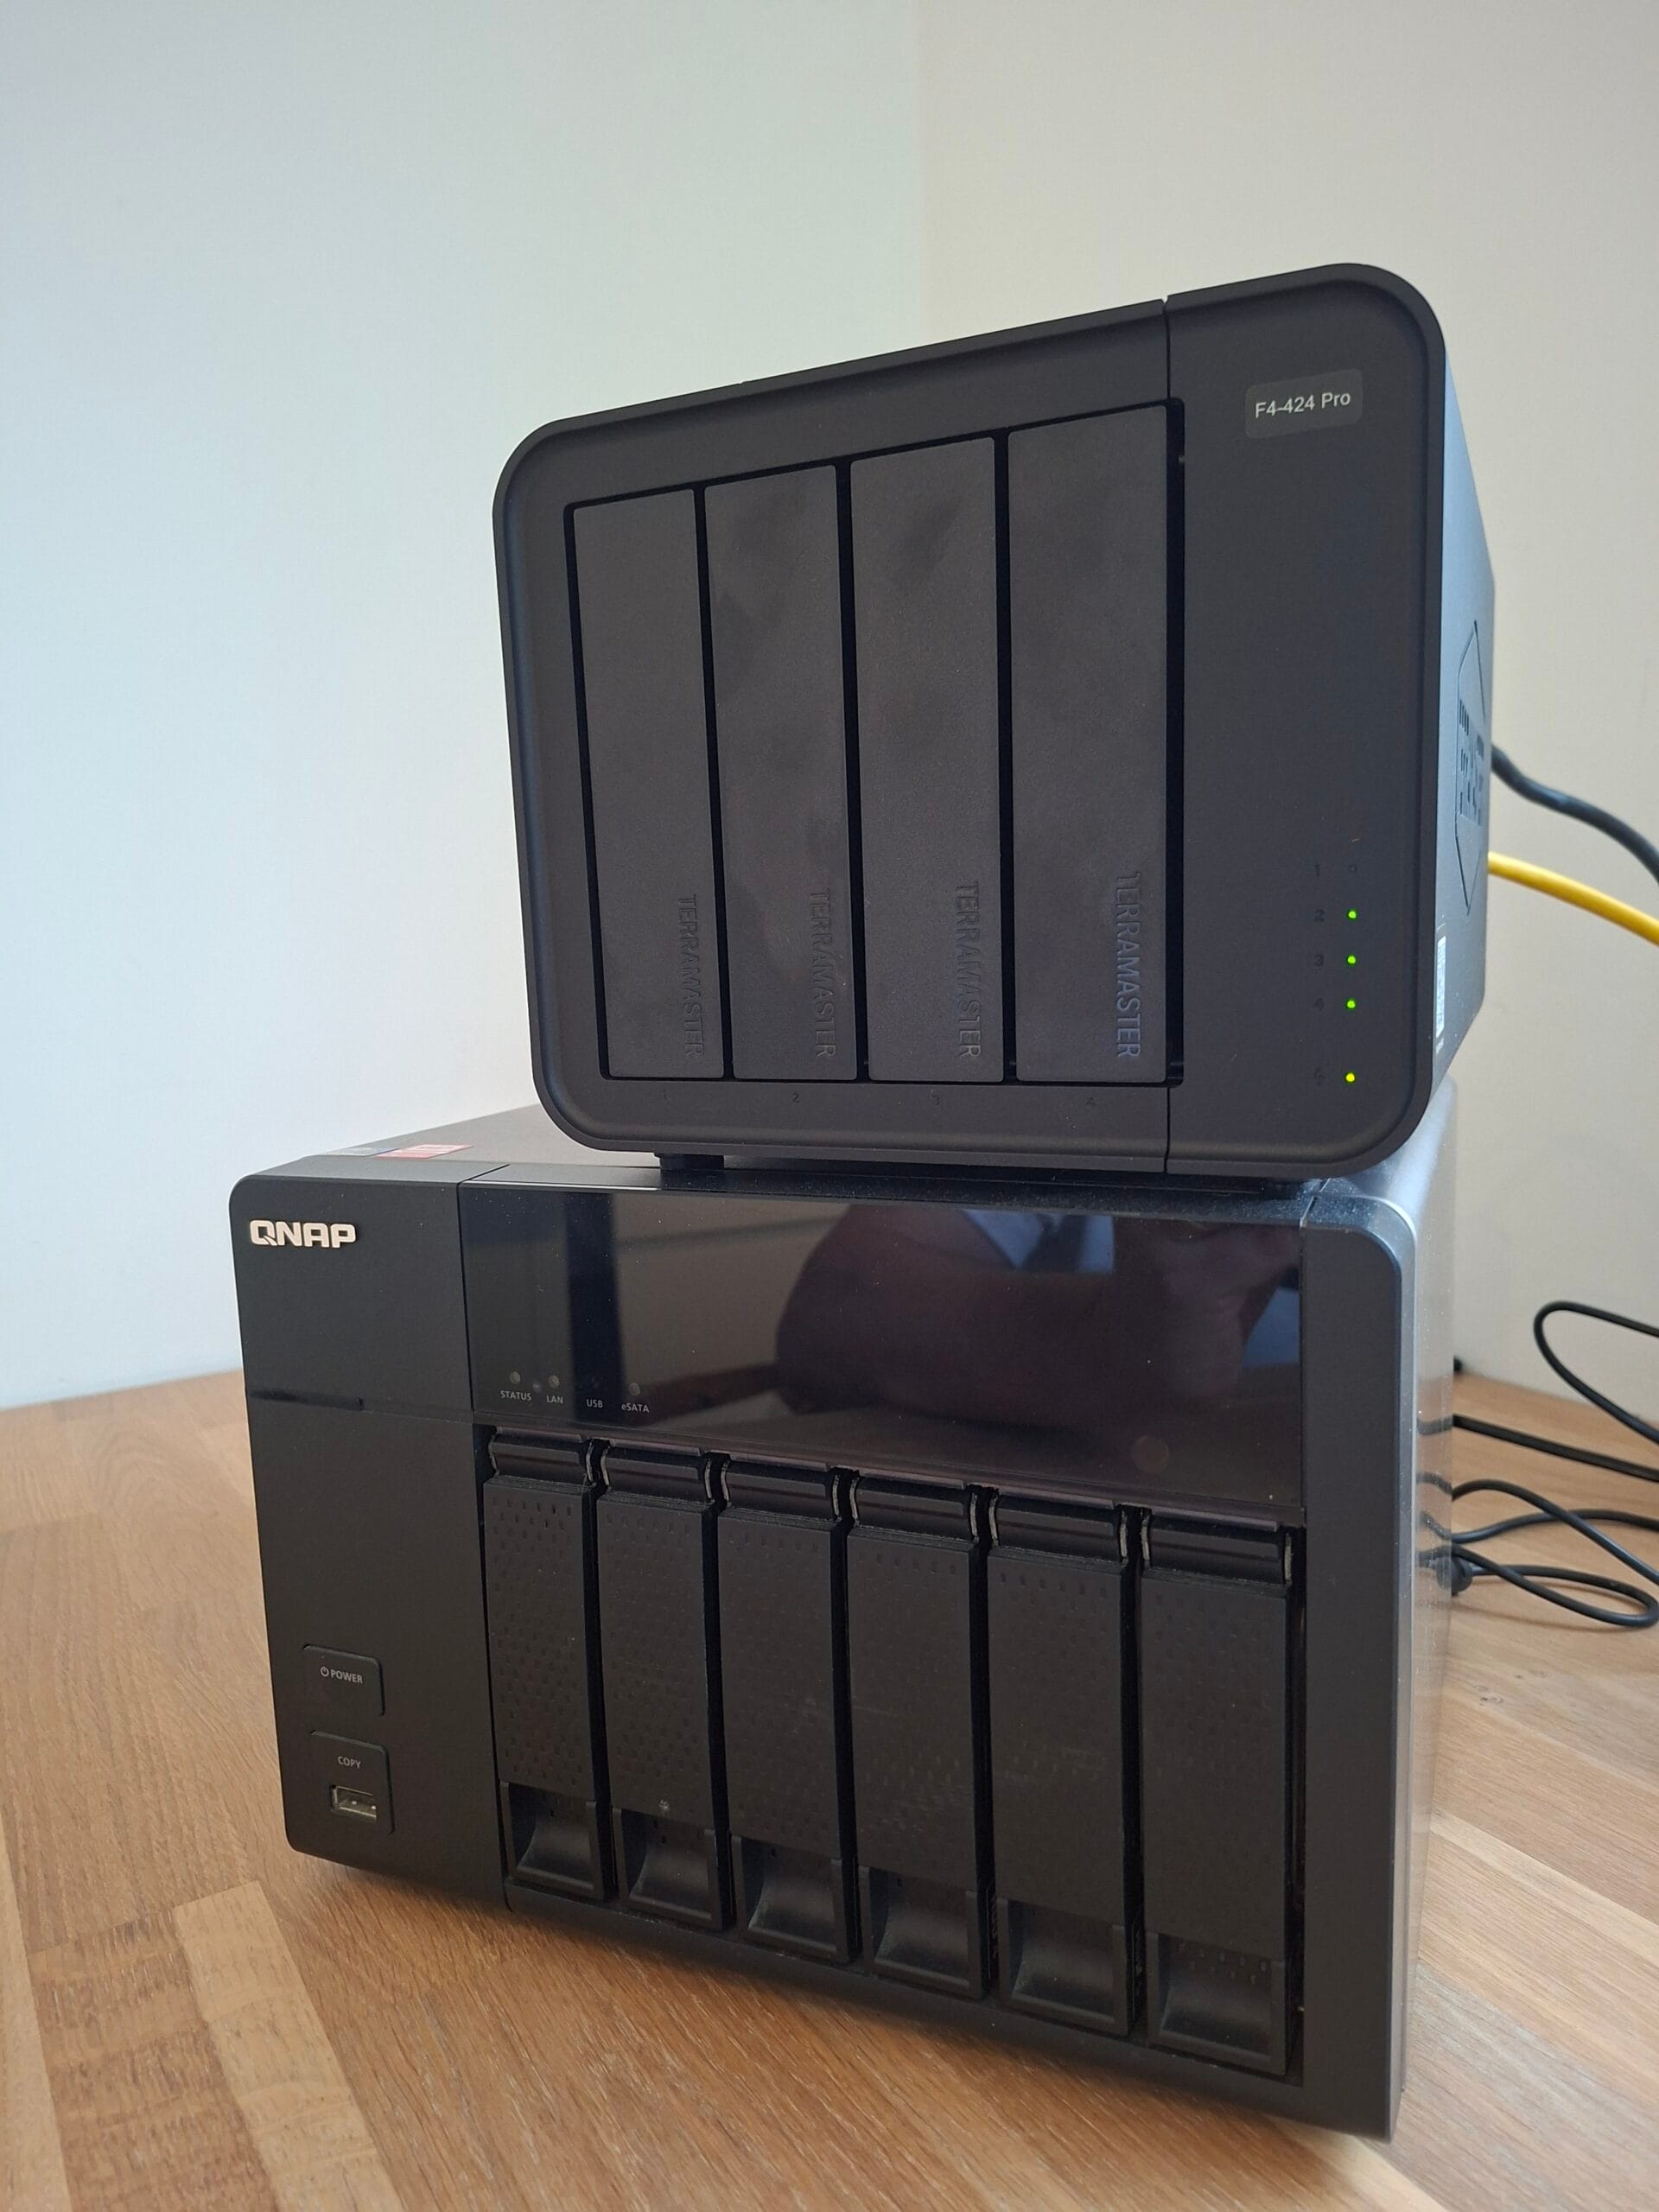
The QNAP TS-669L has been end-of-life for years. QNAP stopped shipping QTS updates for it long ago, and anyone still running the original firmware is doing so on borrowed time. I had one sitting on a shelf after my TerraMaster F4-424 Pro took over primary NAS duties. The TS-669L was previously running TrueNAS Core, which turned out to be a serious mistake for this hardware. This review documents exactly what it takes to turn that mistake into a stable backup server using OpenMediaVault (OMV).
You cannot buy this unit new. You find it secondhand, as decommissioned office hardware, or pulled from a server room clearance. That context matters. This is not a product review in the traditional sense. It is a resurrection guide with hard numbers attached.
Disclosure: This post contains affiliate links. If you purchase something through these links, we may earn a commission at no extra cost to you. We only recommend products we genuinely use and love.
TL;DR Verdict
Score: 8 / 10
Never throw away solid enterprise or SMB NAS hardware just because the manufacturer dropped software support. Switching from the RAM-hungry TrueNAS to the lightweight OpenMediaVault, forcing a Legacy BIOS boot from an external SSD, and stripping Samba down to its bare essentials turned this TS-669L into a capable, efficient backup server. It requires specific BIOS knowledge, patience during RAID synchronization, and a significant intervention in the Samba config to stop the CPU from choking. The result is a solid homelab recycle project that fully saturates a Gigabit network connection.
Pros and Cons
- Pro: Breathes real life into solid 6-bay enterprise hardware that would otherwise be landfill.
- Pro: Very low OS overhead thanks to OMV and EXT4.
- Pro: Full control via x86 architecture. No locked-down ARM nonsense.
- Pro: Reliable network storage and backup host with software RAID support.
- Pro: After Samba tweaks, hits the full physical Gigabit ceiling at 114 MB/s.
- Con: Intel Atom D2700 has no VT-x support. Virtual machines are completely off the table.
- Con: Hard RAM ceiling of 3GB DDR3. Non-negotiable.
- Con: Installation requires specific BIOS manipulation to avoid a fatal GRUB crash.
- Con: Resyncing large RAID arrays is painfully slow on the old dual-core processor.
- Con: Default Samba configuration completely saturates the CPU. Manual tweaks on both the NAS and in Windows are mandatory for usable transfer speeds.
Hardware and Build Quality
This is a heavy metal box built for a server room. The chassis is all steel, the drive sleds are solid, and the power supply feels overbuilt for the job. Six drive bays, all accessible from the front. This hardware was designed to run 24/7 in a utility closet, and every part of it communicates that intent.
The I/O panel gives you dual Gigabit Ethernet ports, several USB ports including USB 3.0, and one feature that proved absolutely necessary for this project: a VGA port. Without that VGA output and the ability to connect a keyboard directly, installing a custom OS would have been impossible. Modern NAS units increasingly omit this. The TS-669L does not.
The processor is a dual-core Intel Atom D2700. It is power-efficient, but it is missing Intel VT-x support. VT-x is the hardware virtualization extension that allows you to run virtual machines (VMs) inside hypervisors like Proxmox or ESXi. Without it, VMs are a dead end on this hardware. Docker containers work fine because they operate at the operating system level and do not require hardware virtualization. RAM is physically limited to 3GB DDR3, with no upgrade path beyond that. Internally, there is a 512MB DOM (Disk on Module), a tiny embedded storage chip where the original QTS operating system lived.
The case fans are large and run quietly. Under sustained load during RAID resynchronization, drive temperatures stayed within normal operating range throughout.
Why TrueNAS Was the Wrong Choice
TrueNAS Core uses ZFS, a powerful filesystem (a system that controls how data is stored and retrieved on drives) that demands a minimum of 8GB RAM to operate reliably. Running it on 3GB is not a configuration issue. It is a fundamental mismatch. The system was sluggish, memory pressure was constant, and the whole setup felt like it was one bad moment away from data corruption.
OpenMediaVault (OMV) is built on Debian Linux. It is lightweight, uses EXT4 (a mature, stable, low-overhead filesystem), and exposes a clean web interface for managing storage, network shares, and users. It is the right tool for this hardware. The only question was whether it would actually install cleanly.
Installation: The BIOS Fight You Need to Know About
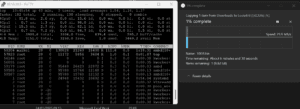
I created a bootable USB stick using Rufus. One important detail for anyone following along: when writing an OMV or Debian installer image in Rufus, always select DD mode (Image mode), not the default ISO mode. ISO mode will cause the installer to fail immediately with an error stating it cannot find a CD-ROM drive. DD mode writes the image correctly.
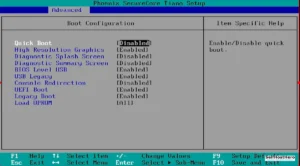
I connected a VGA monitor and keyboard, powered on the unit, and pressed F2 to enter the BIOS. The firmware is a Phoenix SecureCore Tiano Setup. The first installation attempt failed hard. The installer ran to 99% completion and then threw a fatal error.
[!!] Configuring shim-signed:amd64
Executing 'grub-install /dev/sdd' failed.
GRUB is the bootloader, the small program that starts the operating system when the machine powers on. The installer was getting confused by the combination of the internal 512MB DOM, the installation USB stick, the target external SSD, and QNAP’s buggy UEFI implementation. UEFI is the modern replacement for the legacy BIOS boot system. QNAP’s implementation of it on this unit is broken enough to derail a standard Debian install.
The fix is straightforward once you know it. Go back into the BIOS. Under the Advanced tab, find Boot Configuration. Set UEFI Boot to Disabled and confirm that Legacy Boot is Enabled. Under the Boot tab, set the external USB drive as the first boot priority. By forcing Legacy (MBR) mode, you bypass QNAP’s broken UEFI layer entirely. The installation ran to completion without a single error after that change.
Post-Installation Setup: 7 Steps to a Working RAID Array
After removing the USB stick and rebooting, the NAS picked up a DHCP address (an IP address assigned automatically by your router) immediately. The OMV web interface was accessible at that address. Default credentials are admin / openmediavault. Change these immediately.
I had six drives to work with: two 1TB WD Blue drives and four 2TB WD Red drives. The configuration I chose was RAID 1 for the Blues (mirroring, meaning both drives hold identical data for redundancy) and RAID 10 for the Reds (a combination of mirroring and striping that gives both speed and redundancy across four drives). Here is the exact process.
Step 1: Install the Software RAID Plugin
Since OMV 6, software RAID is not included in the default interface. Navigate to System, then Plugins, search for openmediavault-md, install it, and click Apply.
Step 2: Wipe the Drives
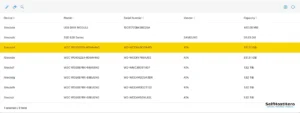
Under Storage, then Disks, all six drives were detected correctly. The old TrueNAS ZFS partition tables needed to be cleared. I ran a Quick Wipe on each drive individually using the eraser icon. Do not skip this step. Leftover ZFS metadata will confuse the RAID setup.
Step 3: Create the RAID Arrays
Under Storage, then Multiple Devices, I created two arrays. The first was /dev/md0 set to Level Mirror using the two 1TB WD Blues. The second was /dev/md1 set to Level RAID 10 using the four 2TB WD Reds. The system begins resyncing in the background immediately. This takes a very long time on the Atom D2700. Plan for it.

Step 4: Format and Mount with EXT4
Under Storage, then File Systems, I created an EXT4 filesystem on both md0 and md1. After creation, each filesystem must be explicitly mounted by selecting it and clicking the Play icon. If you skip the mount step, the shares will not work.
Step 5: Create Shared Folders
Under Storage, then Shared Folders, I created two folders: Louis1TB pointing to md0 and Louis4TB pointing to md1.
Step 6: Enable SMB
Under Services, then SMB/CIFS, I enabled the service. SMB (Server Message Block) is the protocol Windows uses to access network drives. Under the Shares tab, I added both shared folders.

Step 7: Set Access Permissions
Under Users, I created a local account. Using the Privileges button, I assigned Read/Write access to both shares for that account. This is the credential Windows will use to authenticate.

Performance: The Samba Problem
The first file transfer test after setup produced 23 to 25 MB/s. On a Gigabit network, the theoretical ceiling is 125 MB/s. I initially assumed the RAID arrays were still resyncing and causing the bottleneck. They were not. Even after the arrays reported clean, the transfer speed stayed at 25 MB/s.
I ran local write tests using the dd command in the terminal (a Linux tool for raw disk benchmarking) and monitored CPU usage with top. The local write speed to the WD Red RAID 10 array was 100 MB/s. The WD Blue Mirror hit 54 MB/s, which is the physical limit of those drives. The storage was performing correctly. The network was not.
The top command revealed the problem immediately. The smbd process (the background service that handles network file sharing) was consuming over 100% of a single CPU core. The Atom D2700 has two cores, so one was completely saturated by file sharing overhead alone.
OMV’s default Samba configuration enables several security and compatibility layers that are computationally expensive: SMB signing (cryptographic verification of every packet), AES encryption of the SMB connection, Extended Attributes (extra file metadata), and Apple Mac translation modules called fruit modules. The Atom D2700 cannot handle all of this at wire speed. It is not a close call. It is completely overwhelmed.
The fix required changes in three places.
In OMV under SMB Settings, in the Extra Options field, I added the following lines.
smb encrypt = off
fruit:aapl = no
fruit:copyfile = no
server signing = disabled
In OMV under SMB Shares, I edited each share and unchecked Hide dot files and Extended attributes.
In Windows 11, I opened PowerShell as Administrator and ran the following command. Windows 11 enforces SMB signing by default on the client side and will refuse to connect to a server that has signing disabled unless you explicitly allow it.
Set-SmbClientConfiguration -RequireSecuritySignature $false
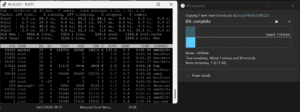
After applying these changes, smbd CPU usage dropped to approximately 35%. Transfer speed to the WD Red RAID 10 array jumped to 114 MB/s, which is the physical ceiling of a Gigabit Ethernet cable. Transfer speed to the WD Blue Mirror settled at 49 MB/s, the physical limit of those drives. The network was no longer the bottleneck. The storage was no longer the bottleneck. The only remaining constraint is physics.
This Samba tuning is not trivial. Without terminal access, knowledge of SMB parameters, and willingness to disable security features in Windows, this NAS would be borderline unusable for bulk transfers on this CPU. That is a significant caveat for anyone considering this project.
OS Selection: Why OMV Wins on This Hardware
TrueNAS Core and TrueNAS Scale both require a minimum of 8GB RAM for ZFS. That eliminates them immediately. Unraid is a viable lightweight option, but it ties its license to a specific USB boot drive. If that drive fails, you need to contact Unraid support to transfer the license. For a setup that boots from an external SSD, this creates unnecessary fragility.
XigmaNAS (formerly NAS4Free) is a legitimate BSD-based alternative with a light UFS filesystem, but its community is much smaller than Debian’s and Docker integration is more complex. OMV on Debian wins on this hardware. The community is large, Docker support via the Portainer plugin is straightforward, and the web interface is clean and functional.
The Apply workflow, where every change requires a confirmation click on a yellow banner, is slightly repetitive, but it prevents accidental configuration changes from going live immediately. That is a reasonable trade. If you want to see what a modern, feature-heavy NAS OS looks like on capable hardware, my TerraMaster TOS 6 review covers that end of the spectrum. The contrast is instructive.
Who This Project Is For
This is not a beginner project. The BIOS manipulation to bypass the GRUB crash requires comfort with firmware settings. The Samba tuning requires terminal access and willingness to run PowerShell commands on your Windows machine. The RAID resync requires patience measured in hours, not minutes.
If you have one of these units sitting unused, or if you can source one cheaply as decommissioned office hardware, the effort is justified. You get a six-bay, software RAID-capable, Gigabit-saturating backup server for the cost of drives and electricity. The hardware itself costs nothing if you already own it.
For context on what a modern NAS build looks like at the other end of the budget and capability spectrum, the TerraMaster F4-424 Pro Proxmox installation guide shows what you get when you start fresh with current hardware. The TS-669L cannot run Proxmox meaningfully due to the missing VT-x support, but as a dedicated backup target for a Proxmox host, it is a natural companion.
Frequently Asked Questions
Can the QNAP TS-669L run Proxmox or virtual machines?
No. The Intel Atom D2700 does not support VT-x, which is the hardware virtualization extension required to run virtual machines. Proxmox and ESXi are not viable options on this hardware. Docker containers work because they use OS-level isolation instead.
Why does OMV show slow SMB transfer speeds on old hardware?
OMV’s default Samba configuration enables SMB signing, AES encryption, Extended Attributes, and Apple compatibility modules. These are computationally expensive and will saturate a weak CPU like the Atom D2700. Disabling them in the OMV Extra Options field and disabling SMB signing on the Windows client via PowerShell resolves the bottleneck entirely.
Do I need to disable UEFI to install OMV on the QNAP TS-669L?
Yes. QNAP’s UEFI implementation on this unit is buggy and causes the GRUB bootloader installation to fail at 99% completion. Setting UEFI Boot to Disabled and enabling Legacy Boot in the BIOS resolves the issue and allows the OMV installer to complete without errors.