🎧 Listen to the 60-Second Audio Recap:
The Privacy Problem — What Big Tech Tracks When You Read
Every time you turn a page on a Kindle, Amazon logs it. Your reading speed, how long you linger on a paragraph, which passages you highlight, which chapters you skip — all of it feeds a behavioral profile tied to your account. ComiXology, which Amazon acquired in 2014, operates under the same data collection umbrella. You paid for those books. You do not own the data generated by reading them.
Kavita is the direct self-hosted replacement for both services. It supports EPUB, PDF, CBZ, and CBR files out of the box. It ships a polished web reader that works on any device with a browser. It collects zero telemetry. Your reading habits stay on your hardware.
Kavita runs on hardware you already own, serves a web reader to any device, and has never heard of Jeff Bezos.
Community Signal: The r/homelab and r/selfhosted communities regularly debate the best pattern for running Docker workloads on Proxmox. The recurring question is whether to use a VM, a privileged LXC, or an unprivileged LXC. This guide answers that question directly and implements the pattern that experienced homelabbers consistently recommend: an unprivileged LXC with a read-only ZFS bind mount for media. If you already have Docker and Portainer running, the quick-start method gets you to a working library in under ten minutes.
If you do not yet have Docker and Portainer running on your Proxmox host, start with our guide on building a Docker and Portainer environment on Proxmox LXC before continuing here.
Prerequisites and Minimal Hardware
What You Need Before You Start
- A running Docker Engine — on a Proxmox VM, an LXC container, or a NAS
- Minimum: 1 CPU core, 1 GB RAM (Kavita is lightweight by design)
- A storage path accessible to Docker for configuration data (your
appdatadirectory) - A storage path for your book and comic collection
- DRM-free files only — Kavita cannot serve files with active DRM. This guide does not cover DRM removal. Your files must already be DRM-free before you begin.
The Non-Negotiable File Structure Rule — Read This First
WARNING: This is the single most common reason Kavita deployments fail on first launch. Kavita requires all media files to be organized inside subdirectories. A flat folder containing 500 loose EPUB files will cause an immediate scan failure. This is not a soft warning — Kavita will refuse to scan the library entirely. Organize your files before you deploy.
The required structure looks like this:
/books/
  ├── Terry Pratchett/
  │   ├── Guards! Guards!.epub
  │   └── Mort.epub
  ├── Saga/
  │   ├── Volume 01.cbz
  │   └── Volume 02.cbz
Each author or series gets its own subdirectory. Files live inside those subdirectories, never at the root of the mapped library folder. For ebook collections, Calibre can bulk-reorganize your library into this structure automatically using its “Save to disk” feature with a custom template. For CBZ and CBR comic archives, ComicTagger handles tagging and organization. Budget time for this step if your collection is currently unstructured. Do it properly before the first scan.
Method 1 — The Quick Start (Newbie Nora Route: Portainer Stack)
Target audience: First-time self-hosters. Docker Engine already running. Portainer already installed.
Step 1 — Open Portainer and Create a New Stack
Log into your Portainer UI. In the left sidebar, click Stacks, then click + Add Stack in the top right. Give the stack a name: kavita. You will paste your Docker Compose definition directly into the web editor on this screen.
Step 2 — Paste the Docker Compose YAML
version: '3.9'
services:
  kavita:
    image: jvmilazz0/kavita:latest
    container_name: kavita
    environment:
      - TZ=Europe/Amsterdam
    volumes:
      - /pad/naar/jouw/appdata/kavita:/kavita/config
      - /pad/naar/jouw/boeken:/books:ro
    ports:
      - "5000:5000"
    restart: unless-stopped
Step 3 — Customize Your Paths
Before you deploy, replace the placeholder paths with your actual filesystem paths. Here is what each line means:
/pad/naar/jouw/appdata/kavita— Replace this with the directory where Kavita will store its database and configuration. A good default is/opt/appdata/kavita. This directory must persist across container restarts./pad/naar/jouw/boeken— Replace this with the path to your media collection. For example:/mnt/media/books.:ro— This flag mounts your book collection as read-only. Kavita can read your files but cannot modify or delete them. Do not remove this flag. It protects your source library from accidental writes.TZ=Europe/Amsterdam— Replace this with your own timezone identifier. You can find the correct string for your location in the tz database list on Wikipedia.
Step 4 — Deploy and Verify the Container is Running
Click Deploy the stack at the bottom of the Portainer screen. Portainer will pull the image and start the container. This takes about 30 seconds on a typical connection.
To verify the container is running from the command line, run:
docker ps | grep kavitaYou should see a line showing the kavita container with a status of Up X seconds or Up X minutes. If the status shows Restarting, check your volume paths — a missing directory is the most common cause.
Open your browser and navigate to http://YOUR-SERVER-IP:5000. The Kavita setup wizard will appear.
Method 2 — The Pro Setup (Pro Paul Route: Unprivileged LXC + Reverse Proxy)
Target audience: Proxmox power users. Covers LXC deployment, ZFS read-only bind mount, and external HTTPS access.
Step 1 — Create an Unprivileged LXC Container in Proxmox
For a single-service workload like Kavita, an LXC container is more efficient than a full VM. It has lower memory overhead, boots faster, and allows direct filesystem access from the Proxmox host via mount points. You do not need the full isolation of a VM for this use case.
Create a new LXC container in the Proxmox web UI using a Debian 12 or Ubuntu 22.04 template. Recommended specs:
- 1 CPU core
- 1 GB RAM
- 8 GB disk for the container root (config data only)
- Unprivileged container: Yes
Community Context: The r/homelab consensus on Proxmox media services is consistent: unprivileged LXC with a read-only host mount is the correct pattern. It gives you the performance of a container with the data safety of filesystem-level access controls. This guide implements that pattern exactly.
Step 2 — Mount the ZFS Pool as Read-Only into the LXC
The architecture here is deliberate. Your media files live on a ZFS pool managed by the Proxmox host. The LXC gets read-only access to that pool via a mount point. Kavita cannot corrupt your source files. ZFS snapshots on the host protect the pool independently of whatever happens inside the container.
Run this command on the Proxmox host, not inside the LXC:
pct set <CTID> -mp0 /mnt/pve/zfs-books,mp=/books,ro=1Breaking down each argument:
<CTID>— Your LXC container ID, for example101./mnt/pve/zfs-books— The path to your ZFS dataset on the Proxmox host. Adjust this to match your actual dataset path.mp=/books— The mount destination inside the LXC. Kavita will see your library at/books.ro=1— Read-only enforcement at the hypervisor level. This is enforced by Proxmox, not just by Docker. It cannot be bypassed from inside the container.
If you want to understand how ZFS datasets and Proxmox storage work together in depth, our guide on building a ZFS-backed file server on Proxmox with LXC bind mounts covers the full architecture.
Step 3 — Install Docker Inside the LXC and Deploy Kavita
Start the LXC and open a shell session. Run the following commands inside the container:
apt update && apt install -y docker.io docker-compose
mkdir -p /opt/appdata/kavita
mkdir -p /opt/kavita
Create the Compose file at /opt/kavita/docker-compose.yml using the same YAML from Method 1, with the volume paths adjusted to match the LXC mount points:
- Config volume:
/opt/appdata/kavita:/kavita/config - Books volume:
/books:/books:ro
Then start the container:
docker compose up -dStep 4 — Expose Kavita Externally via Nginx Proxy Manager or Traefik
Running Kavita on a local IP and port is fine for home use. If you want HTTPS access from outside your network, or a clean domain name on your LAN, you need a reverse proxy.
Option A: Nginx Proxy Manager (NPM) is the recommended choice if you are new to reverse proxies. It provides a GUI for creating proxy hosts. Create a new Proxy Host with these settings:
- Domain Name:
boeken.yourdomain.nl(or your chosen subdomain) - Forward Hostname: the LXC container’s IP address
- Forward Port:
5000 - Websockets Support: Enabled (required for the Kavita web reader)
- SSL: Request a Let’s Encrypt certificate from the SSL tab
Option B: Traefik integrates directly with Docker Compose via labels. Add the following labels to your Kavita service definition:
labels:
  - "traefik.enable=true"
  - "traefik.http.routers.kavita.rule=Host(`boeken.yourdomain.nl`)"
  - "traefik.http.routers.kavita.entrypoints=websecure"
  - "traefik.http.routers.kavita.tls.certresolver=letsencrypt"
This assumes you already have a working Traefik instance with a configured letsencrypt certificate resolver. Traefik will handle SSL termination automatically once the labels are applied and the container is restarted.
Step 5 — Generate an API Key and Configure the OPDS Feed
Once Kavita is running and accessible, navigate to the dashboard. Click your user icon in the top right, then select API Key and click Generate. Copy the key that appears.
Your OPDS feed URL will be in this format:
https://boeken.yourdomain.nl/api/opds/YOUR-API-KEYYou can connect this feed to mobile reading apps:
- Moon+ Reader (Android): Settings → Network → OPDS Catalog → Add URL → paste your OPDS URL.
- Panels (iOS): Add Server → OPDS → paste your OPDS URL.
Note: Kavita does not ship a dedicated native iOS or Android app. The web reader is mobile-responsive and works in a browser, but it is not a native app experience. OPDS integration with third-party apps like Moon+ Reader and Panels is the fully supported, production-ready workflow for mobile reading. This is a known item on the Kavita project roadmap.
Configuration and Validation — Proving It Actually Works
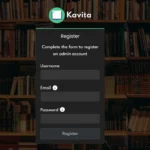
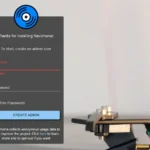
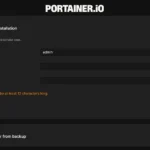
Step 1 — Create the Admin Account
The first time you visit http://SERVER-IP:5000, Kavita will present an account setup wizard. Complete this immediately. Do not leave a freshly deployed Kavita instance running on your network without an admin password set. The wizard takes about 60 seconds to complete.
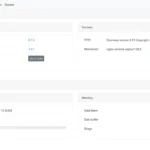
Step 2 — Add Your Library in Server Settings
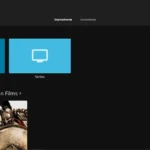
Navigate to Server Settings in the top-right menu, then click Libraries, then Add Library. Select the appropriate library type: Books for EPUB and PDF collections, or Comics / Manga for CBZ and CBR archives. Give the library a name, then point it to /books (or whatever mount path you configured).
Click Add to trigger the initial scan. Watch the scan log for errors. If you see the flat-file error message, stop here and reorganize your files before proceeding. Running a scan on a broken file structure will not fix itself.
Step 3 — The Read-Position Persistence Test
This test confirms that your configuration volume is correctly persisted. If Kavita cannot write to its config directory, read positions will not survive a browser close.
- Open any book in the Kavita web reader.
- Advance at least 3 to 5 pages into the book.
- Close the browser tab completely.
- Reopen Kavita and navigate back to the same book.
- Expected result: Kavita resumes from the exact page where you stopped.
- If it fails: Check that the
/kavita/configvolume is mapped to a persistent directory on the host, not to a temporary or ephemeral path.
The Ugly Truth — Quirks and Honest Limitations
Kavita’s File Structure Requirement Is Non-Negotiable
We said this in the prerequisites and we are saying it again, because it is the number one support question in every Kavita community thread. Flat file structures do not produce a soft warning. They produce a hard failure with an explicit error message. The fix is not a Kavita setting. The fix is reorganizing your files. If you have a large unstructured collection, run Calibre’s bulk organization feature before your first deployment. This is not optional.
No Dedicated Mobile App
Kavita does not ship a native iOS or Android app as of the time of publication. The web reader is responsive and functional on mobile browsers, but it is not the same experience as a native app. OPDS with Moon+ Reader on Android or Panels on iOS is the correct solution for native-feeling mobile reading. Both apps support offline downloads from an OPDS feed, which means you can sync books to your device for reading without a network connection.
Metadata Quality Determines Library Quality
Kavita reads embedded metadata directly from your EPUB files. If your files have incorrect, missing, or malformed author and title tags, the library display will reflect that. Kavita does not automatically pull metadata corrections from external sources by default. The quality of your library in Kavita is a direct reflection of the quality of your file metadata. Calibre is the right tool for auditing and correcting this before your first scan.
Troubleshooting Common Errors
Error: “One or more folders contains files at the root. Kavita does not support this.”
Cause: EPUB, PDF, or CBZ files exist directly in the root of the folder you mapped as a library. Kavita requires all files to be inside subdirectories.
Fix: Create author or series subdirectories and move all files into them. A quick remediation from the command line:
mkdir -p /books/Author-Name
mv /books/*.epub /books/Author-Name/
After reorganizing your files, go to Server Settings → Libraries, click the three-dot menu on the affected library, and select Force Scan. Do not wait for the next scheduled scan — run the force scan immediately to confirm the fix worked.
Error: Books Missing Covers or Metadata After Scan
Cause: The embedded metadata inside the EPUB file is malformed, empty, or uses non-standard tag formats. Kavita reads what is in the file. It cannot invent metadata that is not there.
Fix workflow:
- Open the affected file in Calibre.
- Click Edit metadata and correct the Title, Author, and Series fields.
- Save the file back to the same library path.
- In Kavita, navigate to Libraries and run a Force Scan on the affected library.
Container Starts But Port 5000 Is Unreachable
Run these two commands to diagnose the issue:
docker inspect kavita | grep -i port
ss -tlnp | grep 5000
Common causes:
- A firewall rule on the host is blocking port 5000. Check
ufw statusor your Proxmox host firewall rules. - Port 5000 is already in use by another service. The
sscommand output will show you what process is holding the port. - You are using the wrong IP address in the browser. Confirm the container’s host IP with
docker inspect kavita | grep IPAddress.
Conclusion and Next Steps
Deployment Checklist
- Kavita deployed via Docker Compose (Method 1 or Method 2)
- Book and comic library mounted as read-only (
:roconfirmed) - All media files organized into subdirectories
- Admin account created on first launch
- Library scanned and books visible in the UI
- Read-position persistence test passed
- OPDS feed URL generated and tested in mobile app (Pro route)
- Reverse proxy with HTTPS configured (Pro route)
What Comes Next — Automating Your Library Intake
Kavita is the reader. It does not automate acquisition. Your library will only grow if you manually add files to the mapped directory. The next layer of the stack removes that manual step:
- Readarr — Monitors for new ebook releases and automates downloading into your library path.
- Kapowarr — Handles automated comic and manga series management, including volume tracking and gap detection.
- Prowlarr — Centralized indexer management that feeds both Readarr and Kapowarr from a single configuration point.
The shelf is built. Now stock it automatically.