🎧 Listen to the 60-Second Audio Recap:
What This Guide Builds (And Why It Matters)
Your Proxmox server is the building. This guide builds the machine room inside it. Every privacy-first application you will ever self-host runs on top of what you are about to construct.
Docker is the standard deployment format for self-hosted applications. Nearly every open-source alternative to Big Tech services — from photo managers to file sync platforms — ships as a Docker image. That means before you can replace Google Photos or Google Drive, you need a reliable, high-performance Docker Engine running on your hardware. This guide builds exactly that: a lean Ubuntu 24.04 LXC container on Proxmox, configured with direct ZFS storage access and managed through Portainer’s browser-based interface. This is the foundation layer. The next guides in this series deploy Immich (Google Photos replacement) and Nextcloud (Google Drive replacement) directly on top of this engine.
The privacy case is straightforward. When your Docker host runs on your own hardware, your data never touches a cloud server. No Google account. No subscription. No terms of service that change without your consent. Your photos, files, and documents stay on drives you physically own.
What You Will Have When Finished
- An Ubuntu 24.04 LXC running on Proxmox with kernel nesting enabled
- ZFS datasets injected directly into the container via Bind Mounts, with zero NFS or SMB latency
- Docker Engine installed and operational
- Portainer CE web UI accessible at
https://<IP>:9443
Prerequisites and Minimal Hardware
Required Infrastructure
- Proxmox VE installed and accessible. If you are starting from bare metal, our TerraMaster F4-424 Pro Proxmox installation guide walks through a full host setup from scratch.
- NVMe SSD strongly recommended for the LXC root disk. Docker image layers generate heavy random I/O during pulls and container starts. A spinning disk or slow SATA SSD will create a measurable bottleneck.
- Minimum 4 CPU cores and 4 GB RAM allocated to the container.
- Existing ZFS storage pools for application data persistence. These are the pools you will inject via Bind Mounts. If you have not created them yet, our Proxmox ZFS file server guide covers pool creation in full detail.
Knowledge Prerequisites
- Ability to navigate the Proxmox web UI
- Basic comfort with Linux terminal commands
- A working understanding of containers vs. VMs: a VM emulates an entire machine including its own kernel; a container shares the host kernel and isolates only the userspace processes
Two Routes Through This Guide
Newbie Nora: Follow Method 1 top-to-bottom. Every step is explained. You do not need to read Method 2 first.
Pro Paul: Read Method 2 first for the architectural reasoning, then execute Method 1 with full context. The “why” lives in Method 2. The “how” lives in Method 1.
Method 1: The Quick Start (Newbie Nora Route)
Step 1: Create the Ubuntu LXC in Proxmox (Critical: Enable Nesting)
The single most common failure point in this entire guide is forgetting the Nesting checkbox. We are addressing it first, before anything else.
- In the Proxmox web UI, click Create CT in the top-right corner.
- Set Hostname to
DockerEngine. Ensure Unprivileged container is toggled ON. - Critical action: At the bottom of the wizard, click Advanced. Locate the Nesting checkbox and confirm it is ON.Screenshot placeholder: Proxmox CT wizard Advanced panel with Nesting checkbox highlighted.
Warning: If you skip this step, the Docker daemon will not start. You will see cgroup-related errors. The fix is in the Troubleshooting section, but it is faster to enable Nesting now.
- Select Ubuntu 24.04 as the template.
- Set disk size to 32 GB on
local-lvm. - Set CPU: 4 Cores, Memory: 4096 MB, Network: DHCP.
- Click Finish.
After the wizard closes, navigate to the container in the left panel, open Options, and enable Start at boot. This ensures your Docker Engine survives a power cycle automatically.
Step 2: Configure Bind Mounts (Run from the Proxmox Host Shell, NOT the LXC)
Bind Mounts inject your ZFS datasets directly into the LXC filesystem at the kernel level. These commands must be run from the Proxmox host shell, not from inside the container. You are configuring the container from the outside.
Note: Replace
101with your actual container ID if Proxmox assigned a different number. You can confirm the ID in the left-side resource tree.
# Run on the Proxmox HOST shell
# Replace 101 with your actual LXC container ID
pct set 101 -mp0 /hdd-pool/Opslag,mp=/mnt/opslag
pct set 101 -mp1 /fast-data/SnelleData,mp=/mnt/snelle_data
After running both commands, verify they registered correctly:
pct config 101Look for mp0 and mp1 entries in the output. If they appear, the Bind Mounts are configured. If they are missing, re-run the pct set commands and check that the source paths exist on the Proxmox host.
Step 3: Install Docker Engine (Run Inside the LXC Console)
You are now switching context. From this step forward, you are working inside container 101, not on the Proxmox host. Access the container via the Proxmox UI by selecting Container 101 and clicking the Console tab, or run pct enter 101 from the Proxmox host shell.
# Update system packages first
apt update && apt upgrade -y

# Install curl
apt install curl -y

# Download and execute the official Docker install script
curl -fsSL https://get.docker.com -o get-docker.sh
sh get-docker.sh
Important: The URL https://get.docker.com is the official Docker convenience script. Verify the URL matches exactly before running it. This script detects your OS and installs the correct Docker Engine packages automatically.
Step 4: Deploy Portainer CE
Portainer provides a browser-based GUI to manage all Docker containers, volumes, networks, and Stacks (Docker Compose files run through the UI). You will use Portainer to deploy every application in this series without memorizing CLI commands.
# Create a persistent volume for Portainer's own configuration data
docker volume create portainer_data

# Deploy the Portainer CE container
docker run -d \
  -p 8000:8000 \
  -p 9443:9443 \
  --name portainer \
  --restart=always \
  -v /var/run/docker.sock:/var/run/docker.sock \
  -v portainer_data:/data \
  portainer/portainer-ce:latest
The --restart=always flag tells Docker to restart Portainer automatically if the container stops or the LXC reboots. The /var/run/docker.sock mount gives Portainer direct communication with the Docker daemon.
| Port | Protocol | Purpose |
|---|---|---|
| 9443 | HTTPS | Portainer Web UI |
| 8000 | HTTP | Edge Agent tunnel (optional, not needed for this guide) |
Method 2: The Pro Setup (Architecture Deep-Dive)
The Core Question: Why LXC Instead of a VM?
This question comes up constantly in r/homelab and r/Proxmox threads, and it deserves a direct answer.
The VM approach gives you a dedicated kernel and stronger isolation. The tradeoff is real: you reserve RAM and CPU that cannot be used by anything else, and your Docker data lives on a virtual disk image sitting on top of your actual storage. You have introduced an abstraction layer between your application and your data.
The LXC approach shares the Proxmox kernel. Overhead is near zero. More importantly, it enables direct ZFS Bind Mount injection — the architectural advantage that makes this setup worth choosing. You get bare-metal Docker performance inside an unprivileged container with nesting=1 active.
For a homelab running trusted workloads, the LXC approach wins on every practical metric.
The Bind Mount Advantage: Why This Architecture Wins
Consider the data path in a traditional setup:
Traditional: Docker container writes data → NFS or SMB share → ZFS pool. That is two network hops, even on a local network. You pay latency on every write.
This setup: Docker container writes data → Bind Mount → ZFS dataset. That is a direct kernel-level path. Zero network overhead.
The practical impact is obvious when running Immich. Photo processing involves reading raw files, generating thumbnails, and running machine learning inference. Every one of those operations writes to storage. With Bind Mounts, those writes land directly on ZFS with full Copy-on-Write integrity, snapshot capability, and compression benefits intact. No NFS daemon in the middle. No SMB protocol overhead.
You can verify that nesting is correctly active from the Proxmox host at any time:
# Verify nesting is active from the Proxmox host
pct config 101 | grep features
# Expected output: features: nesting=1
Security Posture: Unprivileged Container as the Mitigation
The VM-vs-LXC security debate is legitimate. The honest position: a VM does provide stronger isolation. If you are running untrusted workloads or operating in a multi-tenant environment, use a VM. That is not the context here.
For a homelab running known, trusted Docker images, the security controls in place are sufficient:
unprivileged=1maps the container’s root user to a non-root UID on the Proxmox host. A container escape does not grant host root access.- Only verified Docker images from known publishers should be deployed inside this LXC.
- No privileged Docker containers should run inside the LXC. Avoid the
--privilegedflag in any container you deploy.
This tradeoff is acceptable for the homelab threat model. It is not acceptable for enterprise production workloads. Know which category you are in.
Docker Compose and Stacks: The Pro Workflow
Portainer Stacks are Docker Compose files executed through the Portainer GUI. You paste a compose.yml file into the Stacks editor, click Deploy, and Portainer handles the rest. This is how Immich and Nextcloud will be deployed in the next guide in this series.
Verify that Docker Compose v2 is available after installation:
docker compose version
# Expected output: Docker Compose version v2.x.x
If this command returns an error, Docker Compose was not included in the installation. Re-run the Docker install script or install the docker-compose-plugin package manually via apt.
Configuration and Validation
Command-Line Validation Checklist
Run these three commands from inside the LXC console to confirm everything is operational before opening a browser:
# 1. Verify Docker Compose v2 is functional
docker compose version

# 2. Confirm the Docker daemon is running and responsive
docker ps

# 3. Find the LXC IP address for browser access
ip a | grep inet
docker ps should return a table with the Portainer container listed and a status of Up. If the status shows Restarting, check the Troubleshooting section. The ip a command will show your LXC’s IP address on the local network. Note it down for the next step.
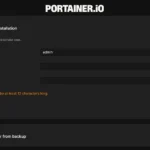
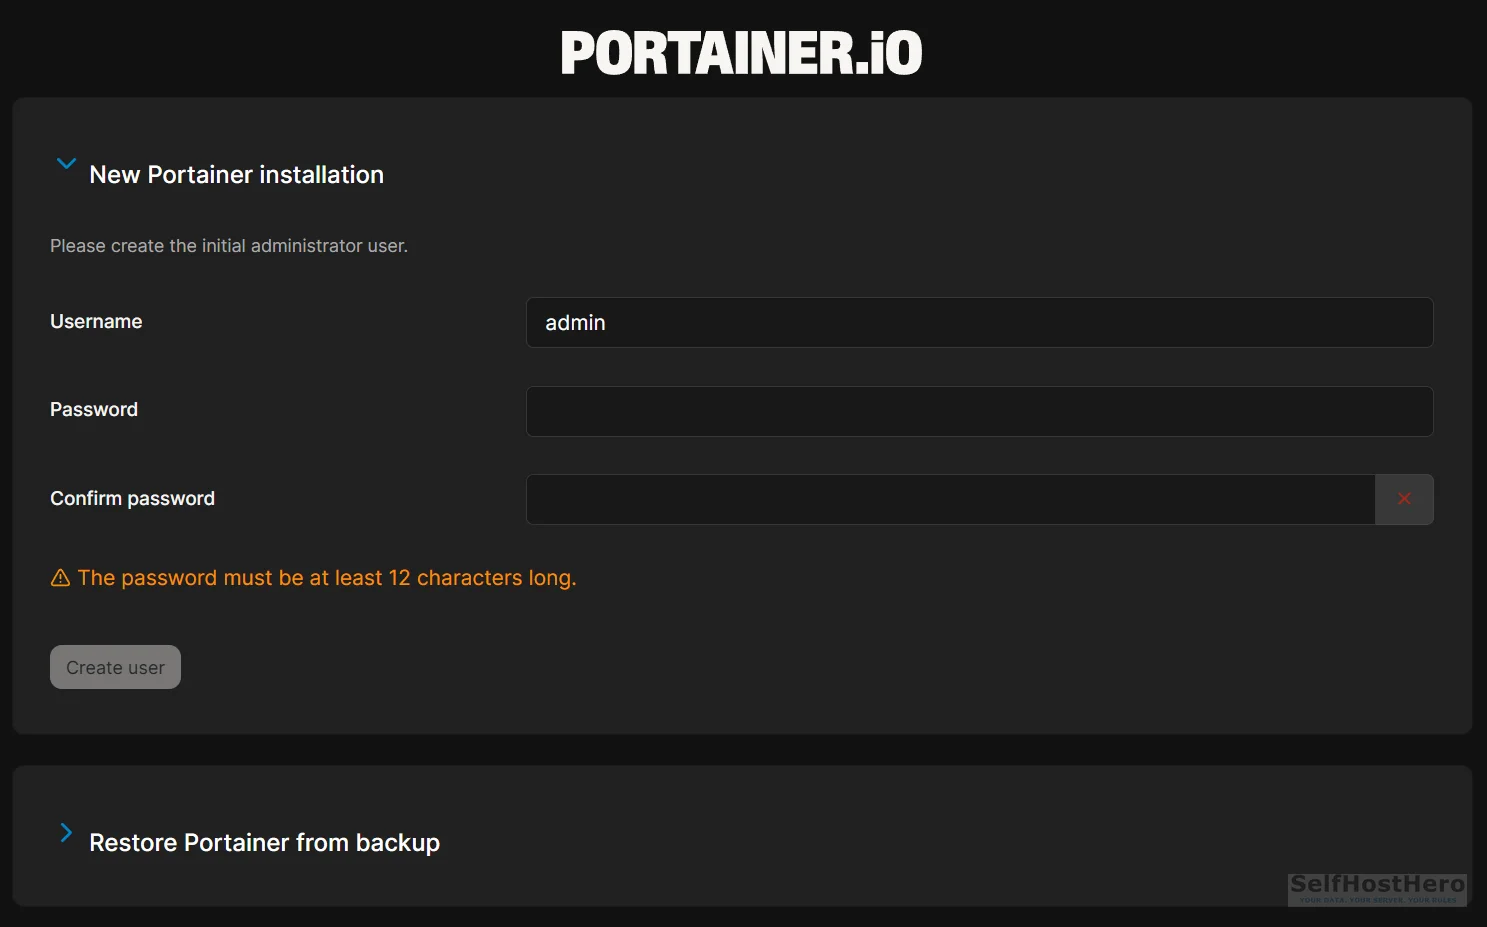
Portainer First-Login Setup
- Open a browser and navigate to
https://<LXC-IP-ADDRESS>:9443. - Your browser will display an SSL security warning. This is expected. See the Ugly Truth section for the full explanation. Click Advanced and proceed.
- Create your administrator account. Portainer enforces a minimum of 12 characters for the password. Use a password manager.
- On the environment selection screen, click Get Started.
- Click the local environment tile.
- Verify that the Portainer dashboard displays the correct CPU core count and RAM allocation matching what you assigned to the LXC.
Final Validation Checklist
- Ubuntu 24.04 LXC is running with
nesting=1confirmed viapct config 101 | grep features - Bind Mounts are visible inside the LXC at
/mnt/opslagand/mnt/snelle_data -
docker compose versionreturns a v2.x output - Portainer UI loads at
https://<IP>:9443 - Administrator account created and local environment connected
- CPU cores and RAM are correctly displayed in the Portainer dashboard
The Ugly Truth: Quirks and Honest Limitations
Docker in LXC Is Not Officially Supported
This needs to be stated plainly: Docker does not officially support LXC as a host environment. Proxmox developers do not recommend it either. This is the most common concern raised whenever this architecture is discussed in r/homelab and r/Proxmox threads, and it is a fair concern to raise.
The counterargument is equally plain: for homelab use with unprivileged containers and trusted images, the performance advantages and the Bind Mount architecture outweigh the isolation tradeoff. Thousands of homelab operators run this exact configuration in production daily without issues.
The recommendation stands: if you are running untrusted workloads, hosting services for other people, or operating in any environment where a container escape would be a serious problem, use a VM. For a personal homelab running your own applications, this setup is the most efficient option available.
The Self-Signed Certificate Reality
Portainer generates its own local SSL certificate on first run. Every browser will display a security warning when you access port 9443. This is expected behavior, not a sign that something went wrong.
The warning means your browser does not recognize the certificate authority, not that the connection is unencrypted. Traffic between your browser and Portainer is still encrypted via TLS. For local network use, clicking through the warning is safe.
A future guide in this series will cover Nginx Proxy Manager with Let’s Encrypt to replace the self-signed certificate with a trusted one, eliminating the browser warning entirely.
Troubleshooting Common Errors
Error: Docker Daemon Fails to Start (cgroups or Permissions Errors)
Symptom: Running systemctl status docker shows a failed state. Error messages reference cgroups, permission denied, or kernel features.
Cause: The Nesting feature was not enabled during LXC creation.
Fix:
- Shut down the LXC from the Proxmox host:
pct stop 101 - In the Proxmox UI, select Container 101, open Options, then click Features.
- Enable the Nesting checkbox and save.
- Start the LXC:
pct start 101
# Verify the fix from the Proxmox host after restart
pct config 101 | grep features
# Must show: features: nesting=1
After confirming nesting is active, run systemctl status docker inside the LXC again. The daemon should now show an active running state.
Error: Browser SSL Warning on Port 9443
Symptom: Browser displays “Your connection is not private” or NET::ERR_CERT_AUTHORITY_INVALID.
Cause: Portainer generated a self-signed certificate on first run. Your browser does not trust self-signed certificates by default.
Fix: Click Advanced in the browser warning, then click Proceed to [IP address] (unsafe).
Clarification: The word “unsafe” in that browser label refers to certificate authority trust, not to whether the connection is encrypted. The connection is encrypted. The certificate is simply not signed by a recognized authority. This is normal for local network services.
Error: Bind Mounts Not Visible Inside the LXC
Symptom: The directories /mnt/opslag or /mnt/snelle_data are empty or do not exist inside the container.
Cause: Either the pct set commands were run while the container was already running, or the source paths on the Proxmox host do not exist.
Fix:
- From the Proxmox host shell, verify the source paths exist:
ls /hdd-pool/Opslagandls /fast-data/SnelleData. If either command returns “No such file or directory,” the ZFS dataset path is incorrect. Adjust the path to match your actual pool and dataset names. - Stop the container:
pct stop 101 - Re-run the
pct setcommands from Step 2. - Start the container:
pct start 101 - Enter the container and verify:
ls /mnt/opslag
Conclusion and Next Steps
What Was Built
- Ubuntu 24.04 LXC running on Proxmox with kernel-level nesting permissions active
- Direct ZFS-to-Docker data path via Bind Mounts, with zero NFS or SMB overhead
- Docker Engine installed and operational
- Portainer CE web interface deployed, secured, and connected to the local Docker environment
The Privacy Milestone
This infrastructure layer is the prerequisite for permanently replacing Google Photos and Google Drive. Every step in this guide ran on your hardware, on your network. No data left your building. No cloud account was required. No subscription was activated.
What Comes Next in This Series
The next guide deploys the first Big Tech replacements using Portainer Stacks:
- Immich: A Google Photos alternative with AI-powered photo recognition, automatic mobile backup, and album sharing. All processing happens on your hardware.
- Nextcloud: A Google Drive alternative with file sync, calendar, contacts, and a full office suite. Your files stay on your drives.
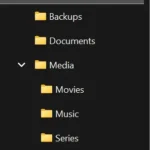
Both applications will write their data directly to the ZFS Bind Mount paths you configured in Step 2 of this guide. The /mnt/opslag and /mnt/snelle_data directories you set up today are exactly where Immich and Nextcloud will store their data.
Community and Further Reading
- Official Documentation: Portainer CE
Consult the primary source for advanced configurations and container management: Portainer CE Documentation. - Previous Guide: ZFS Storage Foundation
If your storage pools are not yet prepared, follow our foundational guide to building your data layer: Ultra-Efficient DIY NAS on Proxmox: Native ZFS + Ubuntu LXC.