Your tax returns, family photos, and personal documents are almost certainly living on servers you do not control, in data centers you will never visit, governed by privacy policies written to protect the company, not you. Google Drive, Dropbox, and OneDrive are convenient. They are also a complete surrender of data sovereignty.
Nextcloud is a full Google Drive replacement you run on your own hardware, under your own rules. You hold the encryption keys. You define the access controls. There are no storage quotas, no subscription renewals, and no third-party data processing agreements buried in the fine print. The r/homelab community has settled on Nextcloud as the de facto self-hosted cloud storage platform.
This guide explains not just how to install Nextcloud, but why your storage architecture determines whether the result feels fast or frustrating. We will build a production-grade setup on Proxmox with the database on NVMe and bulk file storage on a high-capacity HDD pool.
Prerequisites and Minimal Hardware
🎧 Listen to the 60-Second Audio Recap:
What You Need Before You Start
Before you paste a single line of YAML, confirm your environment matches these requirements.
| Component | Minimum | Recommended |
|---|---|---|
| Proxmox Node | Running, accessible | Latest stable release |
| LXC Container | Docker installed | Docker + Portainer CE latest |
| CPU Cores | 2 cores | 4+ cores |
| RAM | 2 GB | 4 GB+ |
| Fast Storage (NVMe) | Any SSD | Dedicated NVMe mount at /mnt/snelle_data |
| Bulk Storage (HDD) | Any HDD | ZFS pool mounted at /mnt/opslag |
If you do not yet have Docker and Portainer running inside a Proxmox LXC, start here first: Build Your Privacy Machine Room: Docker + Portainer on Proxmox LXC.
Storage Architecture: Why Separation Is Not Optional for Performance
Here is the problem most Nextcloud guides ignore. MariaDB performs thousands of small, random read and write operations per second. Every page load, every file listing, every share permission check triggers multiple database queries.
A spinning hard disk has a seek latency of 8 to 12 milliseconds per random I/O operation. An NVMe drive handles the same operation in under 0.1 milliseconds. That is a 100x difference. When your database sits on an HDD, those latencies stack on every single user interaction. The result is a sluggish Nextcloud UI, and users who blame Nextcloud when the real problem is storage placement.
The Reddit Pattern: Threads on r/homelab and r/Proxmox consistently report slow Nextcloud web UI performance. In the majority of cases, the database is sitting on a spinning disk. This guide solves that problem at the architecture level before the first container starts.
Confirm your mount points exist before proceeding:
ls -la /mnt/snelle_data && ls -la /mnt/opslagBoth directories must return a valid listing. If either command returns “No such file or directory,” resolve your storage mounts before continuing.
Confirming Your Portainer Environment
Verify Portainer is accessible at http://[PROXMOX-LXC-IP]:9000 in your browser. Then confirm Docker is running inside the LXC:
docker --version && docker compose versionYou should see version output for both. If docker compose returns an error, you are running an older Docker installation that uses the legacy docker-compose binary. Update Docker to a current release before continuing.
Method 1: The Quick Start (Newbie Route)
Who this is for: You want Nextcloud running in under 10 minutes. Performance is secondary. You can always migrate to Method 2 later.
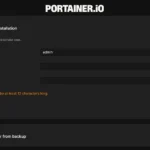
Step 1: Open Portainer and Create a New Stack
Log into Portainer. In the left sidebar, click Stacks, then click + Add Stack. Name the stack nextcloud.
[Screenshot: Portainer Stack creation UI showing the name field and web editor]
Step 2: Paste the Simplified Docker Compose
Paste the following into the web editor. This configuration uses named Docker volumes, which means Docker manages the storage paths automatically. You do not need to create any directories manually. The tradeoff is that both the database and your user files land on the same underlying disk, whatever disk Docker’s default storage driver is using.
version: '3.8'

services:
  nextcloud-db:
    image: mariadb:10.11
    container_name: nextcloud_db
    command: --transaction-isolation=READ-COMMITTED --binlog-format=ROW
    restart: always
    volumes:
      - nextcloud_db_data:/var/lib/mysql
    environment:
      - MYSQL_ROOT_PASSWORD=nextcloud_db_root_password
      - MYSQL_PASSWORD=nextcloud_user_password
      - MYSQL_DATABASE=nextcloud
      - MYSQL_USER=nextcloud

  nextcloud-app:
    image: nextcloud:latest
    container_name: nextcloud_app
    restart: always
    ports:
      - "8080:80"
    depends_on:
      - nextcloud-db
    volumes:
      - nextcloud_config:/var/www/html
      - nextcloud_data:/var/www/html/data
    environment:
      - MYSQL_PASSWORD=nextcloud_user_password
      - MYSQL_DATABASE=nextcloud
      - MYSQL_USER=nextcloud
      - MYSQL_HOST=nextcloud-db

volumes:
  nextcloud_db_data:
  nextcloud_config:
  nextcloud_data:
The volumes: block at the bottom tells Docker to create and manage named volumes internally. Docker stores these under /var/lib/docker/volumes/ on the host. This is convenient but gives you less direct control over which physical disk the data lands on.
Step 3: Deploy and Access
- Click Deploy the Stack.
- Wait approximately 60 to 90 seconds for Docker to pull the images.
- Open your browser and navigate to
http://[NAS-IP]:8080.
[Screenshot: Nextcloud first-run setup screen]
The Honest Tradeoff of the Newbie Route
Important: With this configuration, MariaDB and your user files share the same disk. If that disk is an HDD, every click in the Nextcloud web UI triggers database queries against a spinning platter. Expect 2 to 4 second page loads under normal use. This is not a Nextcloud bug. It is a storage architecture problem. Method 2 below solves it permanently.
Method 2: The Pro Setup (Split NVMe + HDD Storage)
Who this is for: You have separate fast and slow storage. You want a production-grade setup that stays performant as your data grows into the terabyte range.
The Architecture Decision: What Goes Where and Why
| Data Type | Mount Path | Storage Device | Reason |
|---|---|---|---|
| MariaDB database files | /mnt/snelle_data/App_Data/nextcloud_db |
NVMe | High random I/O demand |
| Nextcloud app config + PHP | /mnt/snelle_data/App_Data/nextcloud_config |
NVMe | Frequent small reads on every request |
| User file storage (bulk) | /mnt/opslag/Nextcloud_Storage |
HDD / ZFS pool | Sequential large writes, capacity over speed |
Step 1: Pre-Create the Host Directories
Run these three commands on your Proxmox LXC host. Docker will create these directories automatically on first run, but creating them manually gives you explicit ownership and permission control from the start.
mkdir -p /mnt/snelle_data/App_Data/nextcloud_dbmkdir -p /mnt/snelle_data/App_Data/nextcloud_configmkdir -p /mnt/opslag/Nextcloud_StorageStep 2: The Production Docker Compose Stack
Navigate to Portainer, click Stacks, then + Add Stack. Name the stack nextcloud. Paste the following compose file exactly as written.
version: '3.8'

services:
  nextcloud-db:
    image: mariadb:10.11
    container_name: nextcloud_db
    # These flags are required by Nextcloud for data integrity.
    # READ-COMMITTED prevents phantom reads during concurrent file operations.
    # ROW-based binary logging is required for Nextcloud's database repair tools.
    command: --transaction-isolation=READ-COMMITTED --binlog-format=ROW
    restart: always
    volumes:
      # Bind mount: database files land directly on the NVMe drive.
      - /mnt/snelle_data/App_Data/nextcloud_db:/var/lib/mysql
    environment:
      - MYSQL_ROOT_PASSWORD=nextcloud_db_root_password
      - MYSQL_PASSWORD=nextcloud_user_password
      - MYSQL_DATABASE=nextcloud
      - MYSQL_USER=nextcloud

  nextcloud-app:
    image: nextcloud:latest
    container_name: nextcloud_app
    restart: always
    ports:
      - "8080:80"
    # depends_on ensures nextcloud-db starts BEFORE nextcloud-app.
    # It does not guarantee the database is fully ready. See Troubleshooting.
    depends_on:
      - nextcloud-db
    volumes:
      # App config and PHP files on NVMe for fast reads on every page load.
      - /mnt/snelle_data/App_Data/nextcloud_config:/var/www/html
      # User file storage on the high-capacity HDD/ZFS pool.
      - /mnt/opslag/Nextcloud_Storage:/var/www/html/data
    environment:
      - MYSQL_PASSWORD=nextcloud_user_password
      - MYSQL_DATABASE=nextcloud
      - MYSQL_USER=nextcloud
      # Docker's internal DNS resolves "nextcloud-db" to the database container's IP.
      # This is how the two containers communicate without hardcoded IP addresses.
      - MYSQL_HOST=nextcloud-db
Three annotations worth understanding before you deploy:
--transaction-isolation=READ-COMMITTED: Nextcloud’s documentation explicitly requires this MariaDB flag. Without it, certain file operations can produce database inconsistencies under concurrent load.depends_on: This controls startup order. Docker will startnextcloud-dbbeforenextcloud-app. It does not wait for MariaDB to finish initializing its data directory. See the Troubleshooting section for the practical implication.MYSQL_HOST=nextcloud-db: Docker Compose creates an internal network for the stack. Each service is reachable by its service name. The Nextcloud app container resolvesnextcloud-dbto the database container’s internal IP automatically.
Step 3: Deploy the Stack
- Click Deploy the Stack.
- In Portainer, navigate to Containers and watch both containers appear.
- Wait until both show a green running status.
- Confirm from the command line:
docker ps | grep nextcloudYou should see two rows: nextcloud_db and nextcloud_app, both with status Up.
Step 4: Verify Storage Binding Is Correct
Confirm the database files landed on the NVMe mount:
ls -lah /mnt/snelle_data/App_Data/nextcloud_db/You should see MariaDB system directories including mysql, performance_schema, and a nextcloud directory. If this directory is empty, the database container failed to initialize. Check the Troubleshooting section.
Confirm the user storage path is present and ready:
ls -lah /mnt/opslag/Nextcloud_Storage/This directory will be empty at this stage. It populates after you complete the first-run web setup and create an administrator account.
Configuration and Validation
First-Run Web Setup
Open your browser and navigate to http://[NAS-IP]:8080.
[Screenshot: Nextcloud admin account creation form with database fields pre-filled]
- Enter a username and a strong password for the administrator account.
- Scroll down to the database section. The fields will be pre-populated from the environment variables in your compose file.
- Do not change the database credentials on this screen. They must match exactly what you defined in the compose file. Changing them here will cause a connection failure.
- Click Install.
Skip Recommended Apps on First Boot
After installation completes, Nextcloud will prompt you to install recommended apps including Contacts, Calendar, and Talk. Click Skip for now.
These apps trigger background indexing jobs that spike CPU usage during initial setup. Confirm your core installation is stable first. Add apps deliberately once everything is working correctly.
Validate Split Storage Is Working
Upload a small test file through the Nextcloud web UI. Then verify it physically landed on the HDD pool, not on the NVMe:
ls -lah /mnt/opslag/Nextcloud_Storage/[your-admin-username]/files/You should see your test file listed there. This confirms the bind mount is working correctly and user data is routing to the high-capacity pool.
Verify database activity is occurring on the NVMe by checking the directory modification timestamp:
stat /mnt/snelle_data/App_Data/nextcloud_db/nextcloud/The Modify timestamp should reflect recent activity from your test upload.
Final Deployment Checklist
- Nextcloud web UI loads at
http://[NAS-IP]:8080 - Administrator account created successfully
- Database and config directories confirmed on NVMe mount
- User storage directory confirmed on HDD/ZFS pool
- Test file upload verified on correct physical path
The Honest Truth: Quirks You Will Encounter
Performance Expectations vs. Google Drive
Nextcloud runs on your hardware. Google Drive runs on a global CDN backed by hundreds of thousands of servers with edge nodes a few milliseconds from almost every user on the planet. Your home server cannot match that. Expect longer page loads, particularly on the first load of a session when PHP needs to warm up its cache.
This is not a defect. It is the price of sovereignty. You are trading milliseconds of convenience for complete ownership of your data. Go in with accurate expectations.
The Black Box Storage Model: SMB Access Is Forbidden
Nextcloud’s data directory is owned by the internal Linux user www-data. The application maintains a precise database of every file’s metadata, checksum, and sync state. That database must stay synchronized with the actual files on disk at all times.
Critical Warning: You cannot browse
/mnt/opslag/Nextcloud_Storagevia Windows SMB shares and add, move, or delete files directly. Doing so will corrupt the file metadata database and break synchronization for all users. All file management must happen through the Nextcloud web UI or the official Nextcloud Desktop Sync Client. No exceptions.
If you need a general-purpose network file share alongside Nextcloud, keep it as a completely separate share path. Our guide on building a ZFS file server with Samba on Proxmox covers exactly that pattern.
Nextcloud AIO vs. This Method: The Reddit Debate Answered
Reddit threads frequently debate the Nextcloud All-in-One Docker image versus a manual compose setup. Here is the straight comparison:
- AIO advantage: Simpler initial setup, built-in backup tooling, automatic updates managed by the AIO container.
- AIO disadvantage: Significantly less control over storage paths. Implementing split NVMe and HDD storage with AIO requires working around its opinionated volume structure, which adds complexity rather than reducing it.
The method in this guide wins when storage performance and explicit path control are your priorities. If you want the simplest possible setup and storage performance is not a concern, AIO is a legitimate choice.
Troubleshooting Common Errors
Error: “Your data directory is readable by other users”
Cause: File permissions on /mnt/opslag/Nextcloud_Storage were modified externally. The most common trigger is browsing the directory via an SMB share or running a manual chmod command on the folder.
Solution: Restore correct ownership by running this command inside the Nextcloud app container:
docker exec -it nextcloud_app chown -R www-data:www-data /var/www/html/dataNever run
chmod 777on the Nextcloud storage directory. This is the most common cause of this exact error message. World-readable permissions on the data directory violate Nextcloud’s security checks and will prevent the application from functioning correctly.
Error: Database Container Fails to Start
Cause: Leftover files in the MariaDB data directory from a previous failed deployment. MariaDB cannot initialize a new database into a directory that already contains partial data.
Solution: Bring the stack down, clear the directory, and redeploy:
docker compose down -vrm -rf /mnt/snelle_data/App_Data/nextcloud_db/*Then redeploy the stack from Portainer. The -v flag on docker compose down removes named volumes. Since we are using bind mounts in Method 2, the critical step is clearing the host directory manually.
Error: Nextcloud App Container Starts Before Database Is Ready
Cause: depends_on in Docker Compose controls startup order, not readiness. The nextcloud-db container can be running but still initializing its data directory when nextcloud-app attempts its first database connection.
Solution: Wait 30 seconds after nextcloud_db shows a running status in Portainer, then restart the app container:
docker restart nextcloud_appThis gives MariaDB time to complete its initialization before Nextcloud attempts to connect.
Error: Port 8080 Already in Use
Cause: Another service running on your Proxmox LXC is already bound to port 8080.
Solution: Change the host port in the compose file. Find the ports line and update it to any available port:
ports:
  - "8081:80"
The number before the colon is the host port you access in your browser. The number after the colon is the internal container port, which must remain 80. After changing this, redeploy the stack and access Nextcloud at http://[NAS-IP]:8081.
What You Have Built and Where to Go Next
What You Have Built
You now have a production-grade, self-hosted cloud storage platform with a deliberately designed storage architecture:
- Nextcloud running in Docker on a Proxmox LXC container
- MariaDB database on NVMe storage for fast, low-latency query response
- Nextcloud application config on NVMe for rapid PHP reads on every page load
- User file storage on a high-capacity HDD or ZFS pool for cost-effective bulk storage
- Full administrative control with zero third-party data exposure
Immediate Next Steps, Ordered by Priority
- Create user accounts for your household. Navigate to Nextcloud Settings, then Users, then Add User. Each person gets their own storage quota and login credentials.
- Install the Nextcloud Desktop Sync Client on Windows or Mac. This replicates the Google Drive for Desktop experience with a local sync folder that automatically mirrors your Nextcloud storage.
- Set up a reverse proxy using Nginx Proxy Manager or Traefik. This enables secure
https://cloud.yourdomain.comaccess from outside your home network without exposing raw ports to the internet. - Enable Server-Side Encryption in Nextcloud Settings under Security. This ensures that even if someone gains physical access to your drives, the data remains unreadable without your keys.