What Is Jellyfin and Why Does It Beat Plex in 2025?
🎧 Listen to the 60-Second Audio Recap:
Jellyfin is a fully open-source media server. You install it on your own hardware, point it at your movie and TV collection, and stream to any device on your network. No account required. No monthly fee. No algorithm deciding what you watch next.
Plex used to own this space. In 2025, it no longer deserves that position. Plex requires a mandatory account, gates hardware transcoding behind a paid “Plex Pass” subscription, and actively collects data about your viewing habits. Emby sits in the middle, but its best features are also paywalled.
Jellyfin gives you everything, for free, with zero telemetry.
| Feature | Jellyfin | Plex | Emby |
|---|---|---|---|
| Cost | Free | Free + Plex Pass ($5–$120) | Free + Premiere ($4.99/mo) |
| Account required | No | Yes (mandatory) | Optional |
| Hardware transcoding | Free, built-in | Plex Pass only | Premiere only |
| Data collection | None | Extensive | Moderate |
| Open source | Yes (100%) | No | No |
| Self-hosted, fully offline | Yes | Limited | Yes |
This guide covers two routes: a quick CPU-only deployment for beginners, and a full Intel QuickSync hardware transcoding setup for users who need real 4K performance.
What You Stop Sending to Strangers
Here is what commercial streaming services and Plex collect from you:
- Your complete watch history, including timestamps and completion rates
- Device identifiers and IP addresses linked to your account
- Content preference data aggregated and sold to third parties
- Behavioral profiles built from your viewing patterns over time
With Jellyfin, your media library stays on your hardware. No external requests. No profiling.
What This Guide Will Build
Your Proxmox host runs a privileged LXC container. Inside that container, Docker and Portainer manage a Jellyfin container. Jellyfin reads your media from an HDD pool mounted via SMB or NFS.
Architecture flow: Proxmox Host → Privileged LXC Container → Docker + Portainer → Jellyfin Container → HDD Media Pool
Two deployment routes:
- Method 1 (Newbie Nora): CPU-only transcoding. No GPU configuration required. Works out of the box.
- Method 2 (Pro Paul): Intel QuickSync hardware transcoding via GPU passthrough. Required for 4K and multi-stream performance.
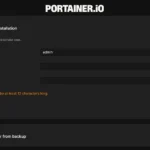
If you do not yet have Docker and Portainer running inside an LXC container, start with our guide on building Docker and Portainer on Proxmox LXC before continuing here.
Prerequisites and Minimal Hardware: What You Need Before You Start
Hardware Requirements
| Component | Minimum | Recommended |
|---|---|---|
| CPU | Any x86-64 | Intel N305 or equivalent with QuickSync iGPU |
| RAM (LXC allocation) | 4 GB | 8 GB |
| Config storage | 20 GB SSD | NVMe volume for fast metadata access |
| Media storage | HDD pool via SMB or NFS | Dedicated HDD pool, RAID or ZFS |
| Intel QuickSync iGPU | Not required (Method 1) | Required (Method 2) |
Software Prerequisites
- Proxmox VE installed and accessible via the web UI
- Docker and Portainer running inside an LXC container
- A privileged LXC container — this is a hard requirement. Privileged mode allows the container to directly access host hardware devices like
/dev/dri. Unprivileged containers cannot do this. - Network access confirmed between the LXC container and your media storage mount
Pre-Flight Checklist
- Proxmox web UI is accessible at
https://[proxmox-ip]:8006 - Portainer is running and accessible on your target LXC container
- Media folders exist on your storage pool and are mounted inside the LXC
- Your LXC container is confirmed as Privileged (check under the LXC Options tab in Proxmox)
- You know the PUID and PGID of the user owning your media files
Method 1: The Quick Start (Newbie Nora Route — CPU Transcoding, No GPU)
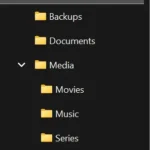
Step 1: Create Your Media Folder Structure on Storage
Before writing a single line of Docker Compose, get your folder structure right. Consistent paths prevent permission problems later. Every volume mount in your Compose file must point to a real directory that already exists.
Run these commands inside your LXC container, or on the host where your storage is mounted:
mkdir -p /mnt/opslag/Media/Movies
mkdir -p /mnt/opslag/Media/Series
mkdir -p /mnt/opslag/Media/Music
mkdir -p /mnt/opslag/Media/Books
Adjust the base path (/mnt/opslag) to match your actual storage mount point. The subfolder names are your choice, but keep them consistent with what you define in the Compose file.
Step 2: Deploy Jellyfin via Portainer Stacks (No Hardware Acceleration)
In Portainer, navigate to Stacks → Add Stack. Name the stack jellyfin. Paste the following Compose configuration into the web editor:
services:
  jellyfin:
    image: lscr.io/linuxserver/jellyfin:latest
    container_name: jellyfin
    environment:
      - PUID=1000
      - PGID=1000
      - TZ=Europe/Amsterdam
    ports:
      - "8096:8096"
    volumes:
      - /mnt/snelle_data/App_Data/jellyfin_config:/config
      - /mnt/opslag/Media/Movies:/data/movies
      - /mnt/opslag/Media/Series:/data/series
    restart: unless-stopped
Adjust before deploying:
- Change
TZ=Europe/Amsterdamto your own timezone (for example,America/New_York) - Replace
/mnt/snelle_data/App_Data/jellyfin_configwith the path where you want Jellyfin to store its configuration database - Confirm
PUIDandPGIDmatch the user that owns your media files. Runid [username]in your LXC to verify.
Click Deploy the Stack. Within 30 seconds, the container status should show running in the Portainer container list.
Step 3: First Launch and Initial Setup Wizard
Open a browser and navigate to http://[your-server-ip]:8096. Jellyfin will present its first-run setup wizard.
- Select your preferred display language
- Create your administrator account with a strong password
- Add your media libraries. Click Add Media Library, choose the content type (Movies, Shows, Music), and set the folder path to
/data/moviesor/data/series— these are the paths inside the container, not the host paths - Complete the wizard and allow Jellyfin to scan your library
For a typical library, the initial metadata scan takes 2 to 5 minutes. Jellyfin pulls posters, descriptions, and ratings from The Movie Database (TMDB) automatically.
The CPU Transcoding Warning
Method 2: The Pro Setup (Pro Paul Route — Intel QuickSync GPU Passthrough)
This method adds GPU passthrough to the LXC container, then configures Jellyfin to use Intel QuickSync Video (QSV) for hardware-accelerated transcoding. The result is 4K transcoding at under 15% CPU load instead of 100%.
Step 1: Expose the GPU Device to the LXC Container in Proxmox
- In the Proxmox web UI, select your LXC container from the left panel
- Click the Resources tab
- Click Add → Device Passthrough
- Add the following two devices, one at a time:
/dev/dri/renderD128 /dev/dri/card0 - Click Restart on the LXC container. This step is mandatory. The devices will not be visible inside the container until after a full restart.
After the LXC restarts, open a shell inside it and verify the GPU is visible:
ls /dev/dri/You should see output similar to:
card0 renderD128If this directory is empty or does not exist, the passthrough was not applied correctly. Go back to the Resources tab, confirm both devices are listed, and restart again.
Step 2: Deploy the Full Pro Docker Compose Stack in Portainer
The key difference from Method 1 is the devices: block. This maps the entire /dev/dri directory from the LXC host into the Jellyfin container, giving it direct access to the Intel iGPU.
In Portainer, navigate to Stacks → Add Stack, name it jellyfin, and paste the following:
version: "3.8"
services:
  jellyfin:
    image: lscr.io/linuxserver/jellyfin:latest
    container_name: jellyfin
    restart: unless-stopped
    environment:
      - PUID=1000
      - PGID=1000
      - TZ=Europe/Amsterdam
    ports:
      - "8096:8096"
    volumes:
      - /mnt/snelle_data/App_Data/jellyfin_config:/config
      - /mnt/opslag/Media/Movies:/data/movies
      - /mnt/opslag/Media/Series:/data/series
      - /mnt/opslag/Media/Music:/data/music
      - /mnt/opslag/Media/Books:/data/books
    devices:
      - /dev/dri:/dev/dri
Adjust the timezone, config path, and PUID/PGID values to match your environment. Deploy the stack. The startup process is identical to Method 1.
Step 3: Enable Intel QuickSync Inside the Jellyfin Dashboard
Deploying the container with the devices: block makes the GPU available. You still need to tell Jellyfin to use it.
- Log in to Jellyfin at
http://[server-ip]:8096 - Click the hamburger menu → Administration Dashboard
- Navigate to Playback → Transcoding
- Set the Hardware Acceleration dropdown to Intel QuickSync Video (QSV)
- Enable the following codec checkboxes: H.264, H.265/HEVC, and AV1 (if your iGPU supports it)
- Enable HDR to SDR Tone Mapping
- Click Save
Configuration and Validation: Proving It Actually Works
The 4K Stress Test: Confirming the GPU Is Doing the Work
Do not assume QuickSync is active just because you enabled it. Run this validation procedure to confirm.
- Open the Jellyfin web player and start a 4K title
- In the player, click the settings icon and manually set the stream quality to 720p. This forces Jellyfin to actively transcode the stream rather than direct-play it
- Open the Proxmox web UI in a second tab, navigate to your host node, and watch the CPU usage graph on the Summary page
- In Jellyfin, go to Dashboard → Active Sessions
(hw) tag next to the codec label, confirming hardware acceleration is in use.Validate Media Library Permissions Are Correct
Permission mismatches are the most common silent failure in this setup. Run these commands inside your LXC container to verify:
ls -la /mnt/opslag/Media/
id jellyfin
The user and group owning your media files must match the PUID and PGID values set in the Compose file. If your SMB mount is owned by root and Jellyfin runs as UID 1000, it cannot write cache files or read protected directories. Correct the mount ownership or adjust the PUID/PGID values to match.
HDR Tone Mapping Validation
Play a known HDR title (any 4K Blu-ray rip labeled HDR or HDR10). On an SDR display, colors should look natural and correctly exposed. If the image looks washed out or blown out, return to Dashboard → Playback → Transcoding and confirm that HDR to SDR Tone Mapping is saved and active.
The Ugly Truth: Quirks and Honest Limitations
Metadata Matching Is Not Plex-Level Polished
Jellyfin’s automatic metadata scraper works well for mainstream titles with standard naming. It struggles with:
- Non-English titles, especially those without a widely-used English translation
- Obscure documentaries and short films with limited TMDB entries
- Files with non-standard naming conventions
The practical fix is simple: rename your files to the format Movie Title (Year).mkv before adding them to your library. Jellyfin’s scraper uses this pattern to match against TMDB with high accuracy.
For titles that still fail to match, right-click the item in the Jellyfin UI, select Identify, and search manually. It takes 30 seconds and works reliably.
GPU Passthrough Breaks After Kernel Updates: Test Every Time
This is the most commonly missed issue in Reddit threads about Jellyfin on Proxmox. After any Proxmox kernel update or server reboot, the /dev/dri device mapping inside the LXC can disappear.
After every reboot, run this check inside your LXC:
ls /dev/dri/If the output is empty or the command returns an error, the device passthrough needs to be re-applied. Go back to the Proxmox Resources tab for your LXC, confirm the devices are listed, and restart the container. This is a known behavior in Proxmox LXC device passthrough, not a Jellyfin bug.
Privileged LXC Is a Security Trade-Off
Privileged LXC containers have broader access to the host system than unprivileged ones. This is the accepted trade-off for hardware passthrough in LXC environments, and it is widely used in the self-hosting community.
The practical mitigation is straightforward: keep your Jellyfin LXC isolated. Do not run other sensitive services inside the same container. Treat it as a single-purpose media server container, and the risk profile is acceptable for a home lab environment.
Troubleshooting Common Errors
Error: /dev/dri: no such file or directory
Cause: Device passthrough was not configured in Proxmox, or the LXC was restarted after a kernel update that cleared the device mapping.
Fix:
- In the Proxmox web UI, select your LXC container
- Go to the Resources tab
- Click Add → Device Passthrough and add both
/dev/dri/renderD128and/dev/dri/card0 - Restart the LXC container
- Verify inside the container with
ls /dev/dri/
Error: No Movie Posters or Metadata Not Loading
Cause A: The LXC container has no outbound internet access. Jellyfin cannot reach TMDB to pull metadata.
Fix A: Test DNS resolution from inside the container:
curl -I https://www.themoviedb.orgIf this fails, check the DNS settings in your LXC network configuration in Proxmox. Set a working DNS server such as 1.1.1.1 or your router’s IP.
Cause B: PUID/PGID mismatch on the SMB or NFS mount. Jellyfin cannot write its metadata cache to the config directory.
Fix B: Run ls -la /mnt/opslag/Media/ and confirm the ownership matches your PUID=1000 setting. Correct the mount permissions or update the PUID/PGID values in your Compose file and redeploy the stack.
Error: High CPU Usage Despite QuickSync Being Enabled
Cause: The codec being transcoded is not supported by your specific iGPU generation. AV1 hardware decoding is only available on Intel Arc and 12th Gen Core or newer. Older iGPUs will silently fall back to software transcoding for unsupported codecs.
Fix: Open Dashboard → Active Sessions during playback. If the transcode stream does not show a (hw) tag, the GPU is not handling that codec. Go to Playback → Transcoding and disable the codec causing the fallback. For N305 and similar Alder Lake-based chips, H.264 and H.265 hardware transcoding are reliable. AV1 support varies by specific SKU.
Conclusion and Next Steps: Your Media Server Is Live
What You Just Built: The Completion Checklist
- Jellyfin is running in Docker on port
8096 - Intel QuickSync hardware acceleration is active and validated with the
(hw)tag confirmed - All media libraries are connected to your HDD pool with correct permissions
- HDR to SDR tone mapping is configured and tested
- Metadata and posters are loading correctly from TMDB
- GPU passthrough verified post-reboot
The Logical Next Steps in Your Self-Hosted Stack
Jellyfin is the playback layer. The next logical step is automating what goes into it. The *Arr stack — Radarr for movies and Sonarr for TV series — integrates directly with Jellyfin and handles automated media acquisition. After that, Nginx Proxy Manager gives you secure remote access without exposing port 8096 directly to the internet.
- Next: Install Radarr and Sonarr for automated media management [LINK: Radarr/Sonarr guide]
- Next: Set up Nginx Proxy Manager for secure external access [LINK: Nginx Proxy Manager guide]
- Next: Install the Jellyfin app on your Smart TV, Apple TV, or Android TV device
If you are building out a broader self-hosted stack, our guide on installing Nextcloud on Proxmox with split NVMe and HDD storage pairs naturally with this setup, giving you a self-hosted file sync layer alongside your media server.
What You Have Reclaimed
No watch history is leaving your network. No subscription fee is leaving your bank account. No recommendation algorithm is deciding what you watch or when. Your media library is on your hardware, indexed by your server, streamed to your devices.
Your media server, your rules.